
In a home or office network there are times when it is extremely necessary to know the number of devices connected to our network and it is even of vital help when handling static IPs on the network.
When you need a simple app that scans the entire network to find out static and dynamic IP addresses, they should start considering the use of Angry IP Scanner. Angry IP Scanner is a free and open source multiplatform IP surveillance tool.
Angry IP Scanner is a TCP / IP network scanner that allows users to easily scan IP addresses within any range of your choice through an easy to use interface.
Once you Angry IP Scanner detects an active IP address, what it will do next is resolve its MAC address, hostname, port and various relevant information for each IP address.
The collected data can then be saved as TXT, CSV, XML or IP-Port list files.
As well has additional functionssuch as NetBIOS information machine name, group name, favorite IP address ranges, web server detection, etc.
With the help of plugin, Angry IP Scanner can collect all the information about scanned IP addresses.
Anyone who can write Java code is able to write plugin and extend the functionality of Angry IP Scanner.
How to install Angry IP Scanner on Linux?
In order to install this tool on our system, we can do it by following the instructions that we share below according to the Linux distribution that they are using.
If they are Debian, Ubuntu, Linux Mint users or any distribution derived from these, we can download the following packages according to the architecture of our system.
For 64-bit systems should download this package:
wget https://github.com/angryip/ipscan/releases/download/3.5.2/ipscan_3.5.2_amd64.deb -O ipscan.deb
While for those who have 32-bit systems should download this package:
wget https://github.com/angryip/ipscan/releases/download/3.5.2/ipscan_3.5.2_i386.deb -O ipscan.deb
Done the package download we proceed to install it with the following command:
sudo dpkg -i ipscan.deb
In case of having problems with the dependencies we must execute this command:
sudo apt install -f
Now for who have systems with support for rpm packages, such as Fedora, OpenSUSE, CentOS, RHEL or any system derived from these, we can download the rpm package according to our system architecture.
For those who have 64-bit systems, you must download this package:
wget https://github.com/angryip/ipscan/releases/download/3.5.2/ipscan-3.5.2-1.x86_64.rpm
While for those who are 32-bit system users can download this package:
wget https://github.com/angryip/ipscan/releases/download/3.5.2/ipscan-3.5.2-1.i386.rpm
Finally, to install the package we just have to execute in the terminal:
sudo rpm -i ipscan-3.5.2-1*.rpm
For those who are Arch Linux, Manjaro, Antergos users or any Arch Linux derived system we must have an assistant to install packages from AUR, you can use the one I recommend in this article.
The command to install it is:
yay -S ipscan
And that's it, we can start using the application.
How to use Angry IP Scanner on Linux?
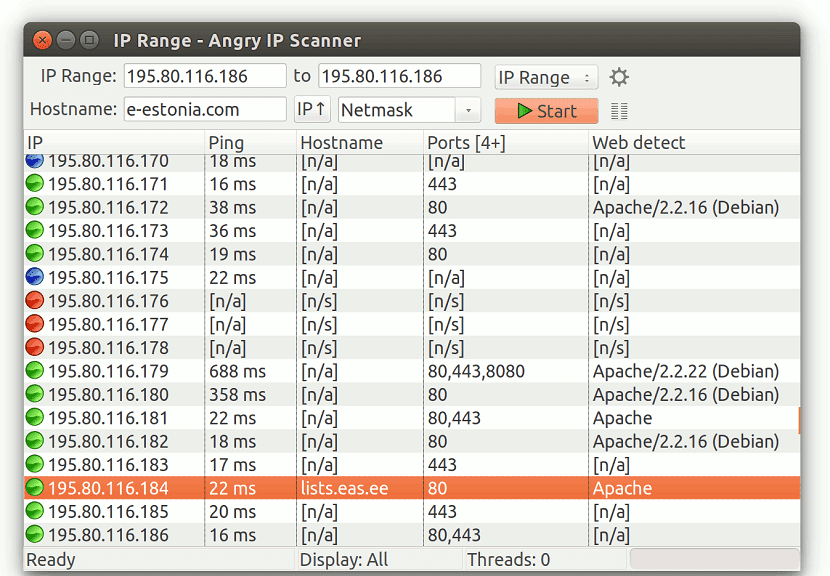
We must open the application and in it we can choose an IP range corresponding (for example, 192.168.0.1 - 192.168.0.100).
If selected randomly, a random range of IP addresses will be automatically included. The third option is text file.
Si has multiple IP addresses written to a text file, you can choose the file and check the ping status of these computers.
Therefore, it is necessary to select the subnet mask from the corresponding drop-down menu. After selecting everything, click the start button.
After completing the scan, you will see the results, which will be displayed in colors, where the blue marked IP addresses are currently in use and working. However, the red marked IP address is dead or is no longer active.
It is also possible to export the list of IP addresses visible in the list. To do this, go to Scan> Export All.
It was very helpful, however I had problems and the most practical thing was to run it from your location. Thanks a lot !!