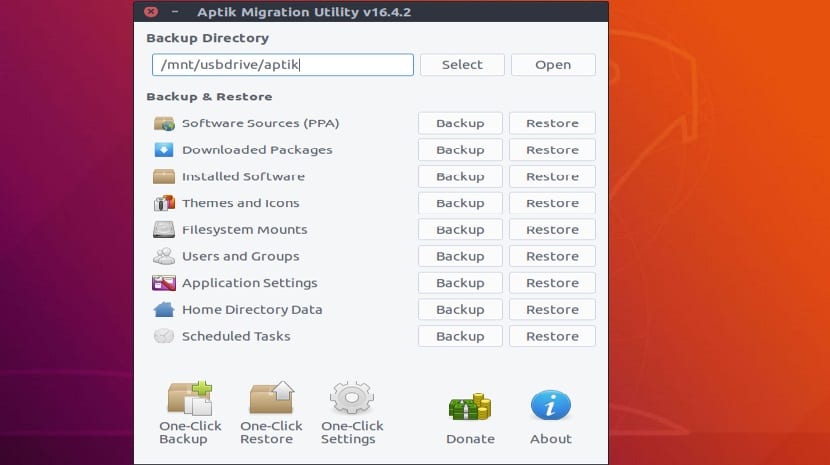
Aptik is an excellent utility to simplify package reinstallation after doing a clean install of Ubuntu / Linux Mint and derivatives. This can be particularly useful when installing a new system or when reinstalling an existing one.
Aptik, can be classified as a pure backup utilityUnlike the Y-PPA administrator, what it does are backup and restore copies, since it allows us to select the repositories.
With this simple tool, can back up and restore:
- Software sources (repositories)
- Selected applications (the list of installed packages)
- Application settings
- Previously downloaded packages (APT cache)
- Themes and icons.
How to install Aptik on Ubuntu 18.04 LTS and derivatives?
If you want to install this tool on your system, we can do it with the help of a repository which will facilitate the installation.
Only We must open a terminal and in it execute the following commands.
First we are going to add the repository to our system with:
sudo apt-add-repository ppa:teejee2008/ppa
Now we must update our list of repositories and packages with:
sudo apt-get update
Finally we proceed to install the application with the following command:
sudo apt-get install aptik
And ready with it, we can proceed to run the application to start backing up our system.
How to use Aptik?
In the first field "Backup Directory" (drop-down menu) select the folder where a backup copy will be saved.
Here it is important to remember that the backup folder must be on another hard drive, another partition other than the system and even a pendrive, as it requires a different place that does not affect the reinstallation or change of the system.
Once the destination folder has been selected, we can proceed to execute each backup that the application allows us to perform.
Backup of system repositories
When you click on the PPA backup button, you will see a list of third-party repositories and installed packages.
The repository with the green icon is that it is active and there are applications installed from them. The repository with a yellow icon marks that it is active, but not used (no applications installed).
Select the repositories to be included in the backup and click on "backup". In the backup directory, a file with the name "PPA list" will be created.
System software backup

When we click on the system software backup, a list of installed packages is displayed here.
It shows only the packages of the »top level«, this means that the dependencies of these will not be reflected in the list.
Packages that are part of the distribution are not selected by default. But they can be selected manually if necessary.
Once we have selected the packages that we consider necessary, we can proceed by clicking on the "backup" button and with this, the file «packages.list» will be created in the backup directory.
Apt cache backup
When we click on the apt cache backup button it will copy the packages from the system's backup cache directory (/ var / cache / apt / archives).
This step is only useful when reinstalling the system, if it is a new system or a higher version this step is not necessary.
Backup themes and icons
Finally, the last backup that this application allows us to make is that of our icon and theme packages that we have installed on the system.
By clicking on the backup button the application will archive and copy all the installed themes and the icons of the paths / usr / share / themes and / usr / share / icons.
How to restore Aptik backups?
In order to restore the backup made previously with this application, We only have to have this application installed in the new system and open it in it.
Done this we are going to select the folder where our backup is hosted and now instead of making the "backups" We will only click the button next to it, which is "restore".
They may have a problem with some things, since the folders of the previous user that had the system had a different UID, for this it is enough to just execute the following command in the terminal:
sudo chown username -R /home/username
Where they replace username with their username.
Hello
After restoring a copy of Ubuntu 18.04 with Aptik everything seems to work fine but I have a problem with UIDs
If I put in the terminal: sudo ufw status, it reports: WARN: The uid is 0 but it belongs to 1000
I try to run the command you suggest to solve the problem but it keeps reporting the same
Does anyone know if it works in KDE?