First of all, this is an up-to-date guide to the installation process of the base system of Arch based on the guidelines of GESPADAS and Arch Linux unofficial guide.
There is nothing new to tell since both are excellent but for those who decide to install and test it, this guide aims to be useful and is updated to the latest ISO released from the distribution that includes SYSTEMD by default.
Although I already have some experience with the distribution, I have noticed that there are some details in the process and therefore I will make some corrections to it.
INSTALLATION MEDIA:
Once the image is downloaded there are 2 possible options:
- Burn the image to a CD / DVD with the corresponding program (K3B, Brasero, XFBurn, etc).
- Use a USB stick or PENDRIVE (use dd command).
BOOTING AND INITIAL PREPARATIONS
Depending on the type of Processor we have (32 or 64 Bits) we choose the one that corresponds:

Once the process is finished, the prompt will be shown already logged in as ROOT.
KEYBOARD AND ALPHABET
First of all, you have to set the keyboard configuration, for this you have to write the following:
# loadkeys distribucion tecladoFor example, if you want to use keyboards in Latin American Spanish, use la-latin1 or if it is Spanish Spain or traditional, just es. For further reference consult here.
The type of characters must be changed, because most languages use more signs than the 26 letters of the English alphabet. Otherwise, some strange characters may appear as white squares or other symbols. To avoid the above, you must specify:
#setfont Lat2-Terminus16
LANGUAGE IN INSTALLATION
By default, the language is set to US English. To change the language for the installation process (Spanish, for example), remove the sign # in front of local you want located in the file /etc/locale.gen, along with English (USA).
# nano /etc/locale.gen
en_US.UTF-8 UTF-8
en_ES.UTF-8 UTF-8
Press Ctrl X to exit, and when it asks you to save the changes, press Y and then Intro to use the same file name.
Outlining the above, please execute the following:
# locale-gen
# export LANG = es_ES.UTF-8
CONNECTION TO THE NETWORK
To avoid complications at the time of installation, it is recommended to do it over the wired network since the various drivers and firmware may present problems. The wireless card configuration can be done after the base system installation process is complete.
Generally the wired network has the designation eth0 (the last character is ZERO) so you have to write the following:
ip link set eth0 up
dhclient eth0
PREPARE OR PARTITION THE HARD DRIVE
NOTICE: For the purposes of this guide, it will be assumed that Arch will be installed as the only system on the PC, for mixed environments, please check the corresponding documentation.
For partitioning the disk the utility will be used cfdisk. For this we write in the terminal:
#cfdisk
It will present something like this:
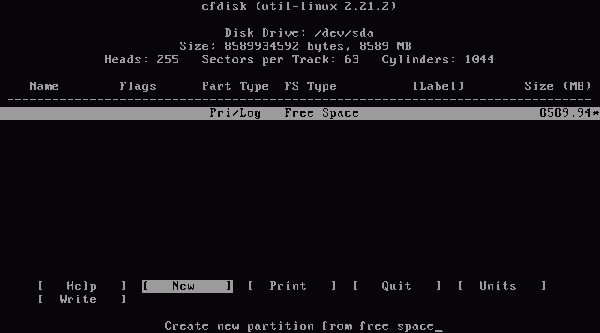
Disk partitioning is generally very much to the user's taste, so the process shown here is just a suggestion.
4 partitions will be made to the disk which will be: BOOT, ROOT, HOME y SWAP.
BOOT: This is where essential files will be stored for boot ArchLinux (such as the kernel, images ramdisk, bootloader, etc). A size of 100 MiB is recommended (no need to give it more space).
/ (ROOT): The operating system and applications will be installed here. Its size depends on the use you want to give to ArchLinux. About 10 GiB should be more than enough for a traditional system; If you think that you will install many applications (games, among them), it is better to think about 20 or 30 GiB.
HOME: Where our personal settings, the application settings (and your profiles in them), and traditionally our data (documents, photos, videos, etc.) will be stored, so it is recommended to allocate considerable hard disk space.
SWAP: Lastly, the place where RAM information is temporarily stored (when it is full) on the hard disk. The size of this varies depending on the physical RAM installed in the PC. If you have less than 1GB it is advisable to assign it twice the size of the physical RAM. If you have a moderate amount of memory, such as 1GB for example, it is recommended to assign the same size to the SWAP. If you have more memory, then the above does not apply and with 1 or 2GB allocated is more than enough.
One detail to consider is the case of laptops when the system is hibernated or suspended. Therefore, if you are going to install Arch on a laptop, it is advisable to assign the SWAP the same size as RAM installed physics.
Using cfdisk We must create the chosen partitioning scheme, creating one partition at a time, with the sequence of commands: New »Primary | Logical »Size (in MB)» Beginning.
Two details to take into account:
- In the case of the partition chosen as swap, go to the option "Type”And select 82 (linux-swap) of the list.
- In the case of the partition chosen as / Boot, select the option "Bootable"
In the end, you should have something as seen in the following image:

Once safe, we must choose the option "Write", And confirm by typing"Yes", Writing the new partition table. This procedure removes all previous content from the hard drive!
To get out of cfdisk, to choose "Quit".
NOTE: It is very important to remember the "name" of each partition, as we will use them in the next step. Example: sda1 =boot, sda2 =/, sda3 = home and sda4 =swap.
FORMAT TO PARTITIONS
For boot ext2 will be used since journaling is not necessary here:
# mkfs -t ext2 / dev / sda1
For /, use ext4:
# mkfx -t ext4 / dev / sda2
For home, also use ext4:
# mkfs -t ext4 / dev / sda3
For swap:
# mkswap / dev / sda4
We activate the partition with:
swapon / dev / sda4
MOUNT PARTITIONS
Each partition is identified with a numeric suffix. For example, sda1 specifies the first partition of the first disk, while sda indicates the entire disk.
Mount the partition / en /mnt:
mount / dev / sda2 / mnt
Create the directories of the other partitions within /mnt:
mkdir / mnt / boot
mkdir / mnt / home
Mount the respective partitions:
mount / dev / sda1 / mnt / boot
mount / dev / sda3 / mnt / home
Arch's guide recommends selecting a mirror, but this is not really necessary and so I will skip it.
INSTALL BASE SYSTEM
We will use the installation script called pacstrap to install the system base. Also, the package group base-devel should be installed if you later plan to compile software from AUR. To do this we doing the next:
pacstrap / mnt base base-devel
Once the process is complete, it is recommended to install (only install) the bootloader. I personally use SYSLINUX but i will use GRUB for this guide.
To install the bootloader we write the following:
pacstrap / mnt grub-bios
This is the GRUB designed to BIOS. If you are interested in the controversial UEFI, I recommend you read the official documentation. If you are not a fan of GRUByou can install syslinux. although at the moment it does not have support for UEFI.
SYSTEM CONFIGURATION
First we are going to generate the file fstab. To do this you have to do the following:
# genfstab -p / mnt >> / mnt / etc / fstab
If you encounter malfunctions in the installation process after running genfstab, do not run it again as it will not, it is easier to edit the file fstab.
In fact there is a little problem here, since the partition address swap it is ignored so it is advisable to edit the file. To do this you have to do the following:
# nano / mnt / etc / fstab
There are some things to do here. First in partition root the last field must be 1, for the others it can be 2 or 0 (zero). As well, data=ordered It should be removed as this option is used automatically whether specified or not. In the end it will be necessary to add /dev/sda4 (is the last line) so that the partition swap be activated from start-up. To save the changes press the key combination Control x, then write y followed by INTRO. For more clarity, here is a screenshot:

For the rest of the configuration actions, we will do a chroot on our newly installed system. To do this, write the following:
arch-chroot / mnt
In this phase, the main configuration files of the database system must be configured. Arch Linux. These can be created if they do not exist, or, if they exist, edited if you want to change the default values. Closely following and understanding these steps is vital to ensuring a well configured system.
LOCALE: Not to be confused with what has been done previously, this step is to configure the final language to install. There are two files that need to be edited: locale.gen y locale.conf.
locale.gen is empty by default (that is, all commented entries and therefore inactive) and the sign needs to be removed # in front of the line (s) you want to activate. You can uncomment more than one line, other than English (US), as long as the selected lines contain the encoding UTF-8:
# nano /etc/locale.gen en_US.UTF-8 UTF-8 en_ES.UTF-8 UTF-8
Once the file is saved, execute:
# locale-gen
This process will be executed in each update (where no user intervention is required) from glibc, regenerating all the premises included in /etc/locale.gen.
locale.conf It does not exist by default. so from the terminal we execute the following:
# echo LANG = es_ES.UTF-8> /etc/locale.conf # export LANG = es_ES.UTF-8
vconsole.conf Here we specify the keyboard layout and font (typeface) of the console. To do this, do the following:
# nano /etc/vconsole.conf
You will be shown a blank file and type the following:
KEYMAP = "la-latin1" FONT = "Lat2-Terminus16" FONT_MAP =
timezone A symbolic link of /etc/localtime to your zone file /usr/share/zoneinfo/Region/Local using the following:
# ln -s / usr / share / zoneinfo / America / Hermosillo / etc / localtime
hardware clock Sets the hardware clock mode uniformly across your operating systems. Otherwise, the hardware clock can be overwritten and cause jet lags.
It can generate /etc/adjtime automatically using one of the following commands:
# hwclock --systohc --utc
and for localtime:
# hwclock --systohc --localtime
The latter is not recommended.
KERNEL MODULES
To load the kernel modules during boot, put the file with the extension *.conf in the folder /etc/modules-load.d/, with a file name that refers to the program being used.
All necessary modules are automatically loaded by udev, so you rarely need to add anything here. You just have to add the modules that are known to be absent.
# nano /etc/modules-load.d/virtio-net.conf virtio-net
HOSTNAME
Add your hostname in the File /etc/hostname. It is worth mentioning that the hostname It is the name that will be assigned to the equipment and by means of which it can be recognized in a network. To do this and from the console write the following:
# threw out myhostname > / etc / hostname
Edit the file hosts to register the myhostname used. To do this, do the following:
# nano / etc / hosts 127.0.0.1 localhost myhostname :: 1 localhost myhostname
Save the file and exit.
Given that we are using a wired network for the installation, for the moment and to start with network service, write the following in the terminal:
# systemctl enable dhcpcd @ .service
Make sure that the network interface is correct (normally eth0) we will verify in /etc/conf.d/netcfg. To do this, uncomment or remove the # from WIRED_INTERFACE = »eth0 ″. Further down in the file is also the specification for the wireless network. For the moment comment it or put the symbol #. Save the file and exit.
It is also recommended to edit the file pacman.conf. To do this in the terminal or console do the following:
# nano /etc/pacman.conf
Here you can add or modify repositories. It is recommended to leave it as is and only add or activate those necessary.
If you have installed ArchLinux x86_64, it is recommended that you enable by removing # from the repository [multilib].
If you want to use AUR, do the following: At the end of the file write:
[archlinuxfr] SigLevel = PackageOptional Server = http://repo.archlinux.fr/$arch
Save it and exit.
CREATE RAMDISK STARTUP ENVIRONMENT
Here I personally recommend adding the KEYMAP so that it is loaded and used from the beginning. For this you need to edit the file mkinitcpio.conf. In the terminal or console we write:
# nano /etc/mkinitcpio.conf
It must be added in the last line of HOOKS the word KEYMAP. It does not matter if it is at the end, in the middle or at the beginning. For example:
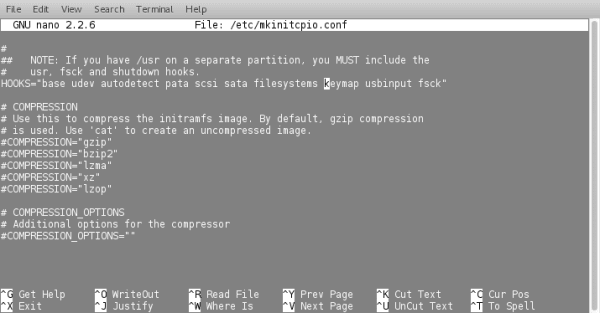
Save the change and exit the file. Done the above, then we proceed to generate the ramdisk writing the following instruction:
# mkinitcpio -p linux
START-UP MANAGER
We had already installed the bootloader grub and here we will proceed to configure it. The reason for doing it up to this point is that whenever I do it as noted in the GESPADAS guide I have error messages and they usually lead me to have to reconfigure the entire system.
Learning from practice I realized that it is better to generate it once we have everything configured and the boot image created.
Carry out the following steps:
# grub-install / dev / sda # cp /usr/share/locale/en\@quot/LC_MESSAGES/grub.mo /boot/grub/locale/en.mo
or it is also (used by GESPADAS)
# cp /boot/grub/locale/en@quot.mo /boot/grub/locale/en_US.mo
This last step is for the correction of a bug having GRUB and not Arch. Then execute the following:
# grub-mkconfig -o /boot/grub/grub.cfg
This last process will automatically generate the configuration file of GRUB.
Once the above is finished, we will proceed to put contraseña al usuario ROOT. To do this in the terminal we write:
# passwd
You will be asked to enter the password and confirm it.
With this, the configuration has been completed, now you have to exit the environment chroot. To do this you just have to write exit.
You have to unmount the partitions, to do this write the following in the terminal:
# umount / mnt / {boot, home,}
Now yes, we restart our system with:
# reboot
Do not forget to remove the installation CD / DVD or USB, as well as if it is necessary to re-arrange the boot order of the units (this is done in the bios of the PC).
The following will appear on the screen:
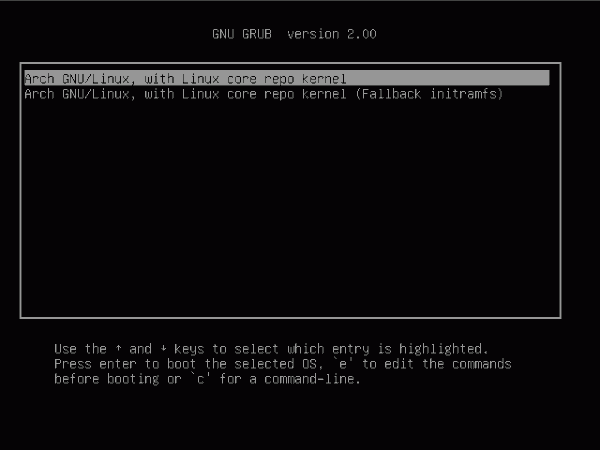
Now we write root in the pointer and the password that we specify and voila, we are in our Arch system, fully functional and ready to be customized. Stop before that I personally recommend doing the following:
First you have to install the sudo utilities; to do this, execute the following:
#pacman -S sudo
Then in the terminal we write:
EDITOR = nano visudo
Uncomment the line where the group comes from %wheel. You will notice that there are 2, I personally recommend uncommenting the one that asks for the password. This will allow us to execute instructions from root with our user.
Now we install the application YAOURT, which allows us to run the installation of applications from the repos of AUR. To do this in the terminal put the following:
# pacman -S yaourt
Create our user with:
#useradd
Enter in login name the username you will use, in additional groups scribe:
audio, lp, optical, storage, video, wheel, games, power, scanner
In the rest just press the key INTRO. Pay attention because you will be asked some questions and one of them is your name. Whether you want to put it or not is a personal matter, but do not leave it blank.
Reboot the system again, but use systemctl reboot and log in with the user you just created.
From here you can make the changes and configurations that are necessary to leave your equipment completely to your liking and personalize it as best as possible.
I hope this is helpful for, as I have already mentioned, installing this distribution that is not really complicated at all, only if it asks for attention and work.
As I mentioned at the beginning, this guide is based on the work of GESPADAS and the unofficial guide of Arch Linux.
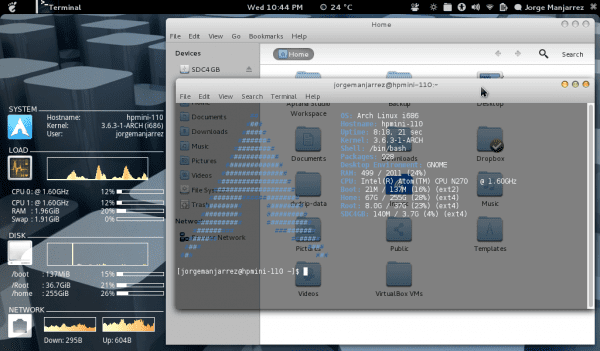
Here are some screens of 2 of the installations that I have made:
My Netbook computer with GNOME SHELL 3.4:
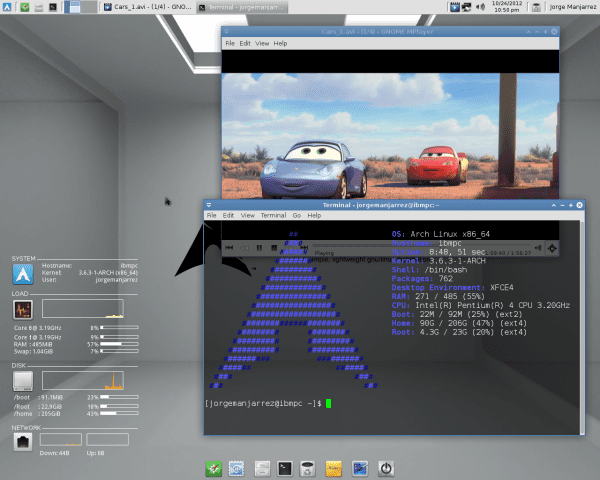
My desktop with XFCE 4.10:
Excellent guide, several have told me that to end my hopping distro I must try Arch, one of these days I cheer up once and for all and try it accordingly.
Congratulations and keep it up.
Greetings from Chile.
I suffered from Distro Hopping until two weeks ago, Arch is the cure 😀
Like me, I was already on SUSE, PCLinuxOS, Ubuntu, Kubuntu, Sabayon, Fedora, etc. And when I got to Arch I stayed with her.
I liked all of those Sabayon, but unfortunately it has problems with the java app and I uninstalled it… .. Now I'm happy with Arch…
They told me the same thing, it happens that I can't leave the pc halfway if I don't get to install and work everything 🙁
Here is a proposal for a new keyboard for discussion:
http://profemaravi.blogspot.com/2011/09/nuevo-teclado-pc-en-espanol-mas-rapido_21.html
This contribution will be better understood with this essay:
http://profemaravi.blogspot.com/2012/07/evolucion-del-espanol-fin-de-qhv-nzxw.html
Every time I want to install Arch I watch the installation tutorials and consider it again… Is there no script that installs the basics?
Arch Linux is a "build it yourself" system. Its objective is precisely to offer only a simple base so that from there you can build it as you want. Asking it to come ready to use is like asking the Legos to come with the figures already assembled. Has no sense.
But anyway, since there are always options for all tastes, you can get one of those "ready-made figures" by installing ready-to-use Arch derivatives like Cinnarch or Manjaro. This way you save the entire installation process (I don't know why they are so scared if it's easy enough) and you enjoy the rest of Arch's advantages, although throwing one of the best in the trash, which is KISS.
I understand the philosophy of the distro, but I don't ask for much, something basic that automates the tasks, come on, if Debian has it!
Well, try the ones that are ready, as Manuel says, those from Cinnarch or Manjaro. But I agree that from the looks of the tutorial it's pretty easy. What does it cost to try? With a virtual machine you try it and then if you like it and if it looks the way you want, and you want to install it on the machine as such, then you do. I think it's the best thing you can do to prove it.
I would recommend ArchBang, to my liking, the best derivative of Arch !!! And with Openbox!
"Asking it to come ready to use is like asking the Legos to come with the figures already assembled." Fuck the phrase. 🙂
Hahahaha yeah!!
I would like you but we don't have that button ... XD
As they already told you, since the July ISO, the AIF, which was an installation script, disappeared. Arch now asks you to do it in a more direct way and I think it is a good way to enter the bull by the horns. ArchBang, Mangajo, Cinnarch and Bridge that offer a script that "makes it easier".
In a few days I will start working at the AIF and that there is this alternative for those who are a little scared by the terminal. As soon as I have it available I will publish it and it will be available to those who want to use it.
Hello, if there is a great script to install Arch, do the following:
first check that you have internet when you boot with the arch cd or usb, the next thing you have to do is install git:
#pacman -Sy git
#git clone git: //github.com/hemulthdu/aui
#cd here
#. / aui –ais
with this you will install the system base, when the script finishes this first phase it will tell you to restart the computer, once restarted you have to do the following;
#cd here
#. / aui
with this you will install necessary programs and desktop of your choice.
All the best
I had trouble trying to install Arch alongside Windows, so the only time I tried, I removed the second one. I'm still waiting for someone to explain to me how to install in a multi-system environment. My downside was assigning the boot to a partition, since all the options that I chose, I rejected them.
just create the partitions before ... you skip the partitioning part and just do the mount points. the rest you follow the same.
That such.
I am going to make an addition to this post in the case of multiple operating systems so that you can try not only Arch, but the distro that you like the most or that suits your needs.
As soon as I have it ready I will publish it and I hope it will be of help to you
And I forgot, great tutorial. Although I am calm for the moment with Suse, I am waiting for the holidays to try again to install this very successful distro.
That such.
SUSE is one of the first distros that I really fell in love with (the first was Slackware) and I tube it until the first Ubuntu distro came out (October 2004). I have installed it several times and the truth is that I generally recommend it as it is very solid. But when I installed Arch I was delighted. You know why the evil of versionitis and although SUSE has Thumbleweed and Packman (repository) it does not compare with Arch. Anyway, any questions you have do not hesitate to ask, we will gladly help you.
I don't think I've ever seen such a comprehensive tutorial for Arch. I'll try again. Thank you!
First, the guide was excellent. I have done 2 Arch installations in Virtualbox, the 2 without any problem. The first one I just started in the Linux world a few months ago simply to banish the myth and the last one will do 1 month following the tremendous guide of Gespadas. I must admit that it is very simple (following the guides obviously) but in the last one where the SYSTEMD is being implemented, it bothers me for 2 things:
1) Every month an iso comes out with modifications in the Systemd implementation, so it has to be constantly updated. Arch is a distro at the forefront and I guess that pays for it. But personally, if someone wants to start, in this flavor of gnu / linux, this is not the year.
2) The installation got worse, I don't complain about making the partitions with cfdisk or having to mount them in the installation process. I like the console and learning commands, but having to define my language in a text file… NO. Arch developers make a script, a tasksel ...
I do not want to cause any discomfort to Arch users, I must clarify that it has the best Linux wiki in the world and personally they have the best artwok that an operating system can have.
That such.
You know, I find it strange that you have problems because I have done this process many times and on different computers, both new and old and the process is done without any problem. For example, I have a Compaq Deskpro EN desktop PC with a Pentium 3 processor, 512MB RAM, DVD RW Internal Drive (which I put in) and a 200GB IDE Hard Drive (which I also put it in). It has Arch with the latest Kernel (3.6.x) and LXDE graphical environment (which I did not put as a screen). Once if there were problems but it was that when passing the ISO to the CD / DVD it was processed wrong and it generated errors as you have no idea.
Anyway, try to verify that the ISO download is correct (verify the checksum) and when you burn it, verify that the recording speed is the lowest possible. If you still have problems, then let us know and we will gladly support you.
I see much more in the guide than what I use to install my arch (the new iso already has systemd by default) it is somewhat difficult to install, I lasted 3 months but I managed it and I am great with my distro… .. I tried cinnarch, Manjaro and chakra and it seemed very unstable, I was afraid of the console but I liked learning the command process and telling the system the steps to take… ..
Anyway, I think Arch only makes you kill your head and in the end the degree of satisfaction is unique when seeing the fruit of your effort = D viva Arch !!!!!
Very good tutorial and quite simple now that it brings systemd. Thank you
That such.
Before you swim, thanks for the comments, but there are a couple of "little details" that when I was editing it and visualizing how it would look, it turns out that in 2 sections there is something to clarify:
1.-in locale.gen it should look like this:
# nano /etc/locale.gen
en_US.UTF-8 UTF-8
en_ES.UTF-8 UTF-8
2.-In locale.conf it should look like this:
# echo LANG = es_ES.UTF-8> /etc/locale.conf
# export LANG = es_ES.UTF-8
3.-In vconsole.conf it should be like this.
KEYMAP = »la-latin1 ″
FONT = »Lat2-Terminus16 ″
FONT_MAP =
4.-In kernel modules
# nano /etc/modules-load.d/virtio-net.conf
virtio-net
5.-When adding a repo in pacman.conf (AUR) it should look like this:
[archlinuxfr]
SigLevel = PackageOptional
server = http://repo.archlinux.fr/$arch
6.-When setting the hostname it must be:
# nano / etc / hosts
127.0.0.1 localhost myhostname
:: 1 localhost myhostname
7.-In Startup Manager, it would be:
# grub-install / dev / sda
# cp /usr/share/locale/en\@quot/LC_MESSAGES/grub.mo/boot/grub/locale/en.mo
The truth is, I checked it thoroughly before uploading it for review and I don't understand why the hard cuts (INTROS or RETURN) were not respected. In short, an apology in case this could have generated any inconvenience.
Let me try editing the post to see if it can be corrected 🙂
How about Elav.
No problem and thanks in advance. It is not something of life and death but it can be a cause of problems for someone who follows it in an installation process. Anyway, it is advisable to read Arch's guide (in particular the unofficial one) because it is the most complete source since it shows all the possible options and solutions to problems that may arise.
That such.
In fact there are 3 derivative Arch distros that make life simpler by scripting to install them. As already mentioned Cinnarch and Manjaro are the best known; I would also add Bridge Linux (link to distrowatch.com where the distro is discussed: http://distrowatch.com/table.php?distribution=bridge)
The truth is they are all very good, but be careful although they are compatible with the mother distro (Arch), some of them have their own repos.
Personally, I have tried Manjaro and it is a great distro, but I feel that it still needs something to finish squaring the circle (hehe). The truth is a very good job and I'm thinking of taking the installation script and adapting it to Arch. This is a job that I will do soon and when I have it ready I will share it with you.
I suppose it could be done as soon as we are in the console a:
wget http://web-donde-bajo-script/instalar_arch.sh && sh install_arch.sh ???
How about Croto.
Good idea. As I have commented to others I am starting to work with AIF to try to update it. I also know that Rafael Rojas has something similar planned. As soon as I have it ready (in my case) I will publish it and leave the address for download. Then with some application (ISO master for example) add it to the ISO and then burn it. We will see in due course.
Always necessary +1
Hello, a very good guide, friend, I have the base installed and I would like to know if you could tell me how to install that environment that you have, I already know that it is gnome-shell but the one that is seen on the side is conky?
Will you have any link on how to configure it?
Well anyway thanks and very very good guide 🙂
How about Jose Daniel.
Leave it to me and I pack it and send it to you by mail as it is not very heavy. The truth is that I don't remember where I got it from and I'm looking at the browser's history to see if I can find it. I leave the email for you to contact me and send it to you. Is: jorgemanjarrezlerma@gmail.com
Here is another updated Archlinux guide: http://archninfa.blogspot.com.es/2012/08/instalacion-de-archlinux-con-kde.html
That such.
Yes I saw it and I liked it. My intention regarding the tutorial is only the installation of the base system and nothing more. The customization and configuration of other things with GESADAS, Rafael Rojas and right here at <° Desde Linux can be consulted and (most of them) include the consideration of SYSTEMD
What happens is that this point (installation of the base system) is the one that is believed to be the most complicated and that is why I decided to take it and adapt some small details and also write down personal observations.
It fit you very well!
EXCELLENT
I would like to know what the GTK + theme you have with the Gnome Shell is called if it is not too much to ask. Thank you
How about jamin-samuel.
In the case of GNOME SHELL I have it configured like this:
Cursor theme: XCursor-Mac
Icon theme: Faienence-Azur
GTK Theme: Adwaita Cupertino L
Windows Theme: Adwaita Cupertino L
The wallpaper is one that you download from san google from HP and add the arch and gnome logos.
The conky, then I'll tell you where I got it from because at the moment I don't remember.
Fantastic guide!
I have been -and I am- virtualizing it for a while in VirtualBox, when I fix a couple of things (the button wheel does not work for me in XFCE) I may dare to install it on the HDD, but we will see. At the moment I'm happy with Kubuntu or Mint 🙂
How about eatcon.
You have two very good distros for my taste. I have not used them for a long time but the truth is that I had no complaint about them at the time. If you want to have a partition and have dual or triple boot and so you have the distros of your liking all together. I am not a believer in indoctrination but if you try arch, believe me you will miss her as soon as you leave her. Greetings and be good
Somewhere I already explained my experience with Arch. Since the August version in which they changed the installer, I found it easier to install. Yes, in theory with those "windows" it should be easier, but with pacstrap it is much better.
I have installed it in a virtual machine and I love it, I have managed to install X.ORG, XFCE and a session manager that I don't remember how to say, and it's scary. It only took me a while to set up the internet with VirtualBox. The only problem I have today is that with XFCE (or perhaps with all environments, I have only tried XFCE) the button wheel does not work for me. In the Wiki I saw a guide that I think solves that by editing xorg.conf, but I tried it like that very quickly (I didn't have time) and I ended up loading X so I left it as it was ... But hey, maybe if I have some time I'll continue Trying it out, I think it's a great distro especially for the KISS rather than for the rolling release. Also, with pacman it is very easy to install packages and update them, and I think AUR is even better, even though I have not tried it.
So, if one day I dare to install it on the HDD, which I hope will come that day, I'm sure I won't move from Arch!
~ comecon
great tuto!
If you can make a guide on how to install TOGETHER (and after having already installed) other distros or SO it would be great!
I have Fedora on the primary partition and would like to keep it until Arch is 100% functional and configured.
How about Hannibal.
In fact comment that I would do a tutorial to install it together with other operating systems. As soon as I have it, I post it.
Now, you have fedora installed, if you want to give it a try, install virtualbox and virtualize it and there you will have a testing ground to learn and get used to Arch's features.
I am pointing to Anibal's request, I suppose that installing with Window $ will not be much of a problem, since there is only one grub. But I have tried to do it several times, Arch being the secondary distro, trying that it should be the primary one, and on another machine with primary ubuntu they will detect Arch, and I have not succeeded. My main problem is that I understand that Arch only needs the boot partition, /, home, and [swap], the boot partition is marked as bootable, my big question, do you have to install grub ?. Once everything is installed according to the gespadas manuals and this, (very good by the way), I try to detect the boot with the primary installation of Debian, or Ubuntu, and there is no way.
Thanks for the time and dedication, greetings.
Wow great, the truth is that it had Arch a season ago and I wanted to reinstall it, but I was scared by the change they made with the installation. I would like to encourage myself to install it again and thanks to this tutorial maybe I will!
Very good guide.
For those who do not have wired internet, I recommend adding the Wireless Tools package during the installation of the base system as this package does not come in Base and Base-devel (during the installation they can raise the Wi-Fi but later when they restart it does not work).
pacstrap / mnt wireless_tools
Greetings to all
How about moscosov
The fact that it does not include the inhálambric configuration is that it is quite a "rough" process. In general, the drivers of the cabling are a little more standardized with respect to the inhálambricas. Some may be lifted in the installation process and others not and this can be a bit problematic for a user who is not very experienced in the terminal and has no other way to do it (that does not have a graphical interface installed). For example in my particular case, the netbook has a broadcom 4312 and the driver is in AUR as well as the firmware. I have already tried it with other PCs that Atheros and Intel bring and depending on the model it works or not.
So from experience, I install the most necessary (apart from the base system) and install everything and in the end I configure the WIFI.
It would also be a good idea to check if the wireless card is natively compatible with the kernel or if there is some work to do.
It seems that the Aur's server crashed, or at least I can't download anything or enter the page. Anyone else has happened??
Yes, it seems that there are some problems with the service in AUR. Hopefully it will be restored soon.
Great, this end I will try to install arch + razor on my old laptop since with chakra I can't because now it is only for 64bits cpu. A question does iso already install systemd?
How about truko22
In fact, the last ISO of October already brings SYSTEMD by default in the installation, so the process should be simple and without fights.
In fact today I am going to do an installation on an old desktop PC (pentium 3) and I will put razor-qt on it since I want to test this desktop environment (equivalent to LXDE) and I will make a post about it.
Greetings and be good
ok any questions I ask you 😀
Great, one day I'm going to install this cute distro.
Well, after reading all the comments, I'm going to virtualize and test Arch. Once I have all my programs running properly I'm going to migrate.
The great obstacle I have had to permanently migrate to Linux has been office. I am a heavy One Note user and unfortunately I have not been able to find a good replacement for it. Although I generally use linux to work and windows to play (which is the only thing it really does).
Greetings.
While the AUR is being restored, we can download a mirror to install the programs we need, the only "but" is that the dependencies are installed "by hand", if there is a method to make it automatic I do not know it but we agree that this is an advance at the time of Need, the tips in question is the following (you have to have git installed, sudo pacman git) we download the mirror:
git clone http://pkgbuild.com/git/aur-mirror.git
then we go to the folder that we downloaded with "cd aur-mirror" (without the quotes, I forgot the code to highlight) then we look for the folder of the program that we are going to install for example bumblebeed-systemd, we write "cd bumblebee-systemd" Inside is the PKGBUILD of the program, all we have to do is write "makepkg -si" and hit enter, if the dependencies are in the Arch repos, it automatically drops them, now if the dependency is in the Aur we must install the dependency first (manually). He trusted that it will serve you as it has served me and will get us out of trouble while the server is down.
Greetings.
To enable the network service it would not be better in the following way:
[b] # systemctl enable dhcpcd@eth0.service[/B]
instead of:
[b] # systemctl enable dhcpcd @ .service [/ b]
I ask…
Sorry for the badly placed labels, in another blog I work like this to place the letters in bold.
Don't worry, this is not bbcode so the labels should not be with brackets but with symbols greater and less than 😉
Look, I have used it in both ways and I have not had problems, but it is better to specify the interface. It is assumed that the first is by itself we only have 2 network and wired interface.
Exactly, I have tried it in both ways with similar results, but as you point out it is better to specify the interface, mainly for users not very soaked in how to enable services in systemd.
@ KZKG ^ Gaara, thanks for the clarification… I've always been used to bbcode… hehehehe
Greetings.
jorgemanjarrezlerma:
I have already left a message, thank you, I really hope it helps me
Too bad I don't have internet!
because Arch needs it a lot (or a repo that I don't have either []
Anyway for newbies like me, I still think that it is a somewhat tedious and complicated installation process
But without a doubt I will try it one day
steppe
I liked it a lot when I tried it a few months ago in vb, but I don't like having the OS virtualized, but installed on the HD "as God intended" xD. However, a few days ago I decided to install it but I could never make everything start automatically (Wi-Fi connection, X and gnome) and now I am realizing that it had to be activated in the installation.
I don't know how much has changed, but I was guided by the Arch wiki and it was not specified, I came to know it here and with the gespadas guide.
Now I'm going to have to try again on the weekend, thanks for the guide !!
Hello
I don't know if I already mentioned this in the comments (there are many) but in my case the wlan0 connection is not activated automatically with the command mentioned since it is for eth0
and it would also be nice to install from the chroot caged environment.
net-tools and network-manager
Which is where ifconfig comes from, (very useful to connect to the internet) and network-manager to automatically call wlan0
sudo systemctl enable NetworkManager.service
Or instead it will always have to be done
ip link set wlan0 up
To call the wlan interface
regards
Wow, Xfce 4.10 is starting to look like GNOME 2, a breakthrough without a doubt.
Hello, could you help me with the wifi networks? What happens is that I do not know how and with what to connect to a wifi network, I have wicd installed, but it does not search, it does not detect wifi networks, I appreciate your help, yours as well as those who participate on the blog, I use kde.
hi i need some help with systemd, i recently installed arch and boot time or it freezes, or throws me a systemctl-udev error. I enter from the live CD and modify the / etc / fstab, I comment on all the ntfs partitions and what they create, it starts up and everything is fine, then I install ntfs-3g and ntfsprogs, and I uncomment the ntfs partitions, and I get the error again…. Does anyone know what to do ????
Another piece of information is that the ntfs partitions are fine, I can mount them manually, but not with fstab, also, I could mount them using a script at startup, but that would not fix the problem. I have arch and windows xp dual boot
Hello, very good guide, very readable XD ...
Well, I have a question ... Is it mandatory to swap? I can't have more partitions and I already have them extended ... Besides, I don't need RAM ...
regards
It is not mandatory, but it never hurts ... it is only a few MB 😉
There was a distribution called CTKArch this was the most adjusted with ARCHLINUX of all, including Archbang, cinnarch, majaro etc ... mm very easy to install for a newbie it was maintained by a certain Calimero and used openbox ..
Hi, I recently found out that Arch doesn't have its classic installer. I will test the manual on my virtual machine. Regards.
Many thanks! It seems to me simpler than the "little screens" installer, it seems faster to do it by terminal than to go browsing through the windows.
I've installed it in VirtualBox (well, it's been a while) with LXDE and it's awesome. The only problem is that the mouse wheel does not recognize me, although that happens to me with everything I virtualize in VirtualBox ... Maybe when I get tired of Fedora I will print the guide and give it a try on the HDD 😉
I have gladly discovered that you had to disable a VBox option, now it works perfectly. I like LXDE and everything!
Nahh, AIF was much more practical, in a few steps you had the system ready.
The new methodology is not complicated at all, but it is more cumbersome, it seems that it installed a Gentoo ... awesome!
A couple of months ago I installed archlinux, but in the step of pacstrap Base and Base-devel, I was throwing an error with 32 or 64 bits, here is the solution, I will try to spend only a few months, before facing archlinux again, When making the partitions, it was not complicated for me, but it does require installing it.
https://bbs.archlinux.org/viewtopic.php?id=151147
regards
Did you try Manjaro? He's not Arch, strictly speaking, but he's pretty close to him. The most important thing is that the installation is not as cumbersome as Arch's today and once the system is installed, if you operate it from the console it is practically identical.
On the other hand if you use Slack you don't miss a thing (unless you want a RR distro), Slackware rulez \ o /
I think it's more a matter of self-love, and having the latest, ahahaha, slackware can also bring you to your knees, but when you find that flavor, hahaha, I'll do what you tell me, as a delicacy, it won't be arch, but I'd like to fingering delicacy. Cheers
If the reason is self-love, then go ahead! ^ _ ^ but don't worry, you don't miss anything, read the Arch installation guide and you will see that there are a few commands in Bash and then set the configuration files - in fact it would be good if you read it to know the system.
Man, if you find your way in Slack then Arch for you is a November 17 picnic Arch is a distro for lazy people: everything works too well and is very easy to manage.
Slackware, it is difficult to administer, a pity that there is not much documentation and what happens is that you have to look for it, I think like everything in Linux, in my previous attempt to install arch, well I armed myself with everything but there was I think a bug or something like that, there will be time to jump. Cheers
How about community.
An apology if I have not answered your questions. The idea of this is an installation guide as generalized as possible. I have done this process with both laptops and desktops and have had no problems. For example, the wireless of my laptop is Broadcom and it does not have the firmware by motion and to avoid problems in the installation process I do it once the base system is installed (without graphical environment). I update and then install the drivers for the wireless.
Of course, before I document, print or use another PC, reviewing the Arch Wiki which is incredibly complete. I personally, in addition to the guides that can be found out there, I highly recommend reading the unofficial arch installation guide since there are the links to the configurations and considerations regarding wireless networks.
Any questions I am at your service for what I can help you. I think that in some of the answers that I provided at the time I put an email address where they can contact me.
I invite you to the archlinux community https://plus.google.com/u/0/communities/116268304449794744914/members
I have read many comments about Archlinux and Manjaro, but I think that Chakra is little spoken, I have chosen
to install it in my second sata disk, in the first I have win, the idea is to do a dual boot but at the end of the
installation and restart I see such a device>, could someone guide me, what can I do? simply
I have to do sudo grub -install / dev / sda, or something else? first of all, Thanks.
i have trouble install archlinux base system
does not take eth0 or dhcpcd eth0
a help please use with another installer change all I install the base system it gives me an error when I do dhcpcd eth0 and it says interface not found invalid
help please
How about Pedro.
An apology for not answering earlier. Look at the process, it is almost completely intuitive, but doing a test installation from scratch with ISO 201302 I have noticed that the wired interface is presented with a different name or "label". The cause of this situation I completely ignore since, as I mentioned, I have just noticed, so doing dhcpcd @ eth0 will not work for you.
I'm giving a verified why of this and how to label it with the traditional nomenclature. As soon as I have it I post it. In the meantime, I recommend the Arch WIKI or the unofficial guide or the GESPADAS page (gespadas.com) that can provide you with more information about it.
You are well and we are in contact.
I have a problem with adduser command not found help and echo all
adduser was declared "deprecated" by the Arch dev team and removed from distribution. Use useradd.
Opssss with each iso changes the installation… ..
This is how computing is, evolving continuously, in the RR it is more noticeable but it is like that in the entire F / LOSS.
Deluxe: D!
Thank you!
Excellent, I am testing Arch through Manjaro.
More than simple the distrucion to settle.
Ah, so while testing Manjaro, not Arch.
*these
I have recently returned to the Gnu / linux world and have read a lot about Arch, so thanks to this I will venture a bit. Thanks a lot.
I WILL GET TO THE WORK OF INSTALLING IT IN VIRTUALBOX JUST NOW !!!!!
Although I am debianita-Ubuntero of armor 🙂
Until you discover the abysmal difference between a well thought out, engineered and executed system and Debian.
I thank you very much Jorge for your manual since I had tried several times to install with some manuals even with the d gespadas but I could not and with your help I already loaded successfully and a little fiddling with a virtual machine and "hours" of sacrifice and reading I achieved install the arch with openbox LM and lxde desktop with the help of gespadas… we are grateful to people like you who advise us with these valuable manuals… thank you very much
By the way, you have to first install an X environment before installing the desktop environment, logically with the respective video driver ... again, thank you very much ...
I used Arch for a long time, but 2 years ago I changed my pc, and it came with uefi, I want to do dual boot with windows 8.1, so this guide is useless for me, that is if I will leave a tip, if you add links to how to install the x and the environments would be much better, up Arch.
Hello editor, I have installed Archlinux together with windows 7, a great success but there is a small detail that I still lack (and personally it bothers me). When I visit pages in other languages the strange characters appear as squares, as I was reading seto is solved with a simple
# setfont Lat2-Terminus16
I do it and restart but it remains the same, I have been reading the manual and trying with several more options of the setfont but I can't get the strange characters to "draw" as they really should.
Could you give me a hand? I thank you in advance.