Once more welcome to this new lesson (# 8) of the Course (Tutorial) about Shell Scripting ”. In the above 7 lessons We were able to make and / or learn about how to create certain modules (sections) of codes with specific functionalities through Shell Scripting using Bash Shell as a performance interpreter. These modules so far are:

To go to the previous post (lesson 7) press the following link:
In this eighth (8) On the other hand, we will concentrate on the construction of several modules, these being the following:
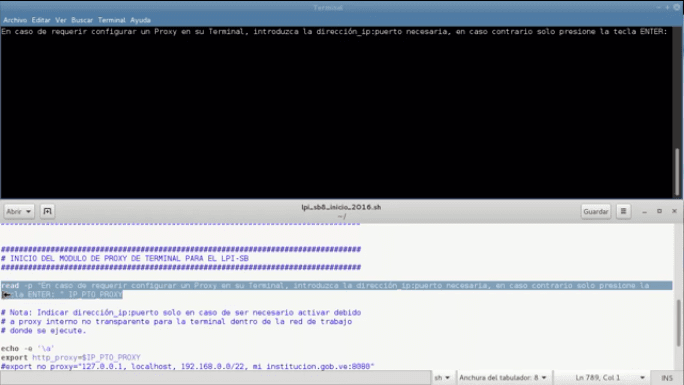
THE PROXY CONFIGURATION MODULE:
# MODULO DE CONFIGURACIÓN DE PROXY


read -p "En caso de requerir configurar un Proxy en su Terminal, introduzca la dirección_ip:puerto necesaria, en caso contrario solo presione la tecla ENTER: " IP_PTO_PROXY

# Nota: Indicar dirección_ip: puerto solo en caso de ser necesario activar debido
# a proxy interno no transparente para la terminal dentro de la red de trabajo
# donde se ejecute.

echo -e '\a'
export http_proxy=$IP_PTO_PROXY
#export no_proxy="127.0.0.1, localhost, 192.168.0.0/22, mi_institucion.gob.ve:8080"

sleep 3
clear

read -p "SI DESEA CANCELAR PRESIONE CUALQUIERA DE LOS SIGUIENTES CARACTERES: "s" "S" "y" "Y". DE LO CONTRARIO PRESIONE CUALQUIER OTRA TECLA! : " op

if [[ $op == "y" || $op == "Y" || $op == "s" || $op == "S" ]];

 then

   sleep 3 ; clear ; exit 0

 else

   sleep 3 ; clear ; read -p "EL PROGRAMA CONTINUARA, OPRIMA CUALQUIER TECLA PARA CONTINUAR..." && sleep 3 ; clear

fi
The function of this module is to indicate to the program that the console to perform tasks that require internet connectivity requires a proxy. If you does not indicate anything (Key Enter without putting any IP) the program will assume that no proxy required, otherwise you must indicate a IP: PORT, for it to configure a temporary outbound proxy and perform connectivity.
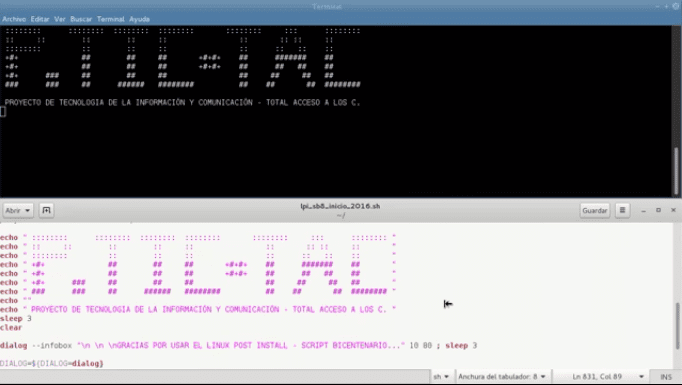
# MODULO DE BIENVENIDA
play /usr/share/sounds/startup3.wav 2> /dev/null
echo " BIENVENIDOS AL PROGRAMA "
sleep 3
clear
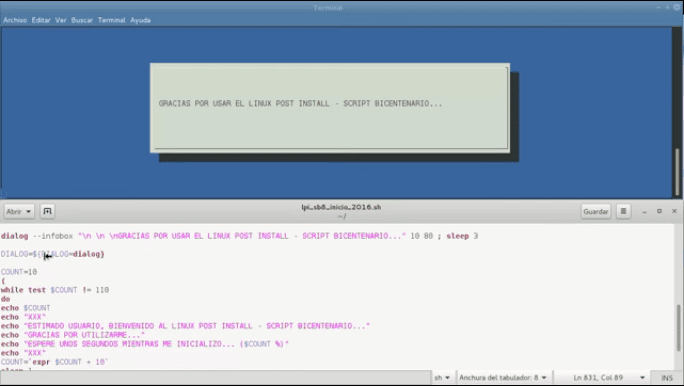
dialog --infobox "\n \n \nGRACIAS POR USAR ESTE SCRIPT..." 10 80 ; sleep 3
DIALOG=${DIALOG=dialog}
COUNT=10
(
while test $COUNT != 110
do
echo $COUNT
echo "XXX"
echo "ESTIMADO USUARIO, BIENVENIDO AL SCRIPT..."
echo "GRACIAS POR UTILIZARME..."
echo "ESPERE UNOS SEGUNDOS MIENTRAS ME INICIALIZO... ($COUNT %)"
echo "XXX"
COUNT=`expr $COUNT + 10`
sleep 1
done
) |
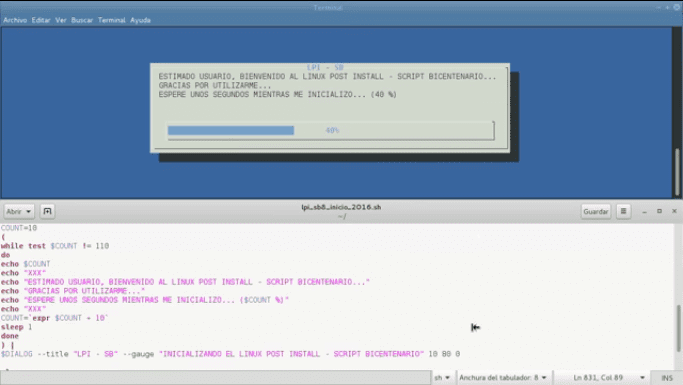
$DIALOG --title "LPI - SB" --gauge "INICIALIZANDO EL SCRIPT" 10 80 0
clear
echo " SCRIPT DE TRABAJO EN EJECUCIÓN "
echo ""
sleep 3
clear
The function of this module is to show a Welcome banner to the user manually designed with alphanumeric and non-alphanumeric characters. Then an informational message window per terminal with Dialogue and finally a progress bar to control the next step to the next module.
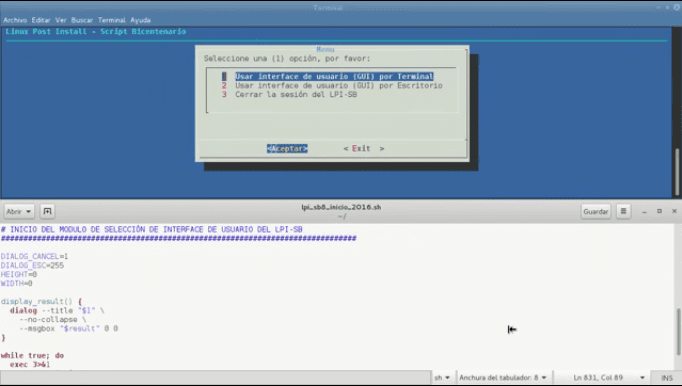
THE USER INTERFACE SELECTION MODULE
# MODULO DE SELECCIÓN DE INTERFACE DE USUARIO
DIALOG_CANCEL=1
DIALOG_ESC=255
HEIGHT=0
WIDTH=0
display_result() {
dialog --title "$1" \
--no-collapse \
--msgbox "$result" 0 0
}
while true; do
exec 3>&1
selection=$(dialog \
--backtitle "Script en ejecución" \
--title "Menu" \
--clear \
--cancel-label "Exit" \
--menu "Seleccione una (1) opción, por favor:" $HEIGHT $WIDTH 4 \
"1" "Usar interfaz de usuario (GUI) por Terminal" \
"2" "Usar interfaz de usuario (GUI) por Escritorio" \
"3" "Cerrar la sesión del Script" \
2>&1 1>&3)
exit_status=$?
exec 3>&-
case $exit_status in
$DIALOG_CANCEL)
clear
echo "Sesión del Script cancelada."
exit
;;
$DIALOG_ESC)
clear
echo "Sesión del Script abortada." >&2
exit 1
;;
esac
case $selection in
0 )
clear
echo "Programa Terminado."
;;
1 )
result=$(echo "Usuario $USERNAME, usted ha seleccionado la interfaz de usuario (GUI) por Terminal"; echo $FECHA_SISTEMA_N / $HORA_SISTEMA)
display_result "Script de Trabajo"
USER_INTERFACE=T ; break
;;
2 )
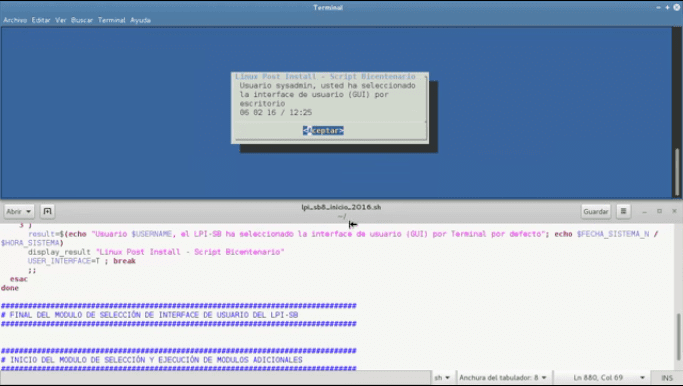
result=$(echo "Usuario $USERNAME, usted ha seleccionado la interfaz de usuario (GUI) por escritorio"; echo $FECHA_SISTEMA_N / $HORA_SISTEMA)
display_result "Script de Trabajo"
USER_INTERFACE=E ; break
;;
3 )
result=$(echo "Usuario $USERNAME, el SCRIPT ha seleccionado la interfaz de usuario (GUI) por Terminal por defecto"; echo $FECHA_SISTEMA_N / $HORA_SISTEMA)
display_result "Script de trabajo"
USER_INTERFACE=T ; break
;;
esac
done
The function of this module is to create a menu-type window that allows you to choose an option with the use of both the keyboard and the mouse. Each option can execute a command command, a module, a function or another script. In this particular case, it was used to store a value in a variable which will then allow decide an order according to its content.

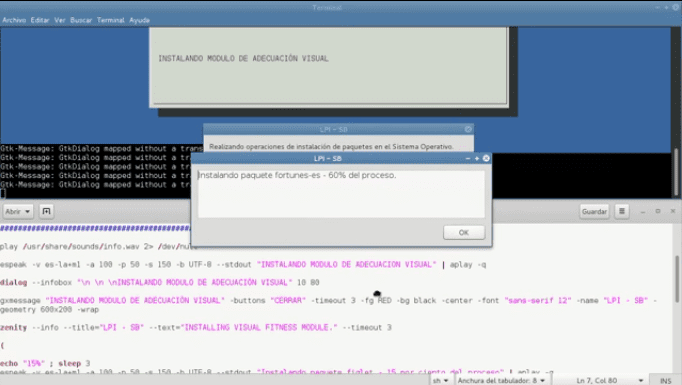
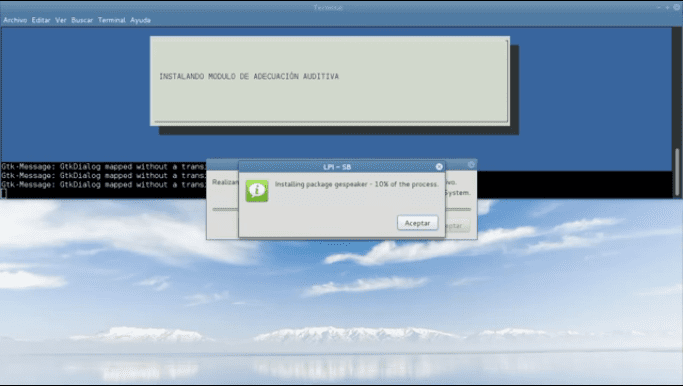
THE MODULE FOR THE SELECTION AND EXECUTION OF ADDITIONAL MODULES
# MODULO DE SELECCIÓN Y EJECUCIÓN DE MÓDULOS ADICIONALES
if [[ "$USER_INTERFACE" == "T" ]]; then
bash $UBICACION/lpi_sb8_gui_terminal.sh
sleep 3
else
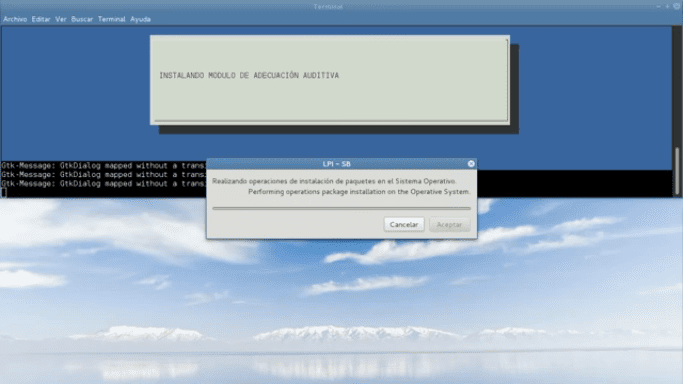
bash $UBICACION/lpi_sb8_acond_audiovisual_g_2016.sh
bash $UBICACION/lpi_sb8_act_mtto_g_2016.sh
fi
The function of this module is to execute a predefined option based on a value previously stored in a variable. In this case, that variable would trigger a selection between continuing to perform activities only via console with commands and graphical interfaces with dialog ó via graphical interfaces for the Desktop Environment with Zenity and Gxmessage.

# MODULO DE DESPEDIDA

# Sección que muestra un mensaje de despedida al usuario

echo -e '\a'

echo ''
echo ''
echo '#--------------------------------------------------------#'
echo '#   ESPERE UNOS SEGUNDOS MIENTRAS SE CIERRAN TODOS LOS   #'
echo '#               PROCESOS ABIERTOS DEL SCRIPT             #'
echo '#--------------------------------------------------------#'
echo ''
echo ''

sleep 5
clear

# Sección que instala los paquetes bases del Script

echo -e '\a'

echo ''
echo ''
echo '#--------------------------------------------------------#'
echo '#           MUCHAS GRACIAS POR USAR EL SCRIPT            #'
echo '#                                                        #'
echo '#  EL PROGRAMA HA CULMINADO Y SE CERRARÁ INMEDIATAMENTE  #'
echo '#                    ESTIMADO USUARIO                    #'
echo '#--------------------------------------------------------#'
echo ''
echo ''

sleep 3
clear

wget -o /dev/null --user-agent="Mozilla/5.0 (Windows NT 6.2; WOW64) AppleWebKit/537.36 (KHTML, like Gecko) Chrome/29.0.1547.2 Safari/537.36" -O "/tmp/audio.mp3" "https://translate.google.co.ve/translate_tts?ie=UTF-8&q=MUCHAS%20GRACIAS%20POR%20USAR%20EL%20LINUX%20POST%20INSTALL%20-%20SCRIPT%20BICENTENARIO%2C%20EL%20PROGRAMA%20HA%20FINALIZADO%20Y%20SE%20CERRAR%C3%81%20INMEDIATAMENTE%2C%20ESTIMADO%20USUARIO.&tl=es&total=1&idx=0&textlen=141&tk=899229.758054&client=t&prev=input" ; play -q /tmp/audio.mp3

play /usr/share/sounds/shutdown1.wav 2> /dev/null

rm -f $UBICACION/$FILE_LOCK

setterm --initialize

# MODULO DE DESPEDIDA
The function of this module is to show a message by the farewell console and delete the file of its successful execution.
Below a Screencast where it is shown how these modules and the previous ones are executed so that they check how all the modules shown during the previous 8 lessons work, and certify the power of the Shell scripting has a higher level:
And why should we use console user interfaces or graphical environment to our Script?
We must remember that graphical user interfaces, also known as GUI (Graphical User Interface) are means used to represent the information and actions available in the lower interface, using a set of images and graphic objects. Its main use consists of provide a simple visual environment to allow communication with the operating system of a machine or computer.
Usually we carry out the actions through direct interaction with the equipment, that is, by typing commands or executing a script with the keyboard. AND GUIs emerge as an evolution of the command line of the first operating systems and becoming the fundamental piece in a graphic environment.
And in a context of human-computer interaction process, the GUI is the interactive technological medium that allows us, through the use and graphic contextualization of visual language, a friendly interaction with a computer system.
Using graphical interfaces provide us with advantages and disadvantages, such as:
Among the advantages: Facilitate the handling of procedures, View each command on the screen through an image or object, Provide standardized control mechanisms such as windows and dialog boxes to the user, Allow the user to interact with the system in an easier way.
Among the disadvantages: It takes more operating system resources, complexity, development time, and cost of doing such a development.
If you want to know more about how to make new and more beautiful interfaces in Terminal or on the Desktop, I recommend you learn about some commands that are used to build dialog windows with the ability to receive or give actionable information with bash scripts, such as:
dialogue: At Dialog Manual gives us the different options you have.
Gxmessage: At Gxmessage Manual gives us the different options you have.
Zenty: At Zenity Manual gives us the different options you have.
And if you want to give an even more special and interactive touch to your Script (Programs) either with Bash shell or another Shell I recommend these other programs that, used well, can help you create true wonders without being very skilled in the Shell Scripting issues. Among these programs we have:
- notify-send: Very useful command to make notifications for events such as notifying when an email arrives, a contact is put online and making reminders of various tasks.
- put: Command used among many things to position the cursor on the screen, delete data from the screen, know the number of lines and columns on the screen, correctly position a field, delete a field whose input was detected as an error. Anyway, almost all the parameterization of the screen is done by this command.
- setleds: Command that allows to control the activation and deactivation keys of the uppercase / lowercase letters, the numeric keyboard and the scrolling keyboard individually for each console and desktop.
Well, so far this series!