As I promised, here are step by step the actions that I carried out once I installed KDE 4.6 in my dear Debian Testing. I've been a bit busy today, so excuse me if it's not as detailed as you'd like.
Today morning I did a clean install (from scratch) of Debian, to better document the packages I need to install and so on, so if you follow this article step by step, you will have no reason to have any problems.
Debian installation.
With regard to the installation there is a peculiarity. I normally use Debian Testing and the most logical thing is that I have downloaded an iso of this link and with that you have completed the installation. The problem is that since my bandwidth doesn't allow it, I had to use an iso of debian-squeeze.
Recommendation # 1: It tries to install with the Debian Testing iso for two reasons:
- There will be fewer packages to update.
- You run less risk of encountering dependency errors or things like that.
Installation, either with iso de Squeeze o Wheezy, it is exactly the same as how I explain it in this pdf, except I don't install Graphic Environment, but only the Standard system utilities. For this guide I am going to assume that the installation was done from the iso of Testing.
Actualización
Once we finish installing without a graphical environment, we log in as root and configure the repositories:
# nano /etc/apt/sources.list
in the sources file we put:
deb http://ftp.debian.org/debian testing main contrib non-free
and update:
# aptitude update
When finished, we update the packages already installed:
# aptitude safe-upgrade
Once this process is finished, if everything has gone well, we restart the PC and we went on to install KDE.
KDE installation
In this guide we are only going to install the necessary packages so that KDE is displayed correctly and be able to use it. We will also install some necessary packages that are not included by default. Once we log in as root, we will have a fully functional environment by installing the following packages:
# aptitude install kde-plasma-desktop kde-l10n-es kde-i18n-es kwalletmanager lightdm
With this is enough so that once it finishes and we restart, we can enter our brand new desktop. If you look at the end I added LightDM and I explain why. When we install the package kde-plasma-desktop, this installs us KDM which for me is very heavy, so I replace it with LightDM. Once we give Enter, the wizard will ask us which one we want to use, you choose the one you want.
LightDM it will also install the packages for the graphical server. Since I use intel, I just add: xserver-xorg-video-intel, being this way:
# aptitude install kde-plasma-desktop kde-l10n-es kde-i18n-es kwalletmanager lightdm xserver-xorg-video-intel
This is enough, but if we want we can install once it finishes, or together with these, the following packages:
# aptitude install kde-icons-oxygen kde-config-gtk-style kde-style-qtcurve kwalletmanager kde-icons-mono system-config-gtk-kde gtk2-engines-oxygen gtk-qt-engine
They are packages with which we will improve the applications gtk that we use and some icons that we add. If you don't use the wallet KDE to manage passwords, you can remove kwalletmanager.
Additional packages.
Before restarting, it would be good to install other packages that we may need, for example:
Audio / Video Related Packages
# aptitude install clementine kmplayer vlc (instalado por defecto) gstreamer0.10-esd gstreamer0.10-ffmpeg gstreamer0.10-fluendo-mp3 gstreamer0.10-plugins-bad lame pulseaudio -y
System utility related packages:
# aptitude install ark rar unrar htop mc wicd wicd-kde dbus gdebi-kde rcconf ksnapshot -y
NO / KDE applications I use:
# aptitude install iceweasel icedove libreoffice-writer libreoffice-l10n-es libreoffice-kde libreoffice-impress libreoffice-calc gimp inkscape diffuse -y
Things I remove:
# aptitude purge exim4 exim4-base exim4-config exim4-daemon-light -y
Of course you should add or remove what you need 😀
Customizing KDE
If we pass the previous steps without problems, we come to the most interesting part of this whole thing: customizing KDE to save us a few Mb of consumption. First we will do it manually (by console) to later move on to the graphical aspects.
Deactivating Akonadi + Nepomuk:
I will not go into details about what it is Akonadi o Nepomuk, especially because there is an excellent article that describes very well what the function of each of them is. You can read it here. To deactivate Akonadi completely, we do the following:
$ nano ~/.config/akonadi/akonadiserverrc
We look for the line that says:
StartServer=true
and we set it to true:
StartServer=false
Keep in mind that applications such as kmail they use Akonadi, so we may not be able to use them. To deactivate Nepomuk edit the file:
$ nano ~/.kde/share/config/nepomukserverrc
and that:
[Basic Settings]

Start Nepomuk=true
[Service-nepomukstrigiservice]
autostart = true
We leave it like this:
[Basic Settings]

Start Nepomuk=false
[Service-nepomukstrigiservice]
autostart = false
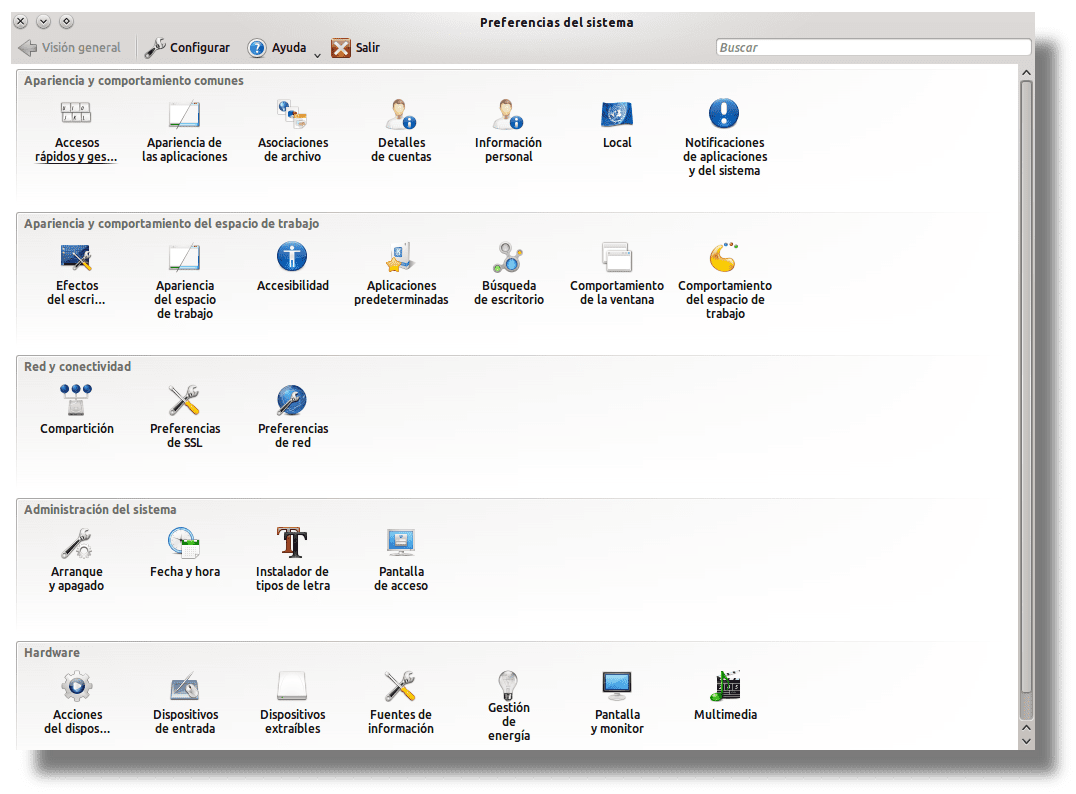
In theory all this can be done by The Preferences of the System, but nothing, around here is faster 😀
Eliminating effects.
We can save a bit of resources by eliminating the effects (transparencies, transitions) that comes in KDE by default. For this we open the System Preferences Manager » Appearance and behavior of the workspace »Desktop Effects and uncheck » Enable desktop effects.
We can also remove other effects by configuring oxygen-settings. For this we press Alt + F2 and we write oxygen-settings. We should get something like this:
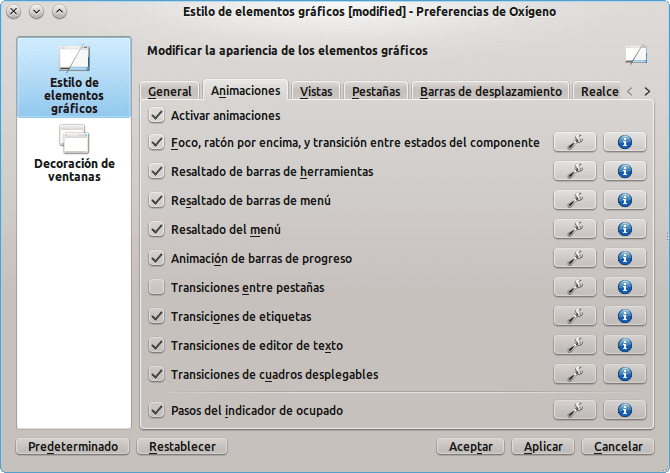
There we can entertain ourselves removing effects of various types. I simply uncheck: Activate animations.
Properly displaying Gtk applications
The first thing we do is install the motors gtk necessary:
$ sudo aptitude install gtk2-engines-oxygen gtk2-engines-qtcurve
Later we open a terminal and put:
$ echo 'include "/usr/share/themes/QtCurve/gtk-2.0/gtkrc"' >> $HOME/.gtkrc-2.0

$ echo 'include "/usr/share/themes/QtCurve/gtk-2.0/gtkrc"' >> $HOME/.gtkrc.mine
Now we only have to select in the KDE preferences than for applications gtk use QtCurve. The result can be seen in me Firefox:
Eliminating processes at the beginning.
We open the System Preferences Manager »System Administration» Startup and Shutdown »Service Manager and uncheck the ones we don't want to start. Example of one that I always disable: Nepomuk search modules.
Eliminating elastic cursor.
Although it may not seem like it, the little jump of the icon that appears on the cursor when we open an application consumes resources. To eliminate it we open the System Preferences Manager »Common appearances and behaviors» System and app notifications »Launch notification and where does it say Elastic cursor we put: No busy cursor.
Classic desk.
I have always liked having the traditional desk, as in Gnome o KDE 3. For this we go to the desktop and click on the icon in the upper right part and select Folder view preference:
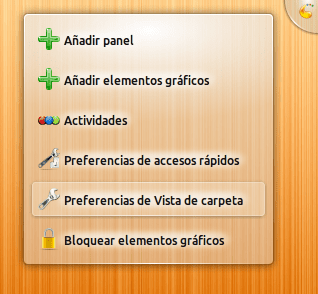
And in the window that comes out we change the disposition to Folder view.

RCConf
We installed rcconf to disable as usual some daemons that start when the system boots. In my case one of the ones I delete is KDM since I use LightDM. You have to be especially careful with this, and never delete dbus.
And so far this guide. I hope I can add more things as time goes by.
Thank you elav for keeping your word +1
😀 I hope it really helps you ...
Thanks, I already made the customization, we are just going to restart to see if we really walk faster, and what programs can I do without at startup time? If I don't bother you much?
Well that depends on what you have installed. If you show me a screenshot, maybe I can help you .. 😉
Where it says the akonadi thing, you put it backwards, to deactivate akonadi the variable has to be false, like this:
StartServer = false
Yes, it happened to me when I was writing the article, thank you very much 😀
elav I think to disable akonadi is the reverse of how you put it in the post.
By removing the stationery, and deactivating Akonadi and Nepomuk, I reduced consumption by 200Mb, I am satisfied.
200Mb? 0_o
But how much RAM do you have? Did you reduce consumption so much? Wow .. Great 😀
I have 1.5Gb and 1.3Gb available with an AMD64 dual core processor, which I think, as I read on the web, consumes more RAM than an i386. I plan to try to get to 4Gb.
MMM OK.
In fact yes.
My kde has never entered me because of the high consumption of Ram.
I love it but I'm in Gnome Ja
With Gnome2 I agree with you but I tried Fedora 15 with Gnome3 and it has a high consumption of RAM almost equal to KDE, I hope that with the development it improves the consumption.
Very good tuto… .ha, almost the same as the installation I have of Debian… the difference is that at the time I installed it with Squeeze and the process was loooong 🙂
regards
Thank you Roman77, we are glad you liked it 😀
Hi Elav. Although I have never been a KDE user, I find this tutorial very interesting. I like learning. Thank you very much and I hope you continue to publish more.
Thanks Carlos-Xfce, I also hope to continue publishing others, I mean, if Gnome doesn't call me, I already see that more Gnome3 packages are entering Testing 😀
I found it interesting. Let's see if the weekend I encourage myself to install it. Regards.
Excellent post, right now I start to follow it ... I also want to compile the kernel for my pc but I don't know what modules to install, I have a Toshiba that uses AMD Thurion Dual core with 4 gb of RAM and this is the output of the lspci:
00: 00.0 Host bridge: Advanced Micro Devices [AMD] RS880 Host Bridge
00: 01.0 PCI bridge: Advanced Micro Devices [AMD] RS780 / RS880 PCI to PCI bridge (int gfx)
00: 04.0 PCI bridge: Advanced Micro Devices [AMD] RS780 PCI to PCI bridge (PCIE port 0)
00: 05.0 PCI bridge: Advanced Micro Devices [AMD] RS780 PCI to PCI bridge (PCIE port 1)
00: 06.0 PCI bridge: Advanced Micro Devices [AMD] RS780 PCI to PCI bridge (PCIE port 2)
00: 11.0 SATA controller: ATI Technologies Inc SB7x0 / SB8x0 / SB9x0 SATA Controller [AHCI mode]
00: 12.0 USB Controller: ATI Technologies Inc SB7x0 / SB8x0 / SB9x0 USB OHCI0 Controller
00: 12.1 USB Controller: ATI Technologies Inc SB7x0 USB OHCI1 Controller
00: 12.2 USB Controller: ATI Technologies Inc SB7x0 / SB8x0 / SB9x0 USB EHCI Controller
00: 13.0 USB Controller: ATI Technologies Inc SB7x0 / SB8x0 / SB9x0 USB OHCI0 Controller
00: 13.1 USB Controller: ATI Technologies Inc SB7x0 USB OHCI1 Controller
00: 13.2 USB Controller: ATI Technologies Inc SB7x0 / SB8x0 / SB9x0 USB EHCI Controller
00: 14.0 SMBus: ATI Technologies Inc SBx00 SMBus Controller (rev 3c)
00: 14.2 Audio device: ATI Technologies Inc SBx00 Azalia (Intel HDA)
00: 14.3 ISA bridge: ATI Technologies Inc SB7x0 / SB8x0 / SB9x0 LPC host controller
00: 14.4 PCI bridge: ATI Technologies Inc SBx00 PCI to PCI Bridge
00: 18.0 Host bridge: Advanced Micro Devices [AMD] Family 10h Processor HyperTransport Configuration
00: 18.1 Host bridge: Advanced Micro Devices [AMD] Family 10h Processor Address Map
00: 18.2 Host bridge: Advanced Micro Devices [AMD] Family 10h Processor DRAM Controller
00: 18.3 Host bridge: Advanced Micro Devices [AMD] Family 10h Processor Miscellaneous Control
00: 18.4 Host bridge: Advanced Micro Devices [AMD] Family 10h Processor Link Control
01: 05.0 VGA compatible controller: ATI Technologies Inc M880G [Mobility Radeon HD 4200]
02: 00.0 Network controller: Realtek Semiconductor Co., Ltd. RTL8191SEvB Wireless LAN Controller (rev 10)
03: 00.0 Ethernet controller: Realtek Semiconductor Co., Ltd. RTL8101E / RTL8102E PCI Express Fast Ethernet controller (rev 02)