This is a small guide that will help us create a realistic sticker or sticker effect, this time I will use this picture.
This Effect can be applied to any image, as long as we prepare it properly.
To make this preparation, we must first remove the background or isolate the image on a transparent background. This is a very basic level in the use of GIMP, but in case anyone does not know, it is done as follows.
With the image selected we will layer > transparency > add alpha channel
In the tools section we use fuzzy selection and we choose the area around the target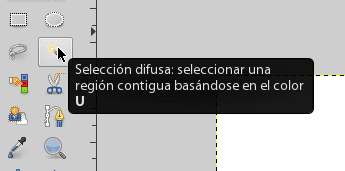
Already the surrounding area selected, we simply press «delete» on our keyboard and we already have a transparent background, if there are any imperfections, we use the eraser to give a precise finish.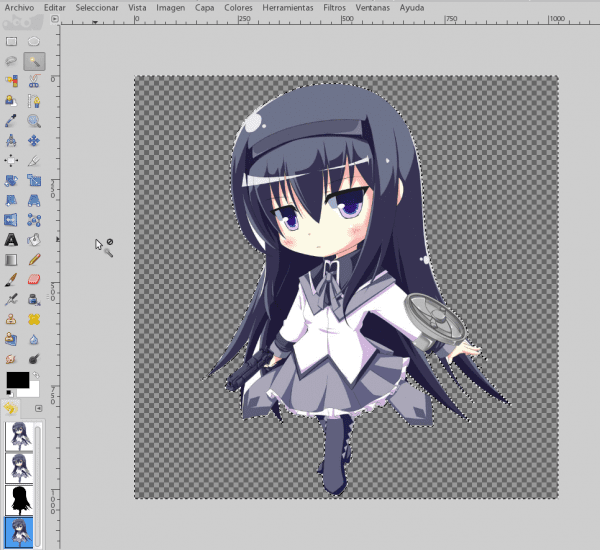
Once we started working on the sticker effect, we went to selection > invest to select the object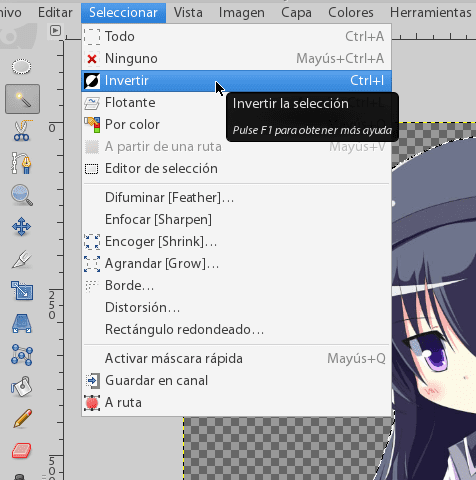
Now we turn to Selection > Enlarge [Grow]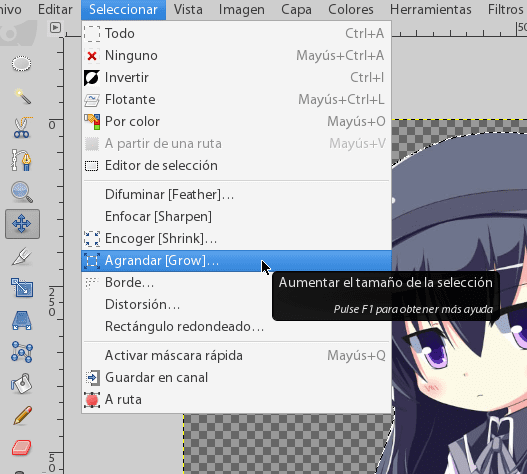
which we will give the value that best suits us, since this value establishes the outline that the image will have, in this case it will be 6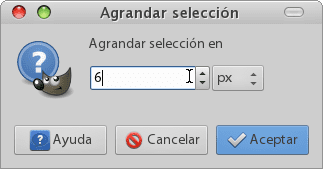
Let Selection > Ruta (this provides better selection of edges)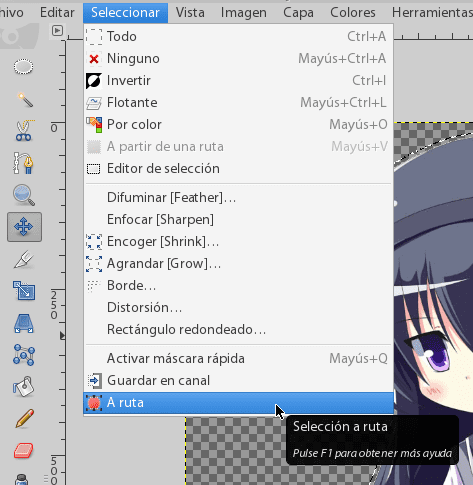
and then in the same menu Starting route 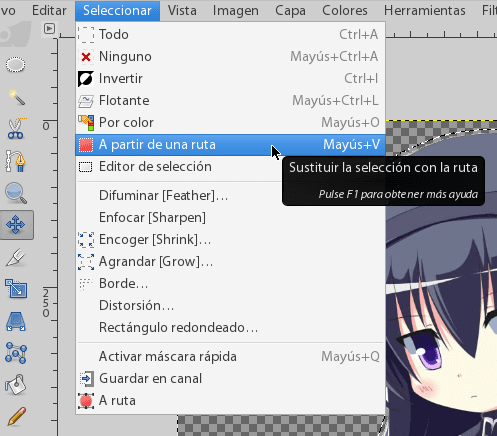
In this part we choose the color of the border, (white) done this we go to Edit > Trace Route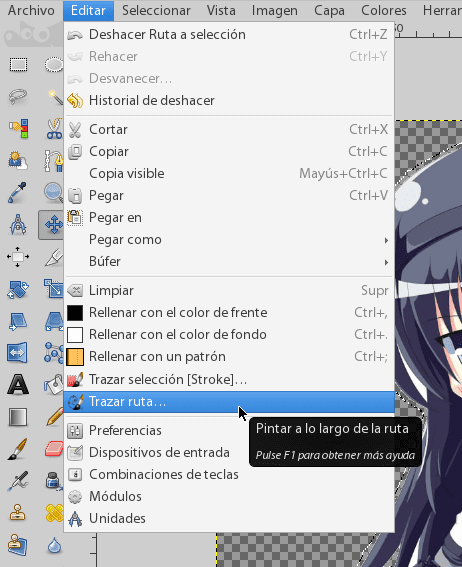
Once again, these values are a function of the size of the image, and this must be proportional to the thickness of the desired border, in this case I will put 15, (if in Enlarge [Grow] you used instead of 6 12, here you could use 30 instead of 15 and so on.)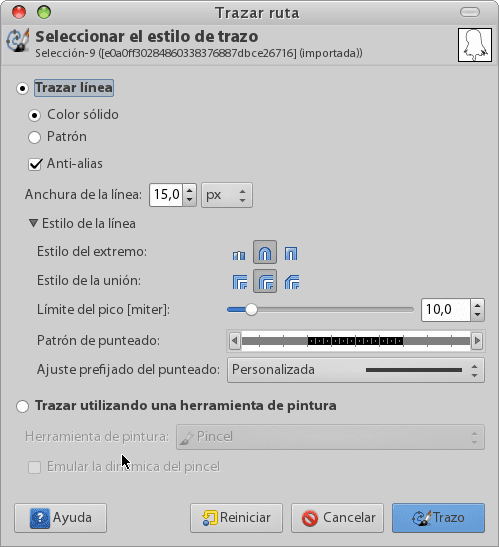
At this point we have the image ready, but we can still add a shadow to give it a 3D effect, (which will make it look cooler; D) we do it by going to Effects > Lights and shadows > Cast shadow and we use the default values.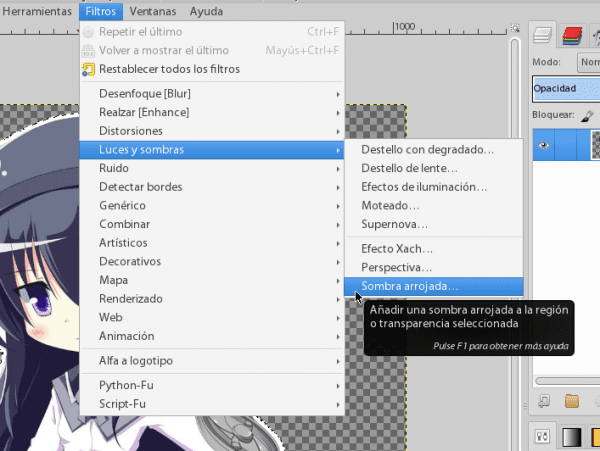

Homura-chan you are a sticker! へ (> w <) ノ
Remember to save it in png and I hope you enjoyed this little tutorial. (^ _ ^) ノ
WOW !!! Great 😀
thanks ^^
I said, just great 😀
From this I am learning a little about Gimp * - *
Thanks for your contributions ^ _ ^
you're welcome, it's somewhat altruistic in a way to write articles 😀
I don't know much about design but I have been looking at Krita a lot and several of her advantages. You should try that program to see how it goes, you know, experiment 😉
Yes, I know krita, it looks very complete and has interesting features, but it's a shame that to install a program I have to download all the DE 🙁, well, maybe one day I will have a decent computer with 8Gb of ram to run KDE xDDD thanks for the advice
As far as I know it is not necessary, but I ignore that detail so I cannot discuss you xD
well I tell you because when I do pacman -S I have to install all KDE.
Excellent Tuto .. I will put it into practice in a very short time.
I love the mix anime + gimp = awesome 🙂
of course !!
The effect looks very cool and this one goes to the log, thanks! :]
so I know how to do it….
waaaaa with your tutes so I will continue fighting to be a gimp graphic designer
Designer with GIMP ... I find it complicated unless you want to work strictly in the digital field.
Right now I'm testing this and your other tutorial and really if they work xD
+10 bonus points for using Homura ~
I'm glad you dare to use the gimp ^ _ ^
hahahaha thanks for the +10 taringa type
I'm a fan of HomuHomu * w *
Humura * - * !!!!
Good morning, thanks!
Nice 🙂
Thank you very much for the tutorial, if one day I dare to give Gimp another chance in my life.
I'm going to install gimp, to see if I can do it 🙂
sudo aptitude install gimp
pacman -s install gimp
it's not that difficult XD
Nooooooo xD, I wanted to say, let's see if I can do what the tutorial says xD
Thanks for the tutorial. You just found out to me what the "trace route" is for, which I have never tried.
The best thing about this program is that it has everything and you can work in many different ways ... you can also:
1- On the layer (already trimmed) click with the opposite button and select «alpha to selection».
2- You press Ctrl and +, we indicate quantity in pixels, we accept.
3- New layer, we drag the border color within the selection, we lower the layer to the background,
4- and create the shadow: Menu / filters / lights and shadows / cast shadow ...
Greetings and thank you!
Yes, really Gimp is very versatile and full of functionalities, the way you do it is also interesting and practical, but I wanted to use the functions that are already included, it would be a waste to never use them right? 😀
Let's see if I understood….
The sticker effect consists of taking an image and making it look like a sticker, right?
It would not be the same:
- Render (extract or crop the image from its original environment)
- Duplicate the layer of the finished render
- Fill the bottom layer with black
- Lower the opacity of the black filled layer to make it look like a shadow
- Move the black layer a bit
?
Please do not take me as the wise crossed is just looking for alternatives to reach the same result that by the way is magnificent.
I will almost give you a tutorial to achieve a similar effect by doing other steps
is that this is so simple that it is achieved in the way you want hahahahaha I do not think you are wise, only that there are so many people and worldviews as ways to achieve things in life.
cheers ^ _ ^
Thanks helena_ryuu, today I will use the Sticker effect for a label 🙂
As always, helena_ryuu, making her excellent GIMP tutorials 🙂 Thank you very much.
I recommend you take a look at Gimp Magazine, there you will find work done with Gimp and its plugins as well as tutorials (in English), from advanced users in graphic design.
http://gimpmagazine.org
Great! Thank you very much for the tutorial. Every so often I like to play with GIMP, now I have a new trick to try 😀
A greeting!
Excellent trick, by the way, # 2 of the gimp magazine is out. Cheers
thanks for this tutorial but in gimp 2.8 the last step that is called cast shadow does not appear ... how is it done in that case to obtain the shadow ??? help »!
Hello, I come to troll XD ...
Long live the Layer Styles !!!!! XD
Of course we can live without them, in fact all I would like to have in GIMP is neither layer effects nor smart objects, but a more efficient gradient editor