

After successfully flashing a system to our Raspberry Pi onto our SD card, we will almost certainly proceed to perform some tests on the new system, as well as make customization configurations to it.
But one thing I am sure of is that you have had to perform this process more than once , simply because, since there are several systems for this device, you have taken the time to test them to see which one suits your needs.
This process may cause you to lose some settings of a system you previously used, and if you lose them, you may later regret having made the change.
To avoid this type of regret, we can perform a preventive backup of our SD card and save those systems and configurations that we deem appropriate.
And not only that, we must also consider that SD cards tend to have a certain life time, so it is never too much to do a preventive backup.
So if you think it is time to back up your SD card, I invite you to follow the following instructions.
One of the simplest ways to back up the information contained within our SD card is to make a complete copy of its contents.
What we're going to do with this is create an image of the SD card which we can save in order to perform the restoration later.
So to carry out this work it is necessary that we extract the SD card from our Raspberry Pi, which we must disconnect from the power.
How to make a backup of our SD card?
Now we need to place our card in our computer, either in our card reader or with the help of an adapter.
Once this is done, we need to open a terminal and run the following command to find out the mount point of our SD card.
sudo fdisk -l
With this command we will see the mount point , as well as all the partitions that our card has.
The mount point is usually /dev/sdb or /dev/sdc by default , although if you have more storage devices connected, this mount point may vary.
In my case it's /dev/sdb , so we'll ignore the partitions /sdb/sdb1, sdb2, sdb3 , etc. We're not interested in those.
Now, in the terminal, we're going to run the following command
sudo dd bs=4M if=/dev/sdb of=imagenraspberrypi.img
You will notice that the command is similar to the one we use to burn the disk images, only that in it we change the mount point and the path of the parameter image.
For Windows users, they can use the same tool recommended for burning images: Win32DiskImager.
The way to do this here is by selecting the folder icon, as if we were going to search for the disk image, but here we are going to create the name of our image.
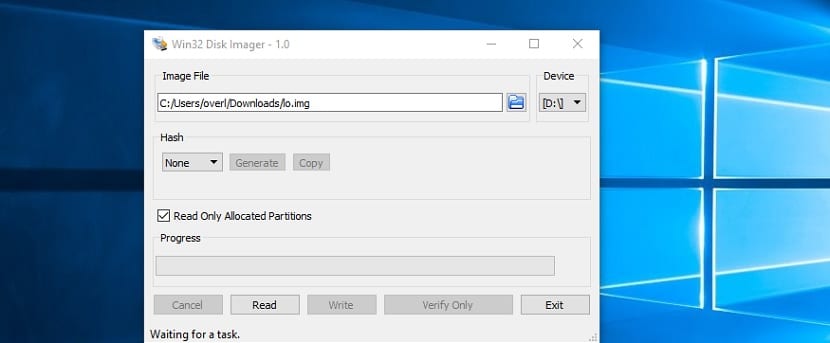
We can position ourselves in the folder where we want to save the backup image of our SD
Now we are going to select the path that the SD card has.
And we will see that the only enabled button is "Read" which we will press to start the process to back up our SD card.
At the end of the process we can verify that the image is in the path we indicated.
How to restore a backup of our SD?
An important point is that you should know that this backup can only be recorded on an SD card of the same capacity, never less.
I have not tried with higher capacity cards, but generally this process can generate some conflict, since the partitions and sectors are a vile copy.
If you have another SD card or want to restore the backup you created, you can do so by following the same instructions you use to save a system to your device's SD card.
So the process is the same and if you have an SD card of the same capacity you can perform the test on it.