
|
Like all Linux distros, Ubuntu already comes with a firewall (firewall) installed. This firewall, in fact, comes embedded in the kernel. In Ubuntu, the firewall command line interface was replaced by a somewhat easier to use script. However, ufw (Uncomplicated FireWall) also has a graphical interface that is super easy to use. In this post, we will present a mini-guide step by step on how to use gufw, the graphical interface of ufw, to configure our firewall. |
Before installing gufw, it is not a bad idea to check the status of ufw. To do this, I opened a terminal and wrote:
sudo ufw status
The output should say something like: "Status: inactive". That is the default state of the firewall in Ubuntu: it is installed but is disabled.
To install gufw, I opened the Ubuntu Software Center and searched for it from there.
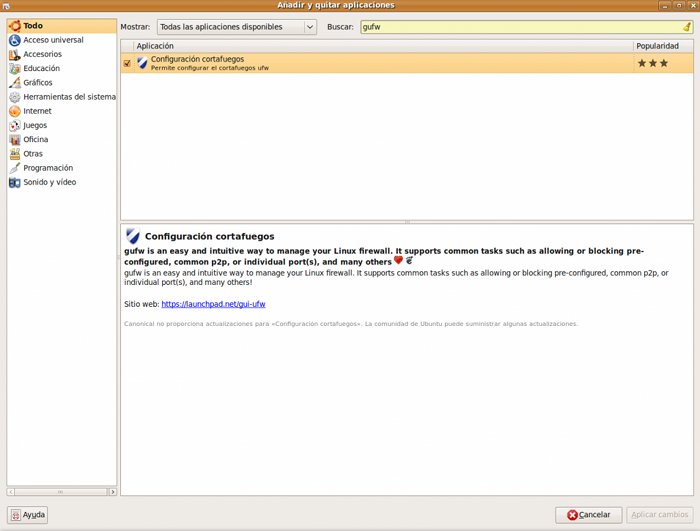
You can also install it from the terminal by typing:
sudo apt-get install gufw
Setting up gufw
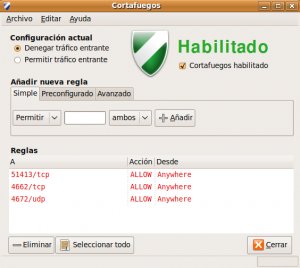
Once installed, you can access it from System> Administration> Firewall settings.
As you can see in the screenshot, ufw operates by default accepting all outgoing connections and rejecting all incoming connections (except those related to outgoing ones). This means that any application you use will be able to connect to the outside (be it the Internet or part of your Intranet) without problems, but if someone from another machine wants to access yours, they will not be able to.
All connection policies are stored in the file / etc / default / ufw. Strangely, ufw blocks IPv6 traffic by default. To enable it, edit the file / etc / default / ufw and it changed IPV6 = no by IPV6 = yes.
Creating custom rules
Click the Add button in the main gufw window. There are three tabs for creating custom rules: Preconfigured, Simple, and Advanced.
From Preconfigured you can create a series of rules for a certain number of services and applications. The available services are: FTP, HTTP, IMAP, NFS, POP3, Samba, SMTP, ssh, VNC and Zeroconf. The available applications are: Amule, Deluge, KTorrent, Nicotine, qBittorrent, and Transmission.
From Simple, you can create rules for a default port. This allows you to create rules for services and applications that are not available in Preconfigured. To configure a range of ports, you can set them using the following syntax: PORT1: PORT2.
From Advanced, you can create more specific rules using the source and destination IP addresses and ports. There are four options available to define a rule: allow, deny, deny, and limit. The effect of allowing and denying is self-explanatory. Reject will return an “ICMP: destination unreachable” message to the requester. Limit allows you to limit the number of unsuccessful connection attempts. This protects you against brute force attacks.
Once the rule is added, it will appear in the main gufw window.
Once a rule has been created, it will be shown in the main window of Gufw. You may also view the rule from a shell terminal by typing sudo ufw status.
Subnormal learning to write, good of something servis
I'm not going to insult you, as you do by calling yourself subnormal, for mistakes in writing, but I have to tell you that "you see the straw in another's eye, and you don't see the beam in yours."
In a single written line, you have made several mistakes and omissions; the most important, perhaps, is to replace the present infinitive with the imperative.
I am not an expert, but as I read, to prevent the equipment from responding to echo requests (a minimum condition for the invisibility of our equipment and to pass a port scanner properly) it is necessary to follow these steps:
$ sudo ufw enable
$ sudo nano /etc/ufw/before.rules
Where the line that says:
-A ufw-before-input -p icmp –icmp-type echo-request -j ACCEPT
so it looks like this:
# -A ufw-before-input -p icmp –icmp-type echo-request -j ACCEPT
Save to nano with control + O. Exit with control + X.
Then:
$ sudo ufw disable
$ sudo ufw enable
I did so on my PC. Someone correct me if it is not correct.
Hello, it is true that in the 64-bit version the GUI is different. I think it is not as intuitive as GuardDog, but I tried it and it gave me better results with some ports that were complicating me, so the gufw was already working. So this post was just right for me. Thanks Let's use ...
As far as I remember, it should work even if you reboot.
This program is just an interface for the firewall that comes by default in Ubuntu.
Cheers! Paul.
Once the firewall is configured, is it functional even if you reboot or does it have to be started at every login? Thanks in advance for the answer.
Thanks for the post.
I am quite a newbie and not sure if what I am doing is correct for effective protection. The only thing that I download from the internet is the Ubuntu iso and other distros, so I like to have all the ports closed and the ufw I activate it in the following way in the console.
»Sudo ufw enable», this returns the message that the firewall is activated, in a further step I make the following modification by entering the following command in the console:
"Sudo gedit /etc/ufw/before.rules"
In the next screen that appears, I modify the line where "done" with a hash at the beginning of the line from the extreme left.
Now the question I wanted to ask you: is this correct for a protection of my computer?
Thanks in advance for the response and best regards.
Yeah that's right. In case you want to create rules, I recommend using gufw. 🙂
Cheers! Paul.
Thank you very much and best regards from Spain
I have installed my version 10.10.1 on Ubuntu 10.10 AMD64 is different, at least in the GUI from the one you explain.
It's what I've been looking for a long time, thank you.
What a good cello! I'm glad!
Cheers! Paul.
yandri i'm new to linux, my question is that simple to configure the firewall in all distributions?
it is said learn ...
I can't add LibreOffice Impress to exceptions. I need it to be able to use the remote control (Impress Remote) with wi fi. So far the solution was to temporarily disable the firewal
Hello…
Excellent article. Very useful
Thank you very much
Hello friend I use ubuntu 14.10, I followed the steps you mentioned to comment the rule
# -A ufw-before-input -p icmp –icmp-type echo-request -j ACCEPT
But when I do the port scan again, I must again have the Ping (ICMP Echo) requests open, I use the GRC ShieldsUp scanner https://www.grc.com/x/ne.dll?bh0bkyd2 , any other solution ??
Thank you