
Many readers will appreciate that in most of the articles where I put an image, I add a kind of shadow to give it a more beautiful appearance, as in this one that starts this post.
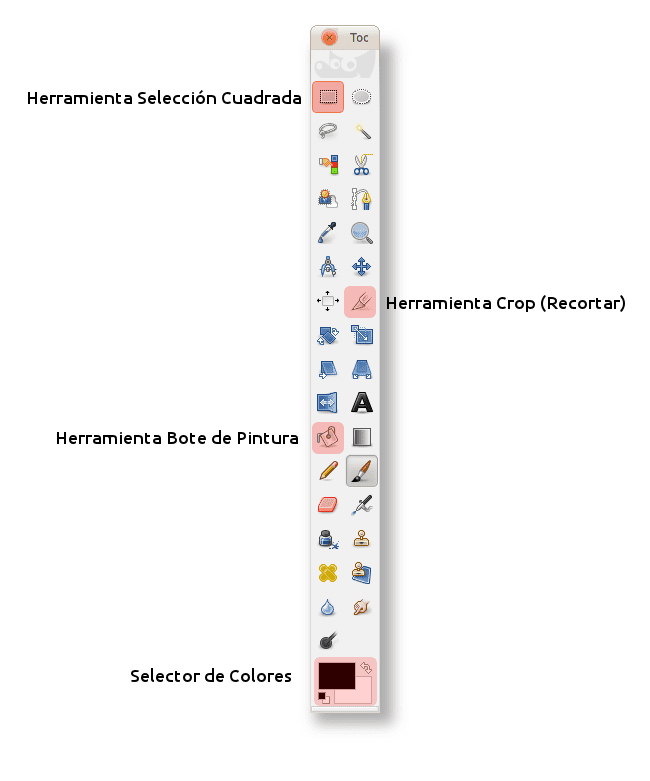
I make the shadow with Gimp, which for me has nothing to envy Photoshop, at least for the things I need. How do I do it? It is very simple. First of all, let's see the tools we will use:
1- We open Gimp » File » Open »And we look for any image.
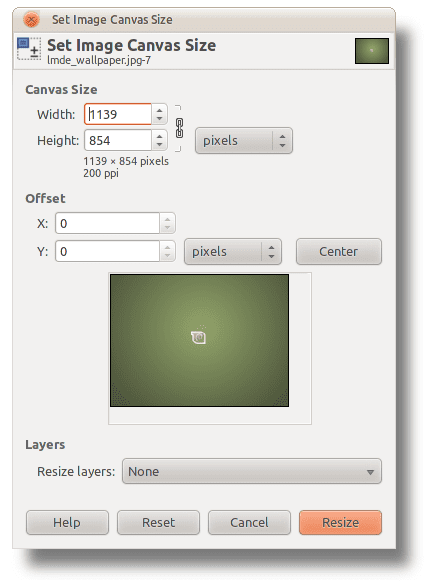
2- To give space to the shade, we will Image » Canvas Size and we increase the value of the proportion, leaving a considerable space as you can see in the image.
3- With the tool Move Tool We move the image layer a little to the center, to detach it from the upper and left edges.
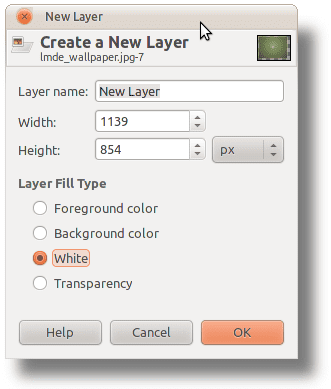
4- We create a new layer, white.
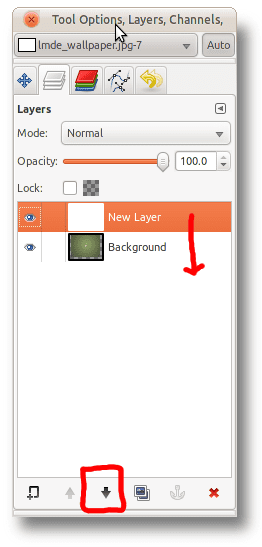
and we move it under the image layer.
5- Then we create another layer, but in this case transparent and it should be placed between the image layer, and the white layer.
![]()
6- With the tool Square Selection, we draw a box on the transparent layer, which is a few pixels outside the Image layer. We click to set the selection.

7- With the Paint pot, we apply a color (by default it is black #00000), although we can use the color selector to choose another, for example a more gray one (# 7b7b7b).

8- When you have the color we want, with the Messenger We paint the box that we marked on the transparent layer.
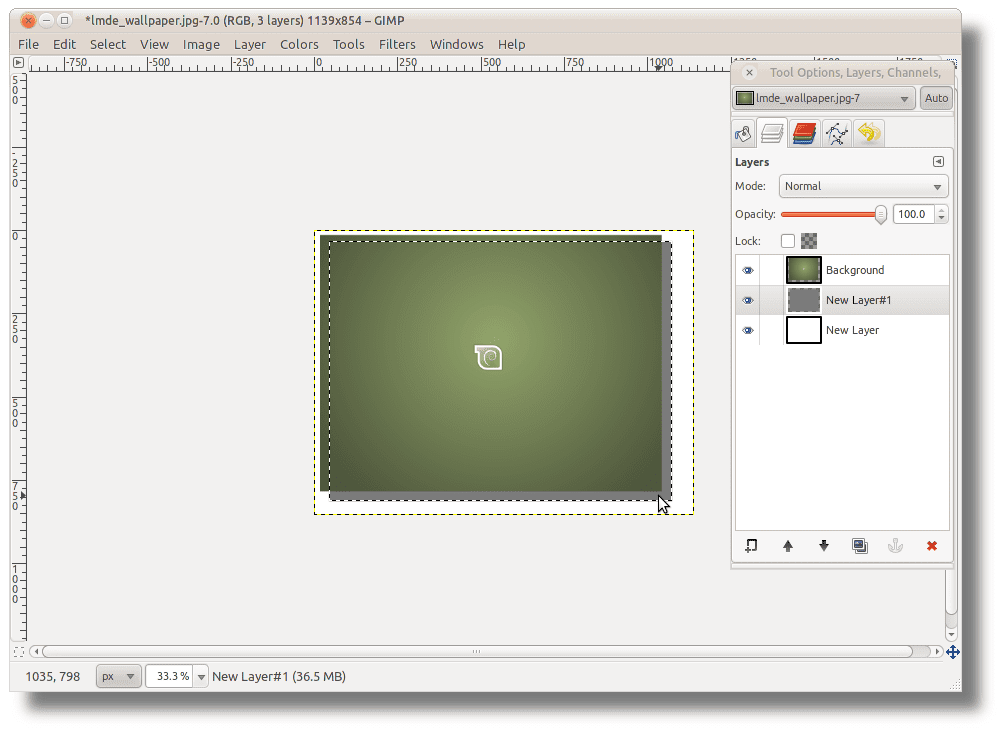
9- We use the key combination Ctrl + Shift + A to uncheck the transparent layer selection. And now comes the trick that is very simple.
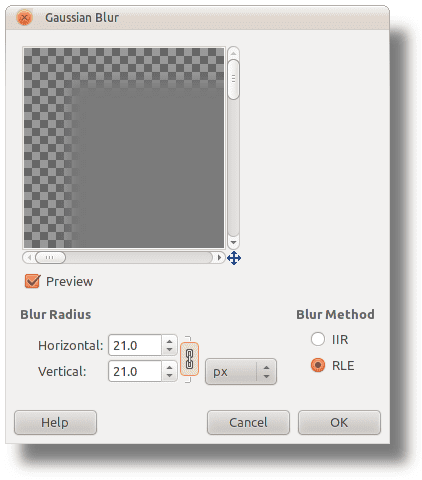
10- Let's Filters » Blur » Gaussian Blur (Gaussian Blur) and in the radio options we put as value 30.0 in both (horizontal and vertical) or more, depending on the effect you want to achieve.
11- Then with the Crop tool we select adjust the visible size of the layers.

12- To finish we save the image and if we want, we delete the white layer.
And then you complain about a certain installation hahahaha
Fuck and you got it in English
Yup, all in English, it's easier to learn that way 😀
It is easier to go to the USA, you are not that far
to the bookmarks, +1 for the post, I would like you to continue talking more about Gimp
Regards!
Thanks for this 😀
elav is the one who works with Gimp the most, he is the one who will possibly put everything or almost everything related to Gimp on the blog, so let's hope for more tutorials to learn 🙂
regards
Come on I recommend this blog if Gara and elav allow me http://tatica.org/category/gimp100podcast/
He has very good gimp tutorials.
Thanks for the information. As soon as we can (if internet access lets us) we take a look at it .. 😀
I recommend looking at this page. It helped me a lot to learn a little how to use Gimp.
Greetings.
http://www.hachemuda.com/video-tutoriales-gimp/
good port I've been trying to work with gimp for a while and I understand with him