Some time ago I told you about this series of tutorials, on how to install and configure a server for high demand hosting. This article will be about installing and configuring Nginx:
NGINX:
We already told you about Nginx earlier in the article Nginx: An interesting alternative to Apache, there we told you that it is a web server like Apache, LightHttpd or Cherokee, but compared to Apache it stands out for its performance and low hardware consumption, precisely why many large sites such as Facebook, MyOpera.com, DropBox or even WordPress .com use Nginx instead of Apache. In the world of Linux DesdeLinux It is not the only one that uses Nginx, as far as I know, emsLinux and MuyLinux also use it :)
My personal experience with Nginx dates back several years, when out of necessity I started looking for lightweight alternatives to Apache. At that time Nginx was on version 0.6 and its compatibility with high demand sites made in PHP was not the most optimal, however nowadays from version 0.9 onwards (v1.2.1 available on Debian Stable, v1.4.2 available on ArchLinux) has improved a lot, to the point that with a proper configuration and union of Nginx + PHP everything will work like a charm.
In this tutorial series I will use Nginx version 1.2.1-2.2, available in the Debian Stable repos (Wheezy).
1. Installation:
We will start with the first thing, install Nginx from our repositories.
If on your server you use a distribution such as Debian, Ubuntu or some derivative in the terminal you must put the following and press Enter :
aptitude install nginx
In case you use another distribution on your server such as CentOS, Red Hat, Fedora, simply install the package: nginx from the official repository
2. Configuration:
We already have Nginx installed, but we obviously need to configure it. I have prepared a compressed file on FTP which contains all the configurations that are used on the servers. DesdeLinux, both for PHP, Nginx, etc. Let's download and unzip that file:
cd ~ && wget http://ftp.desdelinux.net/nginx-spawn-fastcgi.tar.gz && tar xf nginx-spawn-fastcgi.tar.gz
This will create a folder called nginx-spawn-fastcgi, from it we will need two files for pure Nginx (that is, without linking it to PHP):
- nginx.conf - »Main Nginx configuration file (we will talk about its content later)
- index.html - »A simple html file that we will use to see if Nginx really works for us in its most basic form
- mywebsite.net - »Configuration file for a simple website, a VHost (Virtual Host) that will configure access to the previous html
Let's first move to the Nginx settings folder:
cd /etc/nginx/
Then let's remove its default configuration and put our own:
mv nginx.conf nginx.conf_BK && cp ~/nginx-spawn-fastcgi/nginx.conf ./
This, as I said, is the main Nginx configuration file, in it I have already defined the following:
user www-data; worker_processes 4; pid /var/run/nginx.pid;
User access to the file system (with which nginx will access everywhere), number of processes to work with and also the PID (nginx process id).
We also have there a small block called events (settings for events) that contains a line that indicates the maximum number of connections allowed per event. Below is the block called http.
This http block is the one that contains almost everything related to hosting, at least many things that will interest you. For example, the maximum time to live or wait (timeout), where will our general logs (access.log and error.log) be, data compression using gzip, as well as other rules that could be useful in the future.
Once the main configuration file is in place, let's copy the file from our VHost to the sites-available folder
cp ~/nginx-spawn-fastcgi/mywebsite.net sites-available/
In addition, we must make a symbolic link from this file to the sites-enabled folder.
ln -s /etc/nginx/sites-available/mywebsite.net /etc/nginx/sites-enabled/
I explain the usefulness of having sites-enabled and sites-available.
They will find moments when they must have several vhost files ready and configured, because in that server they will put online, say 5 sites. However, it happens that it is not yet the time to enable 2 of those 5 vhosts, but they must have the files ready so that when necessary they are online in the shortest possible time. You can put as many vhosts as you want in sites-available (sites-available), because the ones that Nginx reads to put online are only those of sites-enabled (sites-enabled), it would also work in reverse, in case you want to put offline ( temporarily for example) a site, there is no need to delete files from your server (files that we will need at another time), we simply remove the symbolic link of sites-enabled and that's it. The usefulness of having symbolic links and not simply copying the file from one folder to another, is that when we want to edit a vhost, it does not matter if we edit the one located in enabled or available, in the end it is the same
archive.
The file mywebsite.net as I had said before, a vhost that serves as an example, that is, and in other words, we must modify mywebsite.net and establish our configurations.
We must change the following:
- access_log (line 3): This will be the path of the access log file to this site
- error_log (line 4): This will be the path of the error log file to this site
- server_name (line 5): The URL, domain that is hosted in that folder, for example, if it were the forum DesdeLinux it would be: forum server_name.desdelinux.net
- root (line 6): The path to the folder where the html files are, let's leave this in / var / www / as it will only be a test
Now we just need to copy the html file to the folder that we define in our VHost file, / var / www /:
mkdir /var/www/ && cp ~/nginx-spawn-fastcgi/index.html /var/www/
Then we restart Nginx and that's it:
service nginx restart
And voila, something like this will appear:
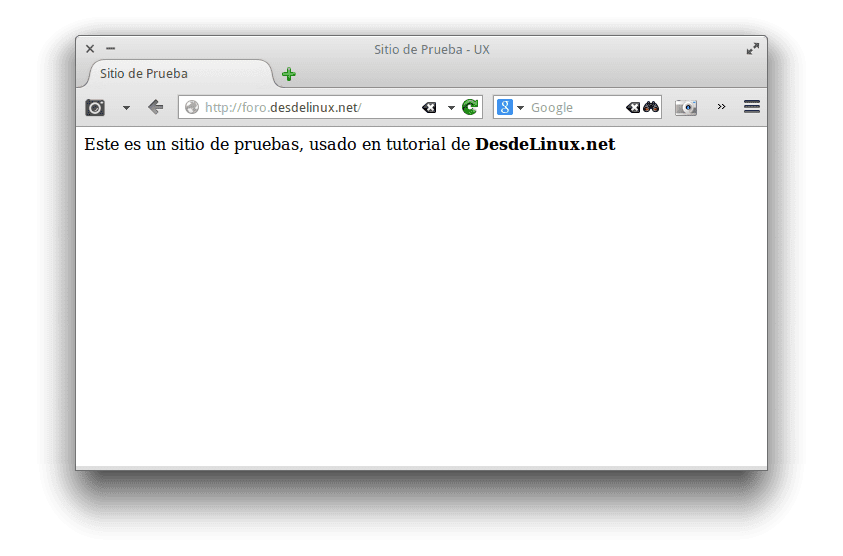
I remind you that we are working first with Nginx for HTML, without having PHP support, this install PHP and link it to Nginx will be the content of the next tutorial (in a few days, I promise).
Anyway, this is the Nginx installation and configuration tutorial so that it works pure, that is, an HTML site, I hope it will be of interest to you.
I will clarify that yes, there are still best practices that can be put to use, however let's wait to finish this series of tutorials and then we will evaluate the final result of the work 😉
regards
Thanks, very helpful!
Thank you for comment
In backports there is nginx 1.4 ..
Yes, but on a server in production I don't use any of that 😀
By "it" you mean the latest stable and tested version released by nginx, you make it sound like it's apt-pinning from sid. ~ _ ~
Ah come on, is that ... on the servers I have never liked using other repos, or backports or anything like that 🙂
Always stable on servers, I learned that years ago.
Nginx 1.4 is stable since last April, in backports it is 1.4.1-3.
2013-04-24
nginx-1.4.0 stable version has been released, incorporating many new features developed in the 1.3.x branch - support for proxying of WebSocket connections, OCSP stapling, SPDY module, gunzip filter and more.
http://nginx.org/en/CHANGES-1.4
You are right in what you say, my hat is off.
Thanks for sharing, I'm currently putting your oldest post into practice.
I'm going to fill you with questions XD
Thanks for reading 🙂
If you have any questions or concerns, you know, we are here to help, there is the forum.desdelinux.net where together we will try to give you the best solution
regards
I have a question I have LAMP [Linux (Debian Wheezy), Apache, PHP and MySQL] running on my server for WordPress and Owncloud, how do I migrate to Ngnix, another question is what difference there is between Ngnix and Lighttpd.
The biggest complication or difficulty to migrate from Apache to Nginx are the configurations of each site, that is, specifically the .htaccess you use.
The .htaccess is the most complex when switching to Nginx, since they are different configurations that you must put in the Nginx VHost.
About LightHTTPd and Nginx… I don't know, I used LightHTTPd only once many years ago, currently I have no idea how its development is going, specifically using PHP.
NGINX looks pretty straightforward compared to Apache. Waiting for the next episode to be able to complement it with PHP
I'm waiting for the tips to optimize more to nginx 😀
By the way Gaara, you can include in your next tutorial, how to implement SSL support.
Greetings.
The tips that come are actually to optimize PHP processing, site caching, I can give the example of the configuration we use in DesdeLinux for Nginx+Wordpress+W3_Total_Cache :)
Thank you good contribution.
And the guide for archlinux when? xD
In Arch it has been very similar, only the names of the packages change but ... the conf is almost identical
But who has a production server with Arch? 😀
Hi there,
It's me again xD ...
I was following your steps applying them on a machine with archlinux and I have the following problem:
[abr4xas@Genius www]$ systemctl status nginx.service

nginx.service - A high performance web server and a reverse proxy server

   Loaded: loaded (/usr/lib/systemd/system/nginx.service; enabled)

   Active: failed (Result: exit-code) since vie 2013-11-15 20:11:35 VET; 1min 13s ago

  Process: 1258 ExecStartPre=/usr/bin/nginx -t -q -g pid /run/nginx.pid; daemon on; master_process on; (code=exited, status=1/FAILURE)
Any suggestions 😀
Jo… xox, I only want an internal server, that is, I only want to replace xampp, should I do all this?
If you want you can implement this (which I repeat, it is what DL works with), in fact my virtual server (which I use for development and testing) I have it done with this same thing that I explain.
That is, you can either remove XAMPP and put this variant and it will work fine, or if you want to leave XAMPP ... it will still work for you.
The positive point of using this that I show is the very low consumption of hardware compared to Apache, but, on your personal computer, which is not a high-demand hosting, far from it ... if XAMPP works well for you, I don't see why remove it 🙂
I already have my Linux server running (Debian, Nginx, MySQL, and PHP) I had a hard time getting PHP to work with Nginx because I was used to the simple Apache Web Server.
Well my question is: Does anyone know how I can point a test domain that I have bought to my server? I would like to try my .com domain to see how it works, but I don't have the slightest idea how to do it, because I have always used a NOIP address to access it with the noip DUC.
I hope someone can help me, Thanks!
I get this when trying to connect to your ftp:
cd ~ && wget http://ftp.desdelinux.net/nginx-spawn-fastcgi.tar.gz && tar xf nginx-spawn-fastcgi.tar.gz
HTTP request sent, awaiting response… 404 Not Found
2015-11-23 17:46:30 ERROR 404: Not Found.
I have my CentOS server running (Gunicorn, Nginx, PHP) it took me a lot of work to make them work but the point where I got stuck is that the Web Page I want to launch needs the domain provider configuration in this case Go Daddy, So at this point I don't know how to continue.
Could you share the configuration files with me since I can't download them please