
MX Snapshot: How to create a personal and installable MX Linux Respin?
For many of us who are passionate about Linux world, not only is it necessary to use it, but many times we are in search of a GNU / Linux distribution ideal or looking for a way to create it, either from scratch with methods of the type LFS (Linux From Scratch) or on the basis of another large and solid distribution, such as, Debian, Ubuntu, Fedora and Arch.
Certainly this usually requires deep knowledge and using specialized software tools, which not any normal and average computer user (office / administrative) usually has. However, the MX Linux distribution, which we talk about frequently, has a useful, simple and efficient application called MX Snapshot, which allows virtually any Linux User to create their own personal, installable MX Linux Respin.
MX-19.3: MX Linux, DistroWatch number 1 has been updated
Be understood by respina bootable (live) and installable ISO image that can be used as a restore point, storage medium and / or GNU / Linux re-distributable distribution among others. Therefore, this tool is a modern and efficient substitute for old ones, such as «Remastersys y Systemback», but that only works on your Native distro, in other words, MXLinux.
In addition, MX Linux currently also includes another software tool called «MX Live USB Maker (Creador de USB Vivo MX)» whose purpose is to record the «Imagen ISO» generated from current, customized and optimized Operating System of the Usuario Linux on a «Unidad USB».
To expand all this information on MX Linux and its Tools, we invite you to click on the following link and / or read our previous following related publications:

MX Snapshot: Snapshot Tool
Previous steps and recommendations before using MX Snapshot
The steps outlined and recommended below are for a MX Linux user after install, configure, optimize and customize su MX Linux Distro to your liking, you can successfully create a respin that allows, among other things, quickly restore the same in any situation that warrants it, avoiding using the original Distro from scratch and having to start all over again. Or in case, you want share your Respin with others, for whatever reason, such as creating a Community around him.
Previous steps
- Manually delete everything unnecessary: I only left in the existing folders of the path «/ home /…», those personal or own files that I want to save and / or share with others. Remember that the fewer files are included the smaller the generated ISO will be. The same applies for applications, that is, the fewer applications included or the smaller they are, the better it will be to preserve a reasonable ISO size for downloading and use on small USB Memory Drives.
- Automatically delete all that excess: For this purpose, the use of the following MX Linux applications and other external applications is ideal: MX Cleanup (MX Cleaning) and BleachBit. Use both preferably at maximum cleaning capacity, and the latter both in your normal user mode as "root".
Recommendations
- Deactivate / disable all those unnecessary services: For this purpose, the use of the following MX Linux applications and other external applications is ideal: The native application "Session and Start" of the "Configuration Menu" for XFCE and the external application Stacer in its option "Services" . Furthermore, Stacer allows us to perform an excellent debugging of the log files (* .log) in its "System Cleanup" option.
- Save user settings and customizations: In the event that you wish to preserve and inherit part or all of what has been done in the MX Linux user created on the new users to be created in the Respin, you must place the necessary folders and files located in the path «/ home / myuser / »within the path« / etc / skel ». For example:
Folders:
- .cache
- .config
- .place
Any other that you consider necessary, for example: .conky, .fluxbox, .kde, among others.
Archives:
- .bash_history
- .bashrc
- .face
- .profile
Any other that you consider necessary, for example: .wbar, .xinitrc, .xscreensaver, among others.
How to use MX Snapshot?
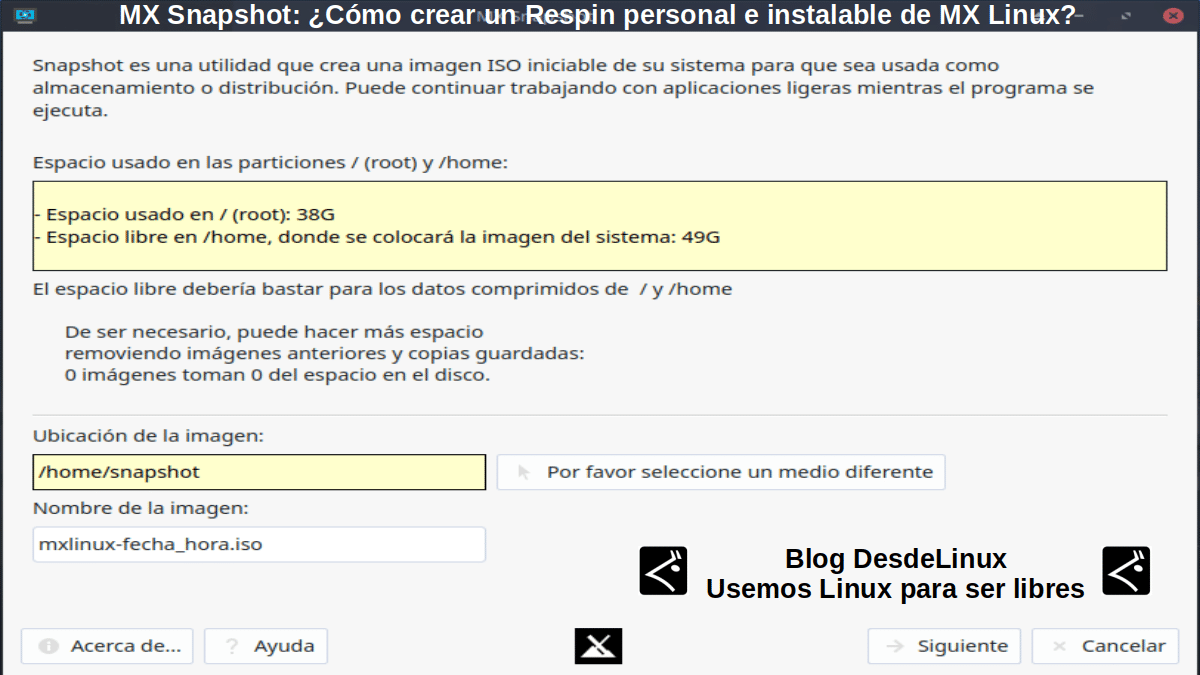
Use MX Snapshot it really is very easy. Once opened (executed), it indicates the following on its initial screen, which can be seen in the immediate upper image:
- Space in / (root): To show how much space is occupied in the entire OS to compress.
- Free space in / home: To show when free space is available on OS Home
- Image location: To show the default path and / or indicate your own, where the ISO will be created.
- Image Name: To show the default name and / or indicate your own, for the ISO to be created.
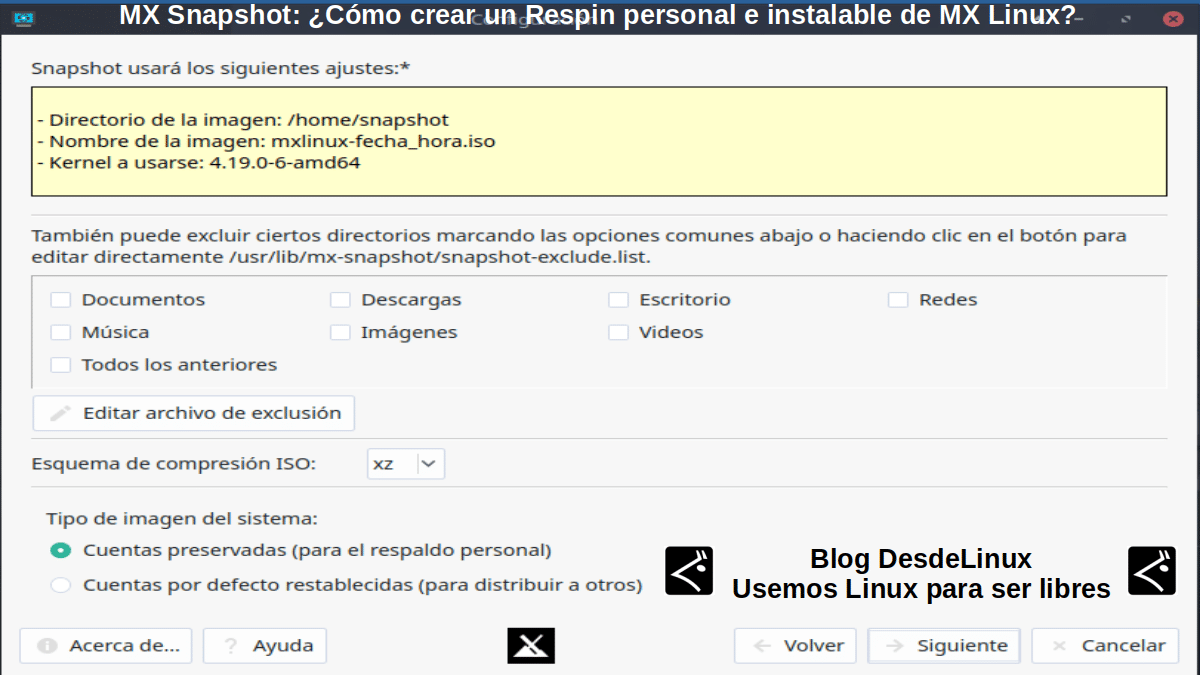
On the next screen, as can be seen in the immediate upper image, it is allowed to indicate which folders of the created user do not want to be backed up, in case the option «Accounts preserved (for personal backup). This option allows the created user to remain recorded and available in the respin both in mode «En vivo» (live) as when installing the same.
In case, the option is selected "Default accounts restored (to distribute to others)", no user account will be saved (copied) and by default, this option will reset the passwords of "Demo" y root to those included by default in MX Linux.
In addition, MX Snapshot offers the following compression schemes: lz4, lzo, gzip and xz, the latter being the most efficient when compressing the files to be inserted into the ISO.
For the rest, by pressing the «next» button the ISO will be created and we can burn it to a DVD or USB using MX Live USB Maker from MX Linux: Balena Etcher, Rosa Image Writer, Ventoy or command "dd" from any other GNU / Linux distribution, or using Rufus from Windows.
Note: In case you want edit (customize) the options of the start menu (boot) of the new Respin the file must be edited edit the mx-snapshot.conf file what is on the route "/etc" and put the option "edit_boot_menu" en "And it is". This will mean that there will always be an edit window for the file «isolinux.cfg» where we can edit them, so that when the Respin starts, for example, the new name of our custom Respin comes out, instead of, "MX Linux" which comes by default.
If you want to know more about MX Linux Respin click on the following links:
- MX Linux Forum - MX Desktop Respins (List)
- MX 19.2 Base Edition Personal Respin
- Sourceforge - Community Respins
And here, to learn more about a Unofficial MX Linux Respin called Miracles, a project that replaced a previous one called Miners based Ubuntu 18.04 using System back.

Conclusion
We hope this "useful little post" about the native tool MX Linux call «MX Snapshot», which is an excellent software utility that allows creating a personal and installable MX Linux Respin, that is, a bootable ISO image (live) that can be used as a restore point, storage medium and / or distribution; is of great interest and utility, for the entire «Comunidad de Software Libre y Código Abierto» and of great contribution to the diffusion of the wonderful, gigantic and growing ecosystem of applications of «GNU/Linux».
And for more information, always do not hesitate to visit any Online library as OpenLibra y jedit to read books (PDFs) on this topic or others knowledge areas. For now, if you liked this «publicación», don't stop sharing it with others, in your Favorite websites, channels, groups, or communities of social networks, preferably free and open as Mastodon, or secure and private like Telegram.
I mean, I can't create images of any linux distro installed on my pc?
Greetings, RocoElWuero. No, this tool is native to MX Linux, and has not been built to work on other Distros. Which, if done, would be phenomenal, due to its excellent functionality and practicality.
Hello people,
habe das mit dem Schnappschuß schon begriffen und schon einige erstellt, was auch wunderbar funktioniert hat unter mx18.3 konnte ich die ISO Datei auch prima auf eine andere Festplatte installieren ohne das es Probleme gab, —- Aber unter MX 19.3 kann ich zwar auch e Schnappschuß erstellen und erhallte dann auch eine funtionierende ISO Datei die auch startet und bis zu einem Punkt abläuft, wo mich das Installprogramm nach Loginname und Passwort fragt, was ich auch eingebe und dann erscheint ein Dollerzeichen $ ,ich dann die ich Installation geht ab diesen Punkt nicht weiter… aber wie gesagt nur bei mx19.3 bei
mx 18.3 lauft alles bis zum Destoppbildschirm weiter dann erscheint das Install brogramm und ich kann es auf Festplatte installieren - bei mx 19.3 geht das nicht hat nicht einmal geklappt was soll ich da beim Dollerzeichen eingeben ??? Bitte helft mir ich find MX Linux einfach toll. Danke
Grüße, Ronald. Ich habe is nicht ganz verstanden. Ich habe jedoch mein eigenes Respin (live und installierbarer Snapshot) von MX Linux 19.3, genannt MilagrOS, und es funktioniert ohne Probleme. Ich weiß nicht genau, was Ihr Problem ist, aber ich kann mir vorstellen, dass, wenn Ihr Respin Sie irgendwann nach einem Kennwort fragt, es das Standardkennwort sein sollte, in MX Linux, das, glaube ich, «demo» oder «root» ist, andernfalls sollte es das sein, das Sie dem Benutzer zugewiesen haben, der vor dem Respin angelegt wurde. Ich weiß nicht, ob is nützlich sein wird, aber dies ist die URL meines Respins, falls Sie is erforschen und sehen möchten, wie is nützlich sein kann: https://proyectotictac.com/distros/
Greetings, Ronald. I did not understand very well. However, I have my own respin (live and installable snapshot) of MX Linux 19.3, called MilagrOS and it works for me without any problem. I would not know exactly what the problem is, but I imagine that if at some point your respin asks you for a password, then this should be the one that comes by default, in MX Linux, which I think is "demo" or "root" , if not, it should be the one you assigned to the user created before respin. I don't know if it will be useful to you, but this is the url of my respin in case you want to explore it and see how it can be useful: https://proyectotictac.com/distros/