As promised, here is the tutorial for using this open source journal and blog tool for Linux.
Display
To start, it must be made clear that there are two types of view in RedNotebook:
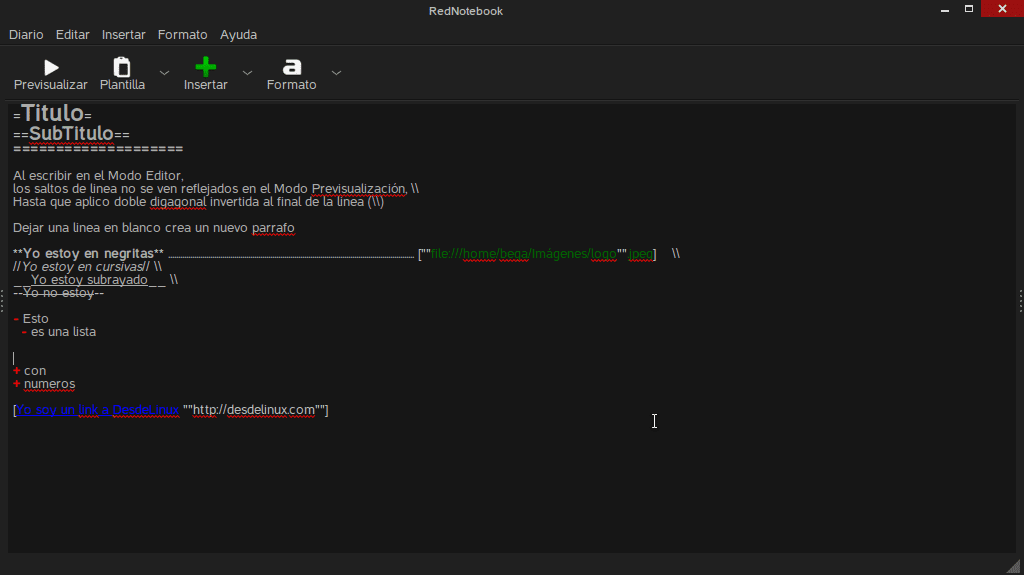
"Edit" mode: In this mode the entries are created. They are written in plain text, that is, most of what you write here will not have any type of format. (See image below)
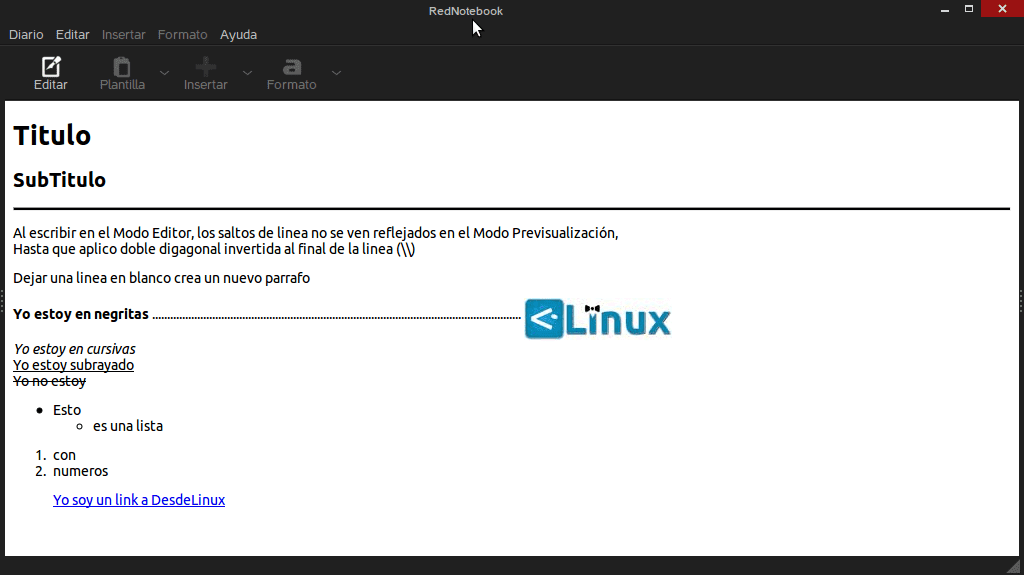
"Preview" mode: I like to call it "Reading Mode" because this is where we access what we have written, but already in the format that we assign to it through certain symbols used in Edit Mode. (See main image)
We can interleave between the Edit and Preview view through the menu button, or through the command Ctrl + P
Format
Here comes the interesting thing and that it may scare away some users due to its "difficulty", but I advise you not to give up, it is easy when you get used to it.
To follow the tutorial you can see the two example images, which correspond to each other, the first is the final result, the second is the text in editor mode.
To assign the format, enter the editor mode. When creating a text you will notice (especially if it is long) that when you go to screen mode the text appears completely lacking in form, without line breaks or paragraphs. So when creating a journal entry, keep the following tips in mind.
New Line and Paragraphs
As you will realize, making a line break in your text in Editor Mode, it is not reflected in the result in Preview Mode. To achieve this at the end of each line you have to add "\\" and continue on the next immediate line.
To create a new paragraph, it is necessary to leave a blank line.
To add a separator line add twenty equal signs consecutively (====================)
Title.
For insert a title you have two options. One is to go to the Insert / Title menu. The other option is to do it manually, by adding the equal sign (=) at the beginning and end of the line that you want to assign as a title.
The real advantage of doing it manually is that you can assign the title level, that is, create titles, subtitles, subtitles, etc. Since if you add in two equal signs (==) you create a subtitle, with three signs (===) a sub-subtitle and so on substantively (as El Chavo del 8 said).
Bold, Italic, Underline and Strikethrough
To achieve this again, you have the option of graphics or by means of symbols.
To put the text in bold fontFor example, use a double asterisk (**) before and after the word or line you want to highlight. Similarly to assign Italics use double diagonal (//), to underline double underscore (__) and for cross out double dash (-).
Create Lists
To create lists you have again the graphic option in the menu Insert / Bullet List. In this case, the advantage of manual mode is that you can determine if your list uses bullet points or numbering.
La bullet point is assigned by putting a dash (-) before the line, while the numeration is assigned with the plus sign (+).
To create levels in lists (only with bullets), you must leave two spaces before the hyphen to create a second-level element, four spaces for a third-level element, etc.
Tags
Labels are assigned with the sign of the pound (#). In the last post, something was commented on the difficulties generated by the fact that only one note per day could be created. I personally have coped with this situation using labels. For example, if a subject or note is related to my work, I use the hashtag #Dispatch. So I only have to use the search bar to find the Dispatch label and if the note was on a special subject I also use the label of that subject. Adding to this that the notes are annotated per day, practically "I have it well done."
Insert Links and Images.
RedNotebook also allows you to add images to your posts, or links to local files or internet pages. To make use of these functions I fully recommend the graphical mode of the Insert menu. It is extremely simple and the result is formidable.
My tutorial on using RedNotebook ends here. There are some other advanced options that I will probably talk about another time.
May you continue to have an excellent weekend.
I have seen pastes with this type of format.
I see a lot of difficulty for a logbook or a diary.
I don't understand the concept.
What advantages does it have compared to a Libyan word processor such as AbiWord?
Mainly, that it has a calendar and a search engine among other qualities. I recommend the first part of the article.
Regards and thanks for commenting.
I apologize if you disturbed the comment, you were completely unaware of the program.
A greeting and thanks for the information.
Very good, another tip, if in the first line we leave indentation with tab it gives a nice effect to the paragraph that can be used to make lists or something like that.
Reminds me of LaTeX
Is there any possibility to prevent the program from crossing out words or phrases enclosed in double hyphens? I use the double dash a lot because Libreoffice automatically changes it to the long dash and I don't want to cross out words. On the other hand, I do not underline or use bold and almost never italic. Is there a way to remove those options that are applied automatically?