At Lóleo Eventos, Part of this series of articles on Scribus I mentioned the basic characteristics of a book layout project. The dimension of the text by centimeters, the orientation of the page, as well as the approach of the cover were indicated.
In this installment we will see the design of the cover.
Editing the cover with Scribus
Previously we saw that for the cover you have to have at least a basic idea of its structure. We already know the data: the title, the author, the edition number and the publishing label. The order, arrangement and design of this data depend on the inventiveness of the designers and / or editors. There are books in which the edition number is not present until the legal part of the book, it all depends on the editorial criteria.
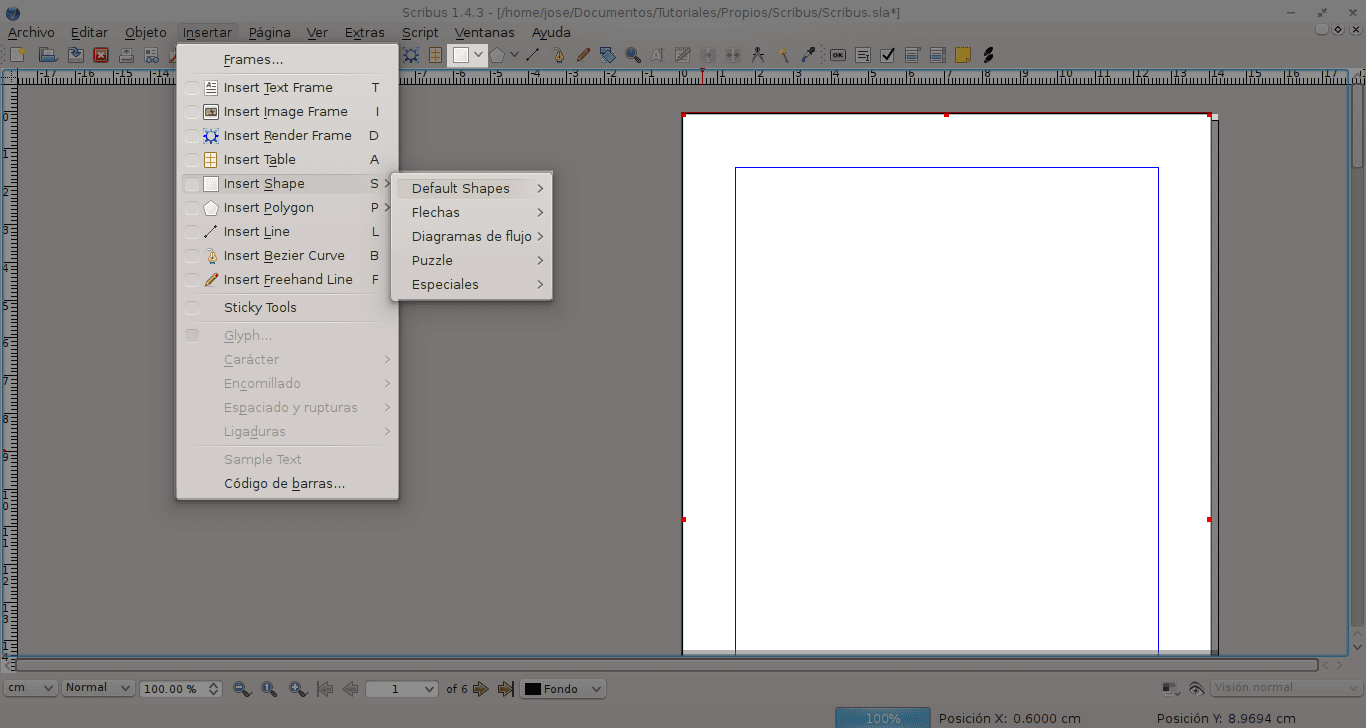
In my case, I like covers whose background is black. To achieve this, we need the "Insert shape" tool that is located at the top. Another way to insert it is by pressing the "Insert" menu and then "Insert shape" ("Insert shape" if it is in English). Once we have the tool selected, we unwrap the object on the first page.
We have already placed the object on the first page. What is missing now is to give it its color properties. To do this we right click on the object, and click on «Properties» where the characteristics of the selected object will be shown.

From this popup window of Scribus we can edit the parameters in the way we have placed. If we have wrongly inserted the object on the page, by editing the position (in "x" and in "y") by centimeters we can adjust it according to our needs. From there we can also configure the size, rotation and base point.
If we stand in the submenu "Form" we will see precisely these characteristics of the object. At the moment those options are not of our importance. The «submenu» that interests us is «Colors». From there we can select the color of our choice for the background of the object, its opacity and gradient mode. For this example I will only select the black background color with 100 percent opacity.
Once we have the color of our choice in the object, we close the window and we will see the modifications we have made.
On my cover, in addition to text for the title and author, I will insert an image alluding to the content of the project. In this example we select two stories by Alejo Carpentier, so I will select an image of the author and place it.
Image insertion into Scribus
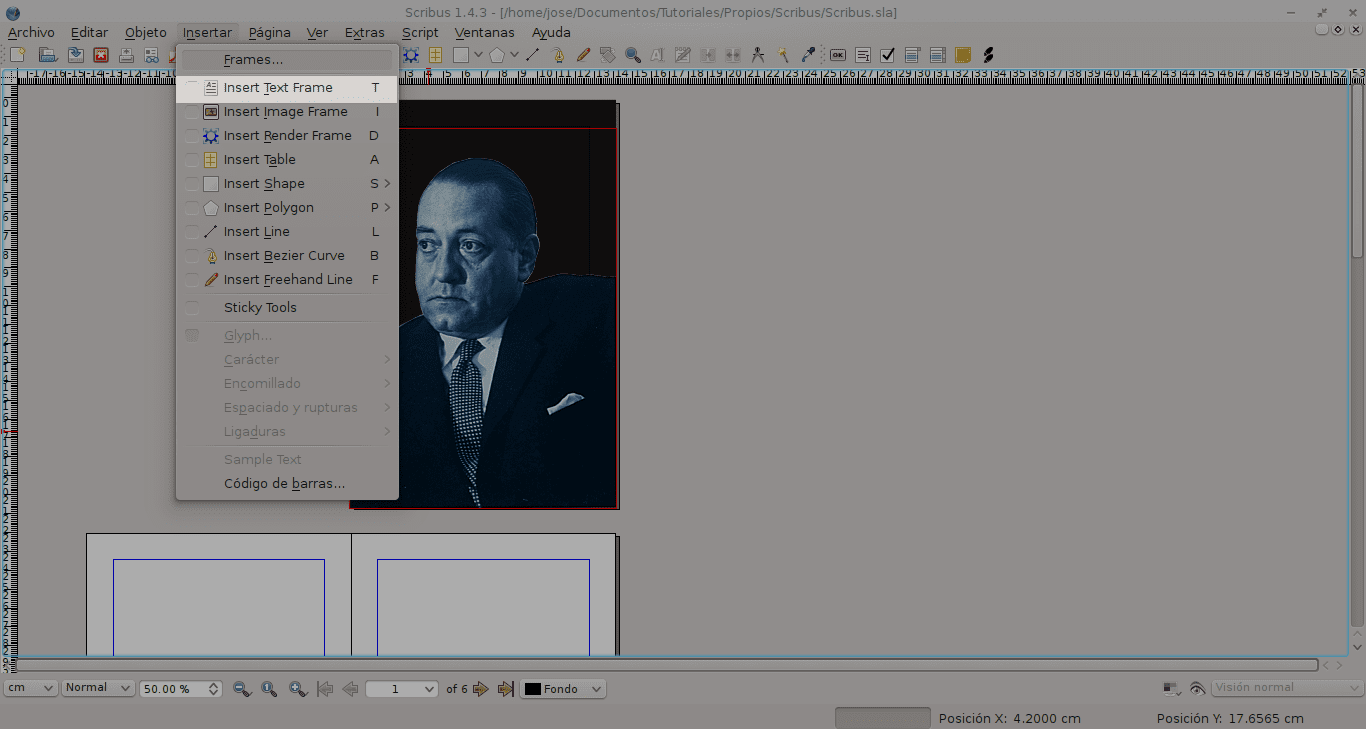
To insert an image, all we have to do is select the box at the top of the window, «Insert image» or from the «Insert» menu under «Insert image form».
Once the tool is selected, the cursor will be shown with an "x" and a small image box, which indicates that we have to select the part where the image will be inserted. I want it on the entire cover, so I will proceed to select the complete page.
If we want the image to look good we will have to look for one with a good resolution.
We double click on the newly created box and from there we go to the directory that contains the image. To edit the image we can use other tools such as Gimp o Chalk.
Once the image is selected, we will see that if it is larger than the frame, it is incomplete. This is because the image has a higher resolution than the text frame. Scribus automatically shows in the box that we have made the proportional part of the image that fits in the object.
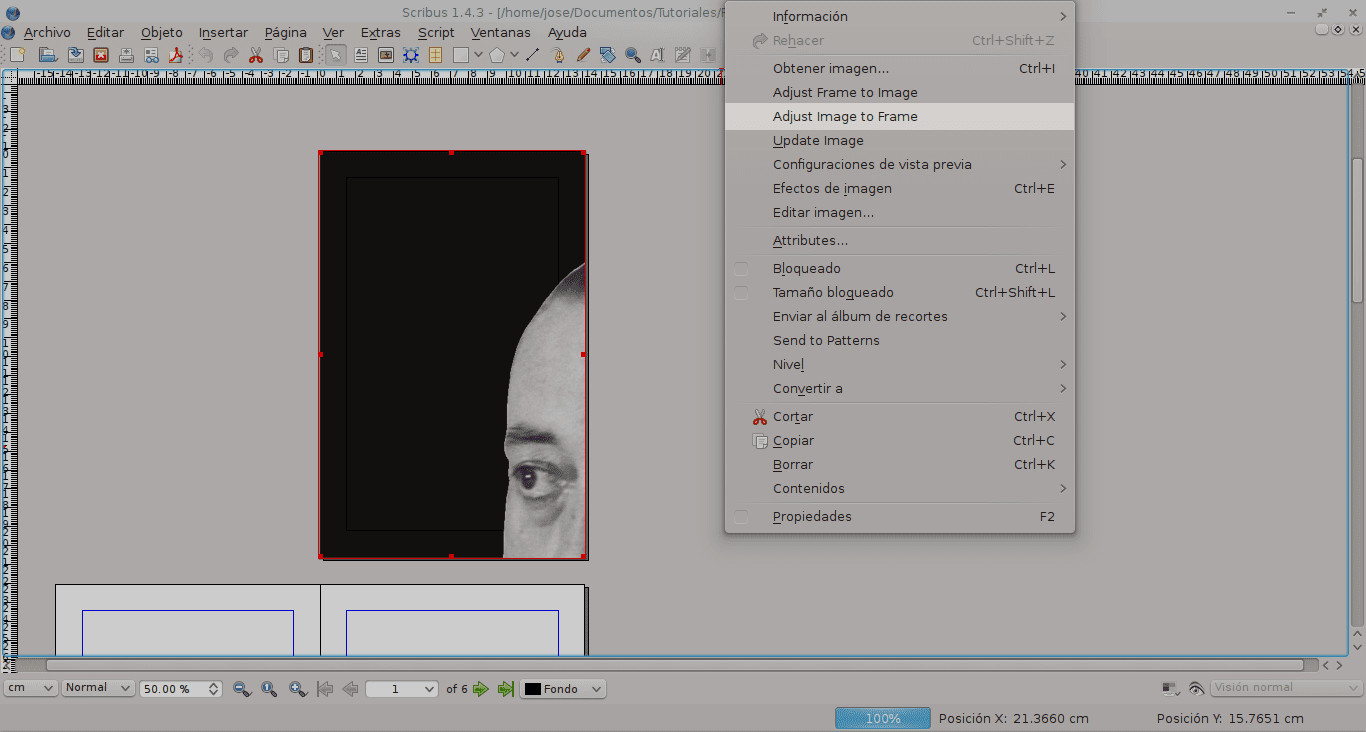
The aspect ratio of the image can be easily changed. We right click and then click on the option "Adjust image to shape" so that the image is placed proportionally in the frame.
To avoid problems with the frames moving or deleting one by accident, we can block it by right clicking and selecting "Blocked". This option makes it impossible to edit the size of the image and move the object.
Add effects to image in Scribus

Scribus It is not an image manipulation program, however it provides some basic tools for retouching them. If we right click on our image and "Image Effects" a window will appear that shows us the different effect options that the program allows us.
To select an effect we will have to select it and then click on the arrow icon to place them in "Effects in use". If we want to remove the effect we carry out the opposite operation.
At the bottom left there is a box, «Options», in which we can modify certain parameters of the objects.
We modify the effects and their parameters and once we have finished we click «OK».
Insert text into Scribus
Text insertion is nothing to write home about. If you have used an image design tool beforehand you will be familiar with it. Likewise, Scribus provides us with a text insertion tool. We go to the top and select the option to insert text. We can also access the tool through the menu «Insert» «Text form».
The cursor will appear in such a way that, as with the insertion of the text and the object (black background of the page), we select the space where our text will go.
We make the object where we are interested and edit. In this case, I will title the book with the name of Alejo Carpentier's short stories and the author's name at the bottom.
Once the box is done we write. If our background is black, the letters will not be noticeable since they share the color. To edit the content, font type, size, color and effects, open the "Properties" dialog by right clicking on the object.
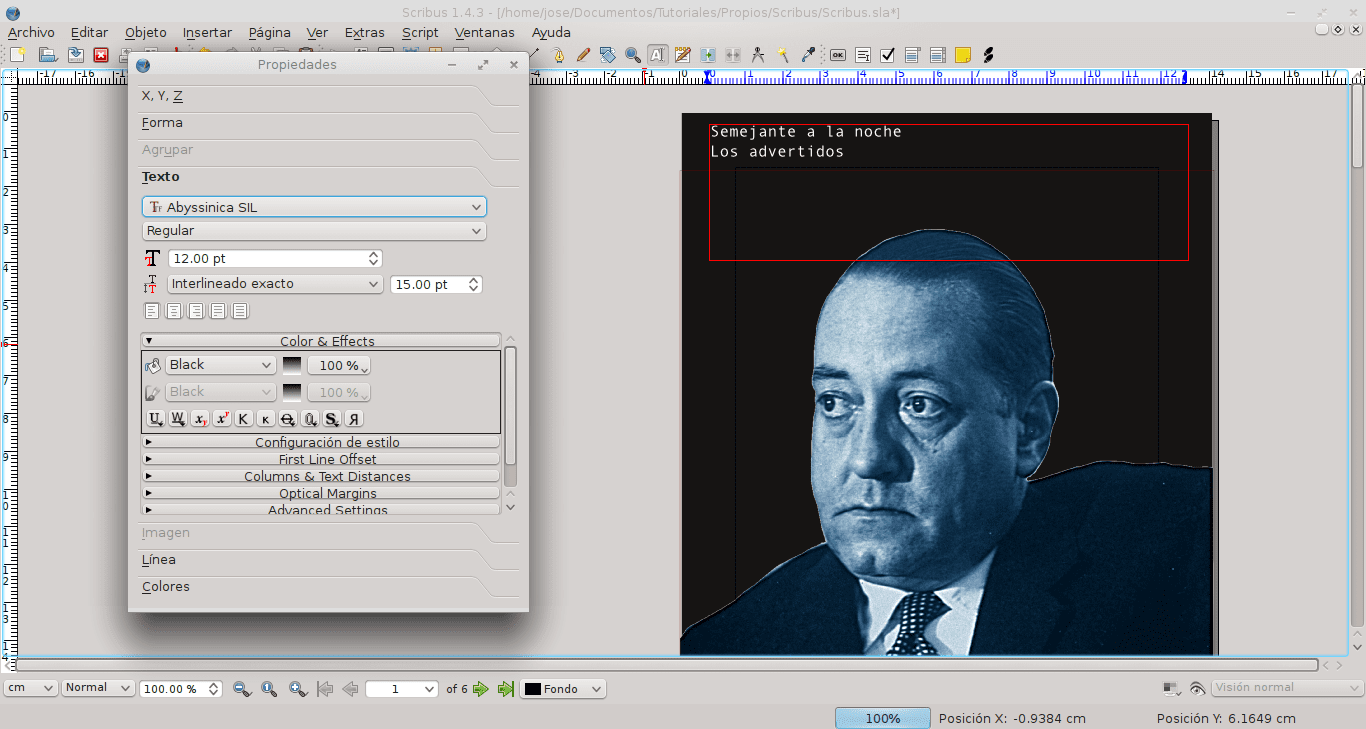
We go to the «submenu» «Text». From there we can edit the font, color, effects, size, line spacing and other parameters. We edit the information at our discretion and make the corresponding modifications. The same procedure applies to the author.

At the moment my project is going like this. How about yours?
Excellent work. Thanks for sharing knowledge.
Excellent tutorial. On several occasions I have wanted to get involved in Scribus but I never finish anything 😛
It is very intuitive. You can quickly see the options for editing the objects. After finishing this series I will write how to do other things with Scribus 🙂
In my case, I see this tool more comfortable than Adobe InDesign, since it does not load as many components as InDesign or anything like that.
In truth, its resemblance to Adobe's book layout is simply abysmal.
InDesign is a good tool, no doubt about that, but it is true that it is too heavy. Scribus is an excellent open source alternative and, in addition, it has nothing to envy its Adobe counterpart. Very good jobs can be done too. It all depends on who uses it, of course.
Very well. Now, with this, you have convinced me to use it as a great replacement for InDesign.
To position the graphics on the layout sheet, just a "drag'n'drop" is enough. It is much faster. Excellent tutorial, thanks a thousand @ jose-rod
Thanks for the tip. It never occurred to me to do it in such a way.
Greetings.
No, on the contrary; thanks a thousand to you for the tutorial. I do not usually use Scribus for layout for many reasons - which I will not discuss here, as it is not the point or the place - however it is a very good alternative to CC Adobe InDesing.
There is so little information about this program that your guide is becoming a reference for me 🙂 Thank you very much!
I will stay tuned.
Very good manual. Everything clear and concise. I like very much.
Thank you.
Good guide, I was working in LibreOffice and exporting in PDF, but it looks like I'm going to get a finer finish with Scribus. Thank you!
Excellent article. My doubts: I want to lay out in a professional way, and my problem is in relation to the front and back covers. Can you do front and back covers with Scribus? I mean, create a document of the size in which you want to create the book and in which in a single file the back cover appears on the left side and the front cover on the right, the back cover bearing the ISBN ... and also ask if with Scribus you can you can create your own ISBN.
Thanks for everything.
A greeting.
Greetings.
Creating front and back covers can be done with Scribus. You simply have to set the document size values. The size depends on the type of document. For example, the size, the spine, if it has flaps, etc. Regarding the ISBN, that has to be processed in another place, which is where the alphanumeric value is assigned, depending on the subject of the book. The ISBN is entered by you in the book once you have it and it is located in the legal part of the book.
Hello, good afternoon.
I would like to ask you how I could incorporate mathematical formulas into scribus. I have written a math text, but I would like to use scribus to be able to do a layout, but I cannot incorporate the mathematical formulas.
(or I haven't found the tool)