Last Friday a reader commented that it would be interesting to create a post about how to format a USB and create a bootable USB by the command dd So in this post I will deal with those issues 🙂
Management of units through the terminal.
Fdisk
The first command required is fdisk, this allows manipulating and / or displaying the partition table of any unit, and its use is as simple as its definition ...
# fdisk -l
Displays the list of drives and their partition table

# fdisk /dev/sdx #sdx es un ejemplo
Enter the interactive partition manipulation menu.
mount / umount
When I started years ago in GNU / Linux I asked myself, Will it be possible to mount a USB by the terminal? My instincts told me yes, but ... How? Little by little I began to use the console more and suddenly the answer came alone with mount y umount.
To mount a USB from the terminal we need to create a mount directory, by tradition it will be in / mnt hahaha
# mkdir /mnt/USB
In this directory all the data from the USB will be mounted. Now we connect the USB, the kernel does all the magic by detecting the driver, and telling the system that the device is ready to be used, we can see this with:
$ dmesg | tail
It will show the last 10 lines that the kernel buffer does but for us it will be imperceptible until we use Fdisk to see that it detects a new unit and shows us information about it; suppose the USB is / Dev / sdb and we want to get the information out of it. To mount it enough

# mount /dev/sdb /mnt/USB
Now when going to the directory / mnt / USB we will find that it has all the information of the USB and it is possible
It is possible to create a bootable USB
# dd if=~/imagen.iso of=/dev/sdb
And it only remains to wait until the terminal cursor reappears.
It is possible to make a copy from unit to unit
# dd if=/dev/sdx1 of=/dev/sdx2 bs=4096
Delete data from entire drive
# dd if=/dev/null of=/dev/sdx
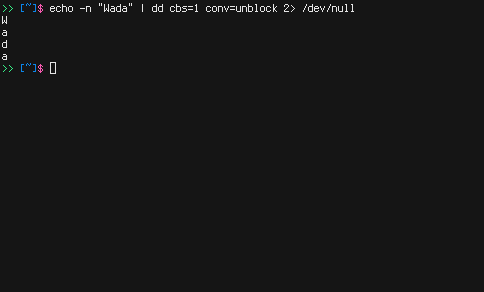
Make a horizontal text
$ echo -n "Wada" | bb cbs=1 conv=unblock 2> /dev/null
Convert text to lowercase
$ echo "wada" | bb conv=ucase 2> /dev/null
Among others.
Well people is everything for today this is the basics that you should know about managing file systems and drives 🙂 We read each other, until next Friday.
I don't know why but I was never able to prepare a liveusb with the dd command using an iso. If I could with a .usb image. Will have to try again.
Good post.
Greetings.
This has also happened to me on some rare occasions, especially with CDs from old distros (Ubuntu 6.04, Fedora 8), I think it is mainly due to the structure of the iso data and how they are recorded in the USB using the dd command. Of the rest, dd has worked wonders for me with ISOs like Arch, Debian, Slackware or Gentoo.
It is convenient to make a post about partition, how to partition and issues related to the installation of distros. When the partition can be resized and when not.
Thank you for your comment 😀 I have thought about it since Friday, but I think it is out of the concept. As if when I have time I put together a normal post on this topic :).
Good tutorial, following as the author says ... it will give the same result to all? At least to me from the command dmesg | tail, gives another result and the USB device appears to be write-protected; It is mounted read-only, so it says in the terminal and I can't go on.
@demo, the dmesg | tail will be different for everyone, we don't all have the same hardware, kernel and distro. As for your write-protected USB drive, that's kind of weird, usually when I've seen that, it's because USB drives have a little physical button for that, or they have corrupted firmware.
I get this:
# fdisk -l
Disk / dev / sda: 100.0 GB, 100030242816 bytes
255 heads, 63 sectors / track, 12161 cylinders, 195371568 XNUMX XNUMX sectors in total
Units = 1 * 512 sectors = 512 bytes
Sector size (logical / physical): 512 bytes / 512 bytes
I / O size (minimum / optimal): 512 bytes / 512 bytes
Disk ID: 0x0008451b
Device Start Start End Blocks Id System
/ dev / sda1 * 2048 191197183 95597568 83 Linux
/ dev / sda2 191199230 195371007 2085889 5 Extended
/ dev / sda5 191199232 195371007 2085888 82 Linux swap / Solaris
Disk / dev / sdb: 7862 MB, 7862353920 bytes
242 heads, 62 sectors / track, 1023 cylinders, 15356160 XNUMX XNUMX sectors in total
Units = 1 * 512 sectors = 512 bytes
Sector size (logical / physical): 512 bytes / 512 bytes
I / O size (minimum / optimal): 512 bytes / 512 bytes
Disk ID: 0x00000000
Disk / dev / sdb does not contain a valid partition table
#
With the command sudo fdisk -l / dev / sda, give this:
$ sudo fdisk -l / dev / sda
Disk / dev / sda: 100.0 GB, 100030242816 bytes
255 heads, 63 sectors / track, 12161 cylinders, 195371568 XNUMX XNUMX sectors in total
Units = 1 * 512 sectors = 512 bytes
Sector size (logical / physical): 512 bytes / 512 bytes
I / O size (minimum / optimal): 512 bytes / 512 bytes
Disk ID: 0x0008451b
Device Start Start End Blocks Id System
/ dev / sda1 * 2048 191197183 95597568 83 Linux
/ dev / sda2 191199230 195371007 2085889 5 Extended
/ dev / sda5 191199232 195371007 2085888 82 Linux swap / Solaris
$
After creating the folder to mount the USB and executing the command dmesg | tail, it outputs this:
$dmesg | tail
[340.659042] sd 3: 0: 0: 0: [sdb] No Caching mode page found
[340.659051] sd 3: 0: 0: 0: [sdb] Assuming drive cache: write through
[340.665044] sd 3: 0: 0: 0: [sdb] No Caching mode page found
[340.665056] sd 3: 0: 0: 0: [sdb] Assuming drive cache: write through
[340.686186] sdb: unknown partition table
[340.688919] sd 3: 0: 0: 0: [sdb] No Caching mode page found
[340.688929] sd 3: 0: 0: 0: [sdb] Assuming drive cache: write through
[340.688937] sd 3: 0: 0: 0: [sdb] Attached SCSI removable disk
[340.936773] ISO 9660 Extensions: Microsoft Joliet Level 3
[340.938020] ISO 9660 Extensions: RRIP_1991A
$
That is where I get lost and cannot continue with the other commands, example:
# mount / dev / sdb / mnt / USB
mount: block device / dev / sdb is write protected; mounts read-only
And this other command:
# dd if = ~ / image.iso of = / dev / sdb
dd: Cannot open "/root/imagen.iso": File or directory does not exist
#
@demo Are you setting the .iso image address right? According to the message you placed, the image is in "/root/imagen.iso", which is curious. It also strikes me that the file is called "imagen.iso".
If you want to make the device bootable you have to put the address and the name of the file. Let's say you are in "Downloads" and the file is called "Fedora20.iso". Then you would have to type it like this:
dd if = / home / user / Downloads / Fedora20.iso of = / dev / sdb
How about José R.
If you fixed what the author exposes, it does not coincide with the result that the terminal shows despite following its instructions step by step, in the command dmesg | tail, gives another result, and from there on, other results begin, that the USB is write-protected, and below that the file or directory does not exist. In some USB, despite recording the iso DVD image on a USB memory with some program - it cannot bounce off the PC's bios even though the bios is programmed for the USB to start first.
@demo What happens is that the author of the article puts the commands, but the user has to modify them according to their needs. For example, from the first "fdisk" command the result will be different because possibly you have a different name assigned to your partitions or hard drives than the author. This command is for you to see which is the one of your usb memory and, from that, enter the other data.
The next commands you put in are "mount" and "umount". In creating the folder with "mkdir" I suppose you did not have a problem. Perhaps the problem was when mounting it because perhaps they do not have the same designation of the units. There you would have to find what it is and write it. The author says that it is "sdx" as an example, but on your usb memory it could be "sda1", "sda2", etc.
The command «dmesg | tail »will not come out the same as the author, since as only the last ten lines indicate that the kernel buffer does, and that varies on all computers, since they have different activities. This command is just to verify that the system has detected the memory. In fact, you can skip the mounting step: almost all distros mount automatically.
From then on you have to follow the same instructions with the respective modifications to the commands, modifications that have to do with your devices and with your .iso image.
Greetings.
@ José R. You understood the concept perfectly 😀 thanks for stopping by.
@demo You will never get the same as me, because we have different hardware, different software, different configurations… The intention is to point out the place, not to tell you which way to go.
About dmesg | tail will only show kernel messages; In fact it is not necessary this step to mount a USB is there so that the new ones know where all the kernel messages are shown from.
Good Tutorial!
I join the tutorial request on partitions since it happened to me that there WAS NO CASE with the dd and I think it comes from the side of the partitioning of the unit.
It is not clear to me, when the of is to sdb (drive) or to sdb1 (partition)
Greetings and excellent Friday!
edureg
When you use sdb without specifying partition you use the whole unit, so if you have 8 GB memory and you put a 4 GB image on it, the other 4 are unusable (not permanently).
Thanks for the reply!
On Saturday I wanted to put "puppy linux" in a usb with dd and there was no case ... I had to raise it in a virtualbox vm and from there go to the option "install in usb" (or something similar), and there it went without problems .
It's weird ... it doesn't happen with ALL iso, as I said before, taking one from Win 8, I was able to build the installer from USB.
Regards!
I love "Terminal Friday"
The only bad thing about dd is that it doesn't have a percentage bar or something like that.
But you can try something like this that I saw it somewhere and write it down so as not to lose it. (At least on Debian Distros it works)
pgrep -l '^dd'watch -n 10 kill -USR1 11132or by installing the "pv" command
pv -tpreb /dev/sda | dd of=/dev/sdb bs=4096 conv=notrunc,noerror(pv -n /dev/sda | dd of=/dev/sdb bs=128M conv=notrunc,noerror) 2>&1 | dialog --gauge "Running dd command (cloning), please wait..." 10 70 0Surely there are more combinations, but hey I'll leave you the one I had in case it works for someone.
regards
I'm a Gil, I just saw:
https://blog.desdelinux.net/tip-comando-dd-con-barra-de-progreso/
That everything was necessary and better explained, but since I don't know or can't delete the comment, I'll clarify it here. In any case, whoever can erase them.
Thank you for your comment, I am flattered that you love my post 😀 you are right because it is a very silent command, thank you very much for the recommendation. 🙂
I have used it several times to create bootable USB, and it was really useful to install Arch on my notebook with a broken DVD reader 😀
Hahaha it's really helpful 😀 there was a time when I had about 50 CD's with different ditres until I met dd 🙂 although I still use it, I have an old pc (2005) that doesn't support USB-boot: D.
Quite an offtopic question with which I hope I don't bother anyone ... Does anyone know the name of that source in the terminal images? Thank you…
Who better than me to answer this 🙂 The font is Terminus. Thanks for stopping by 🙂
Thank you very much for the reply! I'm already looking for it! 🙂
I always read most of the blog posts since in general they are all very interesting. Keep in that way!
Another offtopic question that makes me curious, why when I comment it appears that it is from GNU / Linux but some others appear from exactly which distribution?
Some dd examples use a bb command by mistake. Apparently bb exists but it is for something else, I suggest to install it. With dd it works fine
You're right sorry it was user error hahaha it's dd no bb I'm screwed; Can some editor please correct that horror?
What is there to correct? Wada, it would be nice if you join us on Trello (if you're not already joined) .. 😉
The last two tags code instead of "dd" use "bb" hahaha and of course I'll be there in a while I'll register 🙂
I have never been able to insert a usb with # mount mnt / USB, it has always played with # sudo mount / dev / sdb1 and I have to enter usr / share / media / devicename: /
Writer: Do you happen to know if there are office automation for command line that works to open .odt, and / or .docx texts?
Do you know if FBCMD already works to enter facebook, I have tried everything and I could not (with version 3.0, 1.0 if it works but it can no longer be installed), now the more I have managed to enter the fb chat through finch .
How strange your case, what distro do you use?
The truth is that I do not know anything similar to since the odt is text with format and in the terminal, it would be difficult for editing and / or reading although there are applications that emulate a text editor, but for that we have Vim 😀
Regarding your third question, I can tell you that I don't use Facebook 🙁 so I don't know it completely.