
Ubuntu 14.10 Utopic Unicorn saw the light a couple of days ago. As we do with each release of this popular distro, here are some things you should do after making a installation from scratch.
1. Run the Update Manager
It is likely that after the launch of Utopic Unicorn, new updates have appeared for the different packages that the ISO image distributed by Canonical comes with.
For this reason, after finishing the installation it is always recommended to run the Update Manager. You can do it by searching for it in Dash or by executing the following from a terminal:
sudo apt update sudo apt upgrade
2. Install Spanish Language
In the Dash I wrote language support and from there you will be able to add the language you prefer.
Dictionary in Spanish for LibreOffice / OpenOffice
In case you do not have the spell checker in Spanish, it is possible to add it by hand as follows:
1. Go to the LibreOffice extension center
2. Search the Spanish dictionaries
3. Download the dictionary of your preference (general or specific to your country)
With this we will have an OXT file. If not, you have to change the extension of the downloaded file.
4. Open LibreOffice / OpenOffice, select Tools> Extensions and click Add, we go to the directory where the downloaded file is located and we install it.

To see a complete guide explaining how to install the Spanish spelling and grammar checker in LibreOffice / OpenOffice, I suggest reading this old article. We have also prepared a guide to install the Spanish spell checker in Firefox / Chromium.
3. Install codecs, Flash, additional fonts, drivers, etc.
Due to legal issues, Ubuntu cannot include by default a series of packages that, on the other hand, are very necessary for any user: codecs to play MP3, WMV or encrypted DVDs, additional sources (widely used in Windows), Flash, drivers owners (to make better use of 3D functions or Wi-Fi), etc.
Fortunately, the Ubuntu installer allows you to install all of this from scratch. You just have to enable that option in one of the installer screens.
In case you haven't already done so, you can install them as follows:
Video card driver
Ubuntu should automatically detect and alert you to the availability of 3D drivers. In that case, you will see an icon for a video card on the top panel. Click on that icon and follow the instructions. It is also possible to install the proprietary drivers from the Dash> Additional Drivers.
Proprietary codecs and formats
If you are one of those who cannot live without listening to MP3, M4A and other proprietary formats, as well as you could not survive in this cruel world without being able to play your videos in MP4, WMV and other proprietary formats, there is a very simple solution. You just have to click on the button below:
or write in a terminal:
sudo apt install ubuntu-restricted-extras
In order to view some videos and view flash web content in your web browser, you need to install the flash plugin. It is possible to install it directly from the Software Center and entering the word "flash" or from a terminal with the following command:
sudo apt-get install flashplugin-installer
To add support for Encrypted DVDs (all "originals"), I opened a terminal and typed the following:
sudo apt install libdvdread4 sudo /usr/share/doc/libdvdread4/install-css.sh
4. Install additional repositories
GetDeb & Playdeb
Playdeb, the game repository for Ubuntu, was created by the same people who gave us getdeb.net, the purpose of the project is to provide Ubuntu users with an unofficial repository with the latest versions of the games.
5. Install help tools to configure Ubuntu
Ubuntu Tweak
The most popular tool to configure Ubuntu is Ubuntu Tweak (although it is worth clarifying that in recent days it seems that its development will end, at least on the part of its creator). This wonder allows you to "tune" your Ubuntu and leave it as you like.
To install Ubuntu Tweak, I opened a terminal and typed:
sudo add-apt-repository ppa: tualatrix / ppa sudo apt update sudo apt install ubuntu-tweak
Unsettings
UnSettings is a new tool for customizing Ubuntu. There are other programs like MyUnity, Gnome Tweak Tool, and Ubuntu-Tweak that do the same job, but this one includes some unique features.
sudo add-apt-repository ppa: diesch / testing sudo apt update sudo apt install unsettings
6. Install compression applications
In order to compress and decompress some popular free and proprietary formats, you need to install the following packages:
sudo apt install rar unace p7zip-full p7zip-rar sharutils mpack lha arj
7. Install other package and configuration managers
Synaptic - is a graphical tool for package management based on GTK + and APT. Synaptic allows you to install, update or uninstall program packages in a versatile way.
It is not already installed by default (as they say by space on the CD)
Installation: Search Software Center: synaptic. Otherwise, you can enter the following command in a terminal ...
sudo apt install synaptic
aptitude - Command to install applications from the terminal
It is not necessary since we can always use the "apt" command, but here I leave it for those who want it:
Installation: Search Software Center: aptitude. Otherwise, you can enter the following command in a terminal ...
sudo apt install aptitude
gdeby - Installation of .deb packages
It is not necessary, since when installing the .deb with a double click, the Software Center opens but it may be of interest to some nostalgic people.
Installation: search Software Center: gdebi. Otherwise, you can enter the following command in a terminal ...
sudo apt install gdebi
Dconf editor - It can be useful when configuring Gnome.
Installation: Search Software Center: dconf editor. Otherwise, you can enter the following command in a terminal ...
sudo apt install dconf-tools
To run it, I opened Dash and typed "dconf editor."
8. Find more applications in the Ubuntu Software Center
In case you can't find an application to do what you want or you don't like the applications that come by default in Ubuntu, you can go to the Ubuntu Software Center.
From there you will be able to install excellent applications with just a few clicks. Some popular picks are:
- OpenShot, video editor
- AbiWordSimple, lightweight text editor
- Thunderbird, email
- Chromium, web browser (free version of Google Chrome)
- Pidgin, cat
- Deluge, torrent
- VLCvideo
- XBMC, media center
- fileZilla,FTP
- GIMP, image editor (Photoshop type)
9. Change interface
To the traditional GNOME interface
If you are not a fan of Unity and want to use the traditional GNOME interface, please do the following:
- Log out
- Click on your username
- Look for the session menu at the bottom of the screen
- Change it from Ubuntu to GNOME Flashback
- Click Login.
In case this option is not available, try running the following command first:
sudo apt install gnome-session-flashback
GNOME-Shell

If you want to try GNOME Shell instead of Unity.
Installation: enter the following command in a terminal:
sudo apt-get install gnome-shell ubuntu-gnome-desktop
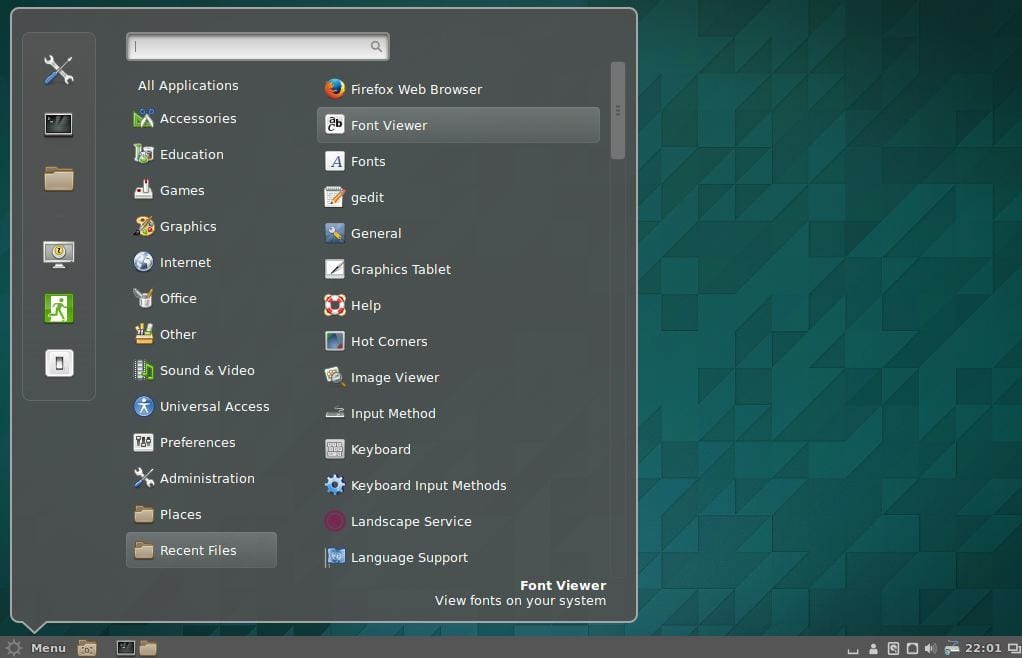
Cinammon is a fork of Gnome 3 used and developed by the creators of Linux Mint that allows you to have a lower task bar with the classic Start Menu.
sudo apt-get install cinnamon

MATE is a fork of Gnome 2 that emerged as an alternative for GNOME users after the drastic change that this desktop environment underwent when using its controversial Shell. Basically, MATE is GNOME 2, but they changed the names of some of their packages.
sudo apt-get install mate-desktop-environment
10. Install Indicators and Quicklists
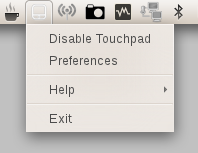
Indicators - You can install many indicators, which will appear on the top panel of your desktop. These indicators can display information about many things (weather, hardware sensors, ssh, system monitors, dropbox, virtualbox, etc.).
A complete list of indicators, along with a brief description of their installation, is available at Ask Ubuntu.
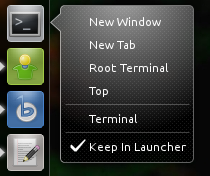
quicklist - Quicklists allow you to access common functionalities of the applications. They run through the bar that appears on the left on your desktop.
Ubuntu already comes with several installed by default. However, it is possible to use some custom quicklists. A complete list, along with a brief description of its installation, is available at Ask Ubuntu.
11. Install the Compiz & plugins Configuration Manager
Compiz is the one who makes those amazing stationery that leaves us all speechless. Unfortunately Ubuntu does not come with any graphical interface to configure Compiz. Also, it doesn't come with all the plugins installed.
To install them, I opened a terminal and typed:
sudo apt install compizconfig-settings-manager compiz-plugins-extra
12. Remove the global menu
To remove the so-called "global menu", which makes the applications menu appear on the top panel of your desktop, I simply opened a terminal and typed the following:
sudo apt remove appmenu-gtk3 appmenu-gtk appmenu-qt
Log out and log in again.
To revert the changes, open a terminal and enter:
sudo apt install appmenu-gtk3 appmenu-gtk appmenu-qt
Window menus in the title bar
Before, the menus of applications that were not maximized also appeared in the global menu. However, it is now possible for the menus in these windows to appear in their own title bar. To do this, you just have to open the Dash, write "Appearance", go to the "Behavior" tab and select the option "Show window menus in the title bar."
13. Remove "commercial" searches from Dash
To disable online searches, I opened the dashboard System Settings> Privacy and Security> Search. Once there, deselect the option "Include online results."
To deactivate only the "commercial" searches that appear in the Dash, you can go to Applications> Filter Results> Type> Extensions. Click on the plugin and select Deactivate.
To disable all "commercial" searches (Amazon, Ebay, Music Store, Popular Tracks Online, Skimlinks, Ubuntu One Music Search & Ubuntu Shop) in one fell swoop you can open a terminal and execute the following command:
wget -q -O - https://fixubuntu.com/fixubuntu.sh | Bash
14. Integrate the web to your desktop
Add your social media accounts
To get started, I accessed the dashboard System Settings> Online Accounts. Once there, click on the "Add Account" button.
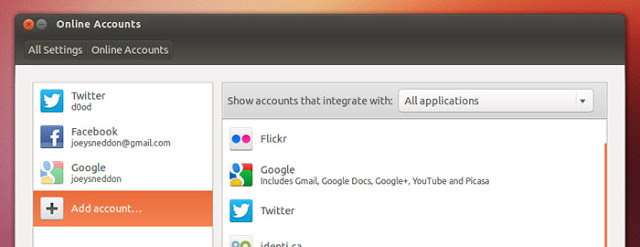
Supported services include Aol, Windows Live, Twitter, Google, Yahoo !, Facebook (and Facebook Chat), Flickr, and many more.
The applications that use this data are Empathy, Gwibber and Shotwell.
web apps
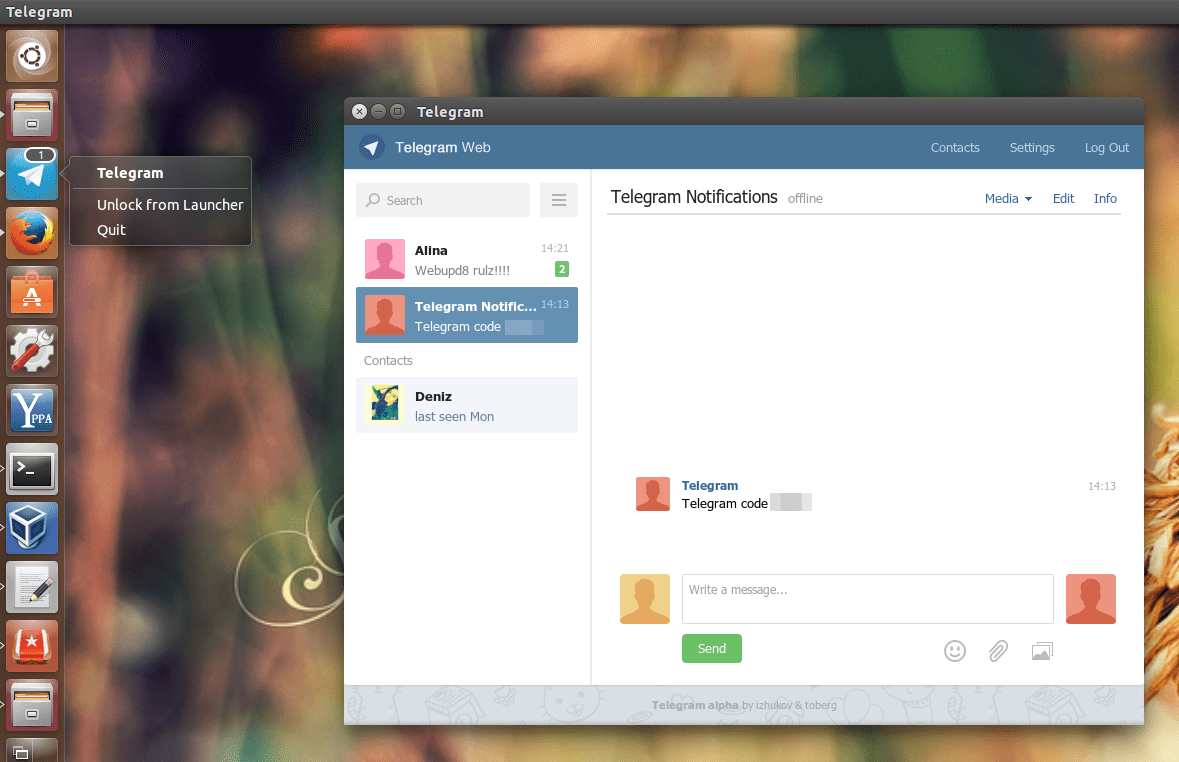
Ubuntu WebApps allows websites such as Gmail, Grooveshark, Last.fm, Facebook, Google Docs and many others, to integrate seamlessly with the Unity desktop: you will be able to search the site through HUD, you will receive desktop notifications, quicklists will be added and it will even be integrated with the messages and notifications menu.
To get started, just visit one of the supported sites (there is a complete list here.) and click on the "install" pop-up, which will appear as shown in the image above.
15. Ubuntu Desktop Guide
Nothing better than taking a look at the official documentation (in Spanish) for Ubuntu. It is an excellent help for newcomers and, in addition to being very comprehensive, it was written with new users in mind, so it is very useful and easy to read.
You will be able to find information about what's new in Ubuntu and information on how to use the launcher to start applications (which can be confusing for those who have never used Unity), how to search for applications, files, music and much more with Dash, how to manage applications and settings with the menu bar, how to close the session, turn off or change user and a very long etcetera.
I love it because it can be summed up as "Now install Linux Mint." It comes with everything to do on freshly installed Ubuntu.
+1
-1
Less Unity… 🙂 Haha…
"What to do after installing Ubuntu 14.10 Utopic Unicorn"
Step 1:
- Uninstall Ubuntu 14.10 Utopic Unicorn… 😛
Hahaha .. Troll !!
Che, this is full of trolls ... haha!
Na, but this troll is special, I have affection for this one and that is why I let him say everything he says .. also, he is an Apple Fanboy, so… 😛
Apple fanboy and is using win 8.1: /
JAJAJAJAJJAJAJA REMARKABLE
worale that is more full of proprietary software than the cyber machine where I connect!
+1
plus 1
Erase It Completely and Install Mageia oo
Good Morning.
(Constructive criticism ON)
I have been following your website for some time and I really like what you post but, if you are going to do tutorials on the versionitis of each system, you should also do it of others and not lose your ass for each version of Ubuntu more removing them every 6 months, excessive according to my point (I clarify, I have ElementaryOS Freya and OpenSUSE 13.1).
(Constructive criticism OFF)
As @ 3ndriago said:
Step 1: - Uninstall Ubuntu 14.10 Utopic Unicorn… 😛
Step 2: Install 14.04 which together with 12.04 is one of the most stable they have achieved and Unity is no longer so heavy: S
Hello Bla6!
I understand and to some extent share your opinion. However, I can assure you that many people are interested in this type of guide for each and every version of Ubuntu. Although there are minor differences between each version, sometimes the changes are not as minor as one imagines.
Anyway ... not everyone thinks like one and you have to respect those people ... and help them. Also, think that a lot of people are just starting with this version of Ubuntu (for better or for worse).
Anyway, thanks for your constructive criticism.
A hug, Pablo.
Yes, in my case I use win 8.1, however I like to spend time installing and using Linux, in this case each version that comes out of Ubuntu, I know that many do not like it, but at least it is friendlier when installing , I have openSUSE installed as well and it turns out that it does not automatically activate my usb wireless network adapter, which does not happen with ubuntu, I do not like wasting my time trying to connect to the internet if this version of Linux (and I know there will be others ) let me use it.
I thank you for the manual, it has helped me a lot, installing things that I will use and others that you may just see and don't use them anymore, but the case is HELP and I think you fulfill the task.
I understand Bla6's answer. But if there were no manuals for all the updates, new users would have a hard time. I got hooked on Linux with Ubuntu 10.xx (I don't even remember). If there were no manuals maybe it would still be Windows-dependent; today I work with both and whenever I can choose with Ubuntu.
Thanks for your work.
@ Bla6 remember that this is a community blog so if you want this blog to talk about other distributions, you can create an account and publish the article.
regarding the article; who has followed the old page usemoslinux.blogspot.com will know that with each new version of Ubuntu, @usemoslinux (Pablo) releases a new version of this article that is a simple copy & paste of the article of the previous version with some slight modification to adapt it to the remake so honestly I wouldn't call that losing your ass.
Regarding the importance of the article, I just tell you that at the time, a few years ago this article was crucial for me and I know it has been for many and will continue to be for many newcomers to Ubuntu.
Greetings.
You talk about the indicators, I didn't even remember them anymore. Do you know how you can configure the indicators that you have in the bar? I mean, deactivate some and activate it again, things like that.
Excellent 😉
Thanks, Gabriel!
By my own decision, at least for now I have decided not to stick with 14.04 and not install 14.10 because according to all the data the differences are minimal. I am one of those who in the end can not hold but hey this time I think so. In short, this preliminary is to tell you that despite everything I think it is the most complete and useful article of the: what to do after installing ubuntu ... .. Congratulations and above all thank you very much.
It seems to me or were the -get missing ????
apt-get ……
Thanks for the guide, it is true that the first times that I went to the linux world these guides were of good help to me, logically with the passage of time one does not see sense, but surely for many others it does.
regards
Starting with Ubuntu 14.04, the apt package manager ("Advanced Package Tool") has new options. You no longer need to type "apt-get" and you can just use "apt", (apt will still work).
Cheers! Paul.
Hahaha, you always learn something new! Greetings and thanks
well good to know. I guess they have added an alias in the .bashrc
I don't consider ubuntu a gnu / linux distro, it looks more like windows than when upgrading to a higher version everything goes to shit.
man that's easy to fix, update every 2 years and that's it. stay at 14.04 which is long term support and update in April 2016 to 16.04. This does not mean that you will run out of updates for 2 years since there will always be security updates, kernel and certain software such as firefox that users want to keep updated
regards
Nothing then, we will have to take a look with virtualbox to see what is happening
I want to install it on my mac: D, is there a tutorial?
There is a very popular protocol of action lately.
1. See what Ubuntu is deriving from
2. Uninstall / reboot the boot DVD
3. Install Linux Mint.
excellent job.
Hello, I installed this version by booting from a USB, there are times that it is difficult to start but finally I was able to do a complete installation, at the moment of restarting the grub starts, I select ubuntu and the black screen remains without doing anything. What can be? I've been like this for a day.
With other distro I get ACPI error or something like that.
Help !!!
Hello Brian!
For a few days we have made available a new question and answer service called Ask DesdeLinux. We suggest that you transfer this type of consultation there so that the entire community can help you with your problem.
A hug, Pablo.
Try putting the word "exit" works for me, after that Ubuntu starts without problems.
Although it may be another mistake.
And Trisquel 7 is out! goodbye Ubuntu!
I have been using Ubuntu 14.04 for a year and I have not had to format my PC any time, there have been no system errors or my PC has slowed down as when I used Windows 8, To update to Ubuntu 14.10 it would be the first time I formatted the PC this year, or can it be updated from the Update manager?
The answer to your question is here: http://ask.desdelinux.net/603/como-actualizar-ubuntu-14-04-a-ubuntu-14-10
We recommend you use this service (Ask DesdeLinux) to make this type of queries. 🙂
I hope this info is useful.
Cheers! Paul.
Is that in reality the difference is minimal if not zero. I, who am a "vicious" of ubuntu updates, this time I have not done it and on another laptop I have installed 14.10 directly and as if I had not installed anything new. I suppose the update will go inside and stuff but I haven't noticed almost anything at all. Anyway, I'll stick with 14.04. A greeting.
I see that the graphics section was not fully developed (in terms of drivers), so here is my little contribution for those who have hybrid nVidia / Intel cards.
Ahem… There is an nVidia implementation called Optimus for windows whose function is to switch between nVidia and intel graphics manually and / or automatically according to the demand of the tasks. What allows a laptop a battery performance almost double, when it is not required in resources.
In Linux there are two implementations of this technology. One is called bumblebee, which by means of a call to the optirun command, allows you to equip an application with the power of nVidia graphics, while in the background it continues to use intel graphics. The other is called prime, which allows you to choose through the nvidia-settings between 2 profiles that you can run for an X server session, one profile is only nVidia, the other only Intel. This last method called prime (* looking forward to a third megatron call *) should be noted that it is exclusive to Ubuntu and is very useful for those of us who do all kinds of tricks to make the battery last longer, although the efficiency will not be as good as on windows.
If this calls the attention of any interested party who wishes to install "prime", the steps to follow are (Ubuntu 14.04 and 14.10).
1) sudo apt-get purge bumblebee * nvidia- *
2) Restart
3) lspci -vnn | grep -i VGA -A 12 // get the model of your chart and look for your driver in> http://www.nvidia.com/Download/index.aspx
4) sudo add-apt-repository ppa: xorg-edgers / ppa -y && sudo apt-get update // add the repositories
5) Install the driver from "Restricted drivers" or "Additional drivers"
6) sudo apt-get install nvidia-prime
7) reboot
8) Open nvidia-settings, in the profiles section select the graph of your choice.
P.S. If you want to use Bumblebee, I recommend you try the manjaro distro, it has a tool that you shit how easy it installs proprietary drivers, except exclusive ones like this one from Ubuntu.
thanks for a lot of help for the illiterate in programs and easy
done all the steps thank you very much!
simply good.
thank you very much.
Very good ubuntu
Thanks for the tutorial when doing the upgrade I have come across this? WARNING: Skipping duplicate certificate UbuntuOne-Go_Daddy_Class_2_CA.pem
do I have to worry?
Thank you
Tooooooodo this is absolutely unnecessary if we install windows.
I am now in Ubuntu 14.10 trying to find how to change Firefox to Spanish since from the same Firefox in Preferences it does not take me. And then I have to find how to switch the keyboard to Latin Spanish. So I can not write ennes or accents and Alt + 64 does not serve to place the at sign.
I'm going to continue testing ... but the truth is, it will be very difficult to decide for Linux if these elementary things do not come with the OS and take so much time.
I had to copy the at of the email from a web page ... do you think?
Hi Dante!
I think it would be better if you ask this question in our question and answer service called Ask DesdeLinux so that the whole community can help you with your problem.
Anyway, as a help, I recommend that you look at the following links:
How to change the language of Ubuntu (including Firefox): https://www.youtube.com/watch?v=PJyB-oY3CqE
How to change the spell checker in Firefox: https://blog.desdelinux.net/firefoxchrome-como-habilitar-el-corrector-ortografico-en-espanol/
How to install the Spanish dictionary in LibreOffice: https://blog.desdelinux.net/firefoxchrome-como-habilitar-el-corrector-ortografico-en-espanol/
How to change the keyboard in Ubuntu: http://ask.desdelinux.net/1102/elegir-distribucion-teclado-espanol-latinoamericano-ubuntu?show=1102#q1102
How to enter an ASCII code in Ubuntu: http://ask.desdelinux.net/1042/como-ingresar-codigo-ascii-en-ubuntu-otras-distribuciones?show=1042#q1042
A hug, Pablo.
Hello people! Is there a way to put the unity launcher at the bottom of the screen in Ubuntu 14.10? Thank you in advance and forgive my ignorance.
I am not very knowledgeable in the matter but my thanks for what I have done and only ask you for more information on the subject in a simple and objective way, my congratulations