

Some time ago I wrote an article here on the blog about TLP, which is an excellent tool that will help us with energy management and how it is used within our laptop.
Today we will learn about a graphical interface designed for TLP, which will allow us to get the best performance and functionality from this application on our computers.
I must remind you that TLP is a tool designed for CLI or, failing that, for the command line.
So not many users prefer to work in this way and even more so when TLP has many different options and settings.
About TLPUI
The tool that will help us manage TLP from a graphical interface is called TLPUI. This is a graphical interface for TLP built on GTK.
TLPUI is considered beta software. At this stage of development, it can read, view, and save TLP settings, and display information about configuration changes (default values and saved/unsaved status).
In order to install this graphical interface on the system, it is necessary to have some prerequisites.
It works:
- Settings can be read and displayed
- Displays information about configuration changes (default / unsaved)
- Changes can be saved with user permissions and sudo (/ etc / default / tlp)
- tlp-stat can be loaded in ui (simple and complete)
Requirements
The first and most obvious requirement is to have TLP already installed on the system , in addition to having the Gtk3 libraries installed (most current systems already have them) and Python3 installed.
If you don't already have TLP installed, you can check out the post where I share the commands to install this tool on some of the most popular Linux distributions. The link is here.
Installing Python 3 on Linux
If you do not have Python 3 on your system, you must follow the commands that I share below in order to obtain it.
For those who are users of Debian, Ubuntu, Linux Mint and any derivative of these, we must run the following command:
sudo apt install python3-gi git python3-setuptools python3-stdeb
For those who are users of Arch Linux, Antergos, Manjaro Linux or any Arch-derived system, you should run the following command.
sudo pacman -S python-pip python3
For those who are users of CentOS, RHEL, Fedora or any distribution derived from these, we will install with:
sudo yum -S python-pip python3
If you are a user of any version of openSUSE, you must type the following in a terminal:
sudo zypper in python3 python-pip
TLPUI Download
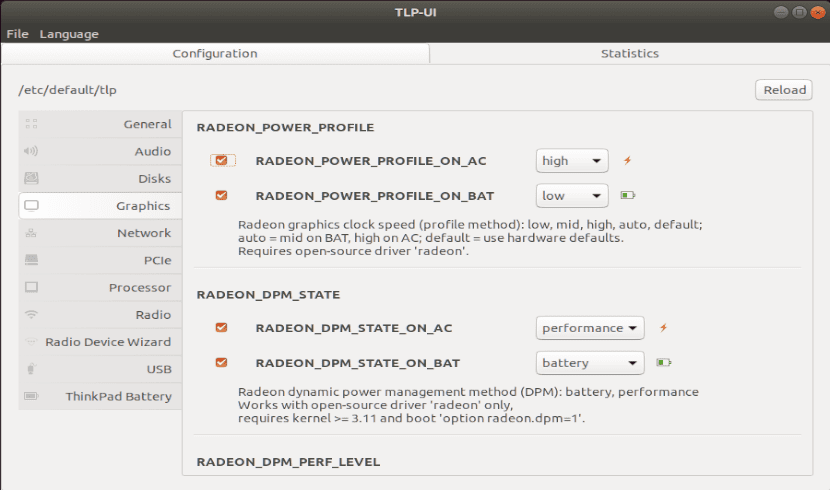
The next step now is to download the TLPUI tool, which will give us the TLP graphical interface.
To do this we must open a terminal in which we will proceed to download and extract ZIP.
We are going to type the following commands:
git clone https://github.com/d4nj1/TLPUI

cd TLPUI
And once inside the folder, we will execute the following command:
python3 -m tlpui
This will open the graphical interface with which we can work with TLP.
In the specific case of Debian, Ubuntu and derivatives, we can build the package to create a deb package that we can install on the system.
We do this by running the following commands in the terminal:
cd TLPUI
python3 setup.py –command-packages = stdeb.command bdist_deb
Having done this, we will now install the deb package on the system using the dpkg command, which installs the generated TLPUI DEB package (python3-tlpui_0.1-1_all.deb). Alternatively, you can install it using a graphical tool. You will find the generated TLPUI DEB package in the TLPUI/deb_dist folder.
sudo dpkg -i deb_dist/python3-tlpui_*all.deb
You may find that the configuration file is empty when you run the TLPUI graphical interface. We can fix this as follows.
In a terminal we are going to type:
mkdir ~/.config/tlpui

gedit ~/.config/tlpui/tlpui.cfg
And replace the contents of this file with the following (you can adjust these options):
[default]
language = en_EN

tlpconfigfile = /etc/default/tlp

activecategorie = 0

windowxsize = 900

windowysize = 600