General index of the series: Computer Networks for SMEs: Introduction
The title of this post refers to a series of console commands beginning with «virt- « And that can be useful in certain circumstances. We will only give a brief description of each one, and some examples of use. We repeat that: We cannot replace the manuals that accompany each command. We strongly suggest check those pages by running man virtcommand.
- The main objective of this article is to continue showing the wide universe that Virtualization in Linux is currently using the Qemu-KVM Hypervisor. Although in the title we write the name the distribution «Debian«, The general principles are applicable to any other distribution by means of the specific commands of each one of them. Especially those related to the search, description and installation of packages, among others.
Before continuing with the reading, we recommend visit the previous article: Qemu-KVM + Virt-Manager on Debian - Computer Networking for SMEs.
When to use the commands?
On many occasions we are remotely managing a virtualization support server with the Qemu-KVM installed, and for some reason we do not have the graphical interface of the Virtual Machine Manager - Virt Manager:
- Typical case, when we access the remote server from a Windows station via PuTTy, or any other of the many alternatives that exist to connect via SSH with a Debian GNU / Linux server, and the latter does not have any support installed for the «X«, Or graphic support.
- We simply want to manage the virtual machines on the local or remote server using console commands.
Installed with libvirt-clients
At previous article we install the package libvirt-bin, and as part of the process it was installed libvirt-clients. If we run in a console:
buzz @ sysadmin: ~ $ sudo dpkg -L libvirt-clients | grep / bin
/ usr / bin
/ usr / bin / virsh
/ usr / bin / virt-host-validate
/ usr / bin / virt-login-shell
/ usr / bin / virt-xml-validate
/ usr / bin / virt-pki-validate
- Virsh: the virsh program is the main user interface for the complete management of Guest Domains - Guests. It is used to list, create, pause, and shut down domains. This command must be invoked with permissions of root. It has two ways to run: in command mode and in interactive mode. We will dedicate a next article to virsh.
- virt-host-validate: tool that allows to validate the Host configuration - Host, so that it is able to support all the Hypervisor drivers - hypervisor. To obtain correct results, the command must be run with permissions of root.
- virt-login-shell: command to execute a shell customized for a normal user in a container LXC, whose name is the same as the user who invokes it. If the container is not running, the command virt-login-shell will try to start it. This command cannot be invoked with user permissions root. The very explicit configuration file for this program is /etc/libvirt/virt-login-shell.conf.
- virt-xml-validate: validate XML files from libvirt comparing them to a schematic - schedule valid. We get a list of valid schema names if we execute man virt-xml-validate.
- virt-pki-validate- Used to validate whether the PKI files of libvirt They are correctly configured, both on the secure server side and on the client that will use the TLS encryption protocol to remotely access the server. Its execution will be necessary if we have enabled remote administration over TLS and SSL. Chapter 22.2 of the document Virtualization Deployment and Administration Guide, is dedicated to this solution. We suggest that our business networks use the remote administration via SSH, simpler and more secure method for a Business LAN, to which we will dedicate a later article.
Installed with virtisnt
In the previous article, we also installed the package virt-manager. As part of that process, the package was installed boil. If we want to know which commands the latter contains, we execute:
byzz @ sysadmin: ~ $ sudo dpkg -L virtinst | grep / bin
/ usr / bin
/ usr / bin / virt-convert
/ usr / bin / virt-image
/ usr / bin / virt-xml
/ usr / bin / virt-install
/ usr / bin / virt-clone
- virt-convert- command that converts virtual machine definitions into formats VMX y Ovf to the native libvirt format XML. The VMX format is typically used by the VMware, while the OVF «Open Virtualization Format»Can be used by any hypervisor support it.
- virt-image- Creates a virtual machine from an image descriptor file in XML format. This particular tool will be removed from future versions of boilTherefore We do not suggest its use.
- virt-xml: Allows the editing of native XML files used by libvirt, using command line options.
- Virt-Install: command line tool that allows creating new virtual machines in Hypervisors such as KVM, Xen or Linux Containers that use the hypervisor management library "Libvirt". This tool supports graphical installation if we use, for example, the VNC Virtual Network Computing, or the SPICE. It also fully supports console or text mode. Through its use we can create a virtual machine with one or more hard drives, one or more network cards, sound devices, physical USB or PCI devices, and so on. The installation media can be local, remote, published using the native UNIX NFS Network File System protocol, HTTP, FTP. etc.
- virt-clone- command line tool to clone existing virtual machines using the hypervisor management library "Libvirt". Basically copy the image of a virtual machine and create a new Guest - Guest with identical hardware configuration. Hardware items that need to be unique, for example the hardware address of a network card, will be updated to avoid collisions or noise between the old and new Guest.
virt-viewer
This tool is also installed when you do the virt-manager. virt-viewer it is a separate package.
- virt-viewer: allows us to show a graphical console, via VNC or SPICE, of a specific virtual machine, whether it is located locally or remotely. We can refer to Guest that we want to display through its name, ID, or UUID. If the virtual machine is not running, virt-viewer will wait for it to start.
Other "virt-" commands that can be installed from separate packages
- virt-goodies- A collection of tools related to virtualization. Includes a plugin for «Munin«, And a script to convert virtual machines created with VMware Workstation or VMware Server, to the format used in Qemu-KVM.
- virt-top: Shows the statistics of virtualized domains. A kind of top o htop for virtual machines
Installed with qemu-utils
Although the name of these tools does not begin with virt-Surely we will have to use some of them at a certain time, especially the one related to the images of the virtual machines disks.
We can invoke them after installing the Qemu-Kvm virtualization platform, as indicated in the previous article. If we want to know which commands the package left at our disposal qemu-utils, we just need to run:
buzz @ sysadmin: ~ $ sudo dpkg -L qemu-utils | grep / bin
/ usr / bin
/ usr / bin / qemu-img
/ usr / bin / qemu-nbd / usr / bin / qemu-io
If instead of discriminating by / bin we would have done it for / sbin, we would obtain another result which we leave to your consideration.
- qemu-img: allows us to create, and convert and / or modify images of discs that are not working or that are Out of line.
We suggest run the command man qemu-img. We will only emphasize that we should NEVER use this command to modify any image that is in use by any virtual machine or any other process, because it can destroy the image. Nor should we consult the data of an image that is in the process of modification, as we can find inconsistencies in its state.
Examples of use of some of the commands
virt-host-validate
buzz @ sysadmin: ~ $ virt-host-validate
  QEMU: Checking for hardware virtualization: PASS QEMU: Checking for device / dev / kvm: PASS QEMU: Checking for device / dev / vhost-net: WARN (Load the 'vhost_net' module to improve performance of virtio networking) QEMU: Checking for device / dev / net / tun: PASS LXC: Checking for Linux> = 2.6.26: PASS

buzz @ sysadmin: ~ $ sudo virt-host-validate
[sudo] password for buzz: QEMU: Checking for hardware virtualization: PASS QEMU: Checking for device / dev / kvm: PASS QEMU: Checking for device / dev / vhost-net: PASS QEMU: Checking for device / dev / net / tun : PASS LXC: Checking for Linux> = 2.6.26: PASS
virt-xml-validate
buzz @ sysadmin: ~ $ sudo virt-xml-validate /etc/libvirt/qemu/dns.xml
/etc/libvirt/qemu/dns.xml validates

buzz @ sysadmin: ~ $ sudo virt-xml-validate /etc/libvirt/qemu/networks/default.xml
/etc/libvirt/qemu/networks/default.xml validates
qemu-img
buzz @ sysadmin: ~ $ qemu-img check /tera/vmware/omicron/omicron.vmdk
No errors were found on the image.

buzz @ sysadmin: ~ $ qemu-img info /tera/vmware/omicron/omicron.vmdk
image: /tera/vmware/omicron/omicron.vmdk
file format: vmdk virtual size: 20G (21474836480 bytes) disk size: 3.6G cluster_size: 65536 Format specific information: cid: 1473577509 parent cid: 4294967295 create type: monolithicSparse extents: [0]: virtual size: 21474836480 filename: / tera / vmware / omicron / omicron.vmdk cluster size: 65536 format:

buzz @ sysadmin: ~ $ qemu-img info /tera/vms/omicron.raw
image: /tera/vms/omicron.raw
file format: raw virtual size: 20G (21474836480 bytes) disk size: 3.4G

buzz @ sysadmin: ~ $ qemu-img info /tera/vms/miweb.qcow2
image: /tera/vms/myweb.qcow2
file format: qcow2 virtual size: 10G (10737418240 bytes) disk size: 4.5G cluster_size: 65536 Format specific information: compat: 1.1 lazy refcounts: false

buzz @ sysadmin: ~ $ sudo qemu-img convert -p /tera/vms/omicron.raw -O qcow2 /tera/vms/omicron.qcow2
    (27.56 / 100%)

buzz @ sysadmin: ~ $ qemu-img info /tera/vms/omicron.qcow2
image: /tera/vms/omicron.qcow2
file format: qcow2 virtual size: 20G (21474836480 bytes) disk size: 3.5G cluster_size: 65536 Format specific information: compat: 1.1 lazy refcounts: false
buzz @ sysadmin: ~ $ sudo qemu-img create -f qcow2 /tera/vms/hyp2.qcow2 20G
Formatting '/tera/vms/hyp2.qcow2', fmt = qcow2 size = 21474836480 encryption = off cluster_size = 65536 lazy_refcounts = off

buzz @ sysadmin: ~ $ sudo qemu-img info /tera/vms/hyp2.qcow2
image: /tera/vms/hyp2.qcow2
file format: qcow2 virtual size: 20G (21474836480 bytes) disk size: 196K cluster_size: 65536 Format specific information: compat: 1.1 lazy refcounts: false
virt-xml
First, we create a new album:
buzz @ sysadmin: ~ $ sudo qemu-img create -f qcow2 /tera/vms/dns2.qcow2 10G
Then we join it to the existing "dns" domain:
buzz @ sysadmin: ~ $ virt-xml --connect qemu: /// system dns --add-device --disk /tera/vms/dns2.qcow2 --confirm
--- Original XML +++ Altered XML @@ -128,5 +128,10 @@  + + + + +

Define 'dns' with the changed XML? (y / n): y
Domain 'dns' defined successfully.
At the end of the article we give the complete structure of the newly modified /etc/libvirt/qemu/dns.xml file.
virt-convert
Let's convert a virtual machine created using the VMware Workstation towards the format libvirt, but not before specifying that the format of the converted hard disk is qcow2, and also that the new virtual machine image is created in the main repository / tera / vms. We also want the command output to be as explicit as possible, so we use the option -d.
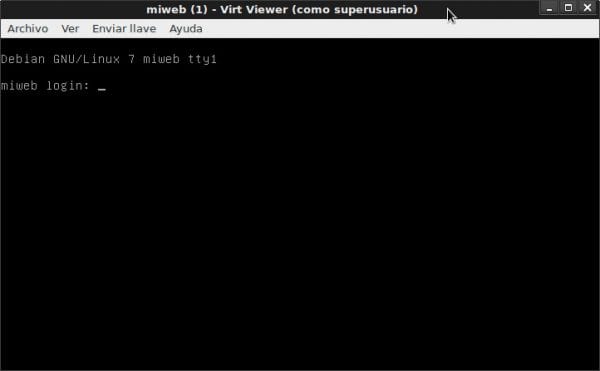
buzz @ sysadmin: ~ $ sudo virt-convert -d / tera / vmware / miweb / --disk-format qcow2 --destination / tera / vms
Afterwards, the virt-viewer automatically connects to the newly converted Guest, and we can see its entire boot process.
virt-clone
Let's clone the virtual machine «dns«:
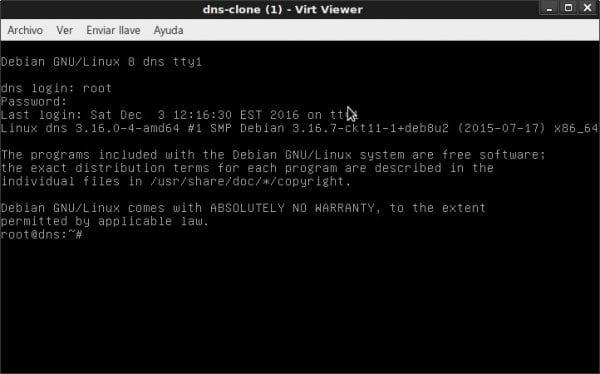
buzz @ sysadmin: ~ $ virt-clone --connect qemu: /// system -o dns --auto-clone
Assigning 'dns-clone.qcow2' | 10 GB 00:20 Assigning 'dns2-clone.qcow2' | 10 GB 00:01

The clone 'dns-clone' has been created successfully.
We check using the command Virsh, which is a preview of the next article:
buzz @ sysadmin: ~ $ sudo virsh list
 Id Name State ----------------------------------------------- -----

buzz @ sysadmin: ~ $ sudo virsh list --all
 Id Name State ----------------------------------------------- ----- - dns shut off - dns-clone shut off - miweb shut off

buzz @ sysadmin: ~ $ sudo virsh start dns-clone
Domain dns-clone started
buzz @ sysadmin: ~ $ virt-viewer --connect qemu: /// system dns-clone
Virt-Install
We want to create a virtual machine named «WordPress»To host the site of the Business Intranet. It will not be published on the Internet. That it has about 1024 megabytes of RAM, a hard disk of 80 gigabytes of dynamic growth, which is based on Debian Jessie, and is connected to the network «default«.
To make our lives easier, we first create the disk image using qemu-img:
buzz @ sysadmin: ~ $ sudo qemu-img create -f qcow2 /tera/vms/wordpress.qcow2 80G
Formatting '/tera/vms/wordpress.qcow2', fmt = qcow2 size = 85899345920 encryption = off cluster_size = 65536 lazy_refcounts = off
Next, we create the machine and begin the installation process:
buzz @ sysadmin: ~ $ sudo virt-install --connect qemu: /// system --virt-type = kvm \
--name wordpress --ram 1024 --vcpus = 1 \
--disk /tera/vms/wordpress.qcow2 \
--cdrom /home/buzz/isos/Linux/debian-8/debian-8.0.0-amd64-CD-1.iso \
--os-type linux --network network = default \
--description wordpress.desdelinux.fan

virt-top
buzz @ sysadmin: ~ $ virt-top --connect qemu: /// system
virt-top 15:39:21 - x86_64 2 / 2CPU 1600MHz 3863MB 2 domains, 2 active, 2 running, 0 sleeping, 0 paused, 0 inactive D: 0 O: 0 X: 0 CPU: 0.7% Mem: 768 MB ( 768 MB by guests) ID S RDRQ WRRQ RXBY TXBY% CPU% MEM TIME NAME 22 R 0 0 104 0 0.3 6.0 0: 11.49 dns 21 R 0 0 104 0 0.3 13.0 0: 13.42 miweb
Structure of the dns.xml file
At first it may seem a bit difficult to understand the structure of the definition file of a virtual machine or Guest, as understood by the Qemu-KVM hypervisor and related libraries as libvirt. The file is in the standard format.xml. It is structured by definition blocks, contained within the main block «domain«.
....
Within that block we will find the definitions of the entire virtual machine:
- name of the team
- uuid of the team
- amount of RAM
- number of processors
- type of operating system and its architecture. device of boot.
- Features that it supports such as ACPI "Automatic Control Power Interface", APM "Automatic Power Management", and PAE.
- CPU model (s) and their characteristics
- clock setting: whether it is UTC "United Time Cordinate" or not.
- response to events such as shutdown, reboot, or system crash
- if the PM «Power Management» has enabled the events «suspend writing to memory» and «suspend writing to hard disk»
- emulator type of different devices or KVM devices
- for all hard drives: driver, disk type, image file path, target device, bus type, slot «slot»Pci to which it is connected, etc., depending on the virtual disk: IDE, SATA, SCSI, USB or Virtio.
- optical devices like CDR
- number and type of USB connectors
- pci slot for IDE disk
- serial connector for communications
- parallel connector for printers
- network cards with a unique MAC address, type of network card, to which pci slot it is connected, and to which virtual network it will connect
- pty series consoles
- input devices such as pad «tablets", Mouse keyboard "mouse", etc.
- video card and its RAM, type, model, slot, bus, etc.
- and another long etcetera
In short, La Mar Océana of definitions and devices that are necessary and supported by the Qemu-KVM hypervisor and related libraries, to have a fully functional virtual machine as if it were a real machine.
buzz @ sysadmin: ~ $ sudo cat /etc/libvirt/qemu/dns.xml
<!--
WARNING: THIS IS AN AUTO-GENERATED FILE.  CHANGES TO IT ARE LIKELY TO BE OVERWRITTEN AND LOST.  Changes to this xml configuration should be made using: virsh edit dns or other application using the libvirt API.
Upcoming deliveries
- Virsh command
- Remote management of hypervisors and their virtual machines using SSH
Remember that this will be a series of articles by Computer Networks for SMEs. We will be waiting for you!
You asked me for feedback and here it goes ... 🙂
The series is very interesting, very complete. I'm learning a lot from it, although I haven't tried "in production" yet.
At the moment I am finishing a project that has me very busy, but I will surely use this series as a reference. Thanks for the enormous effort.
Thanks Diego for the feedback. At least I know that what I published is useful to you. And you are right about the great effort we make in DesdeLinux to deliver quality articles to you in the Spanish language. We know that these types of posts are not abundant and that is why we write them.
Comprehensive and didactic article amigo Fico, which collects in a post the virt- * commands used in KVM. It is very difficult to find materials like this in the Spanish language. I think the virt-what command was missing. Otherwise excellent
Thanks for commenting, friend Zodiac. It is true that the virt-what command was missing. I consciously omitted it because the recommendation on its use according to its manual left me a bad taste. In the end what I understood is that they do not recommend its use
Very true friend Zodiac. As Diego says in his comment, it is a great effort that we make in DesdeLinux to deliver quality articles to you in Spanish. Other than the classic copy and paste cd posts that abound in the WWW Village. That help in the training of System Administrators. Those who have followed this series will have realized that we plan to comprehensively cover, and in a logical order, the solution for a small or medium-sized business network. Thanks again everyone for your comments.
I've been doing something with android smartphones, and I hadn't had the chance to read such a good article, this time I just want to say something. Go soft. A good understanding ...
Crespo88, the article may be a bit long, but I am not a friend of cutting a specific topic like this in several posts, if that is what you mean. The relative complexity of the content, I do not put it, it is the issue of virtualization itself. 😉
I was not referring to it, excellent article as always. I mean that you are playing very good songs, that is, with a very useful utility. The "Give it soft" means that you are escaping. Hehehe, a hug brother.
Thanks brother for commenting
Very good post ... Didactic, complete and simply perfect.
Now, for those who prefer to use this type of virtualization, it is better to use oVirt (http://www.ovirt.org/), a project on which Red Hat Virtualization and Open Source are built. In this way, it is possible to access very advanced options in a really easy way, which are quite complex in the console :).
http://www.ovirt.org/download/
http://www.ovirt.org/documentation/introduction/about-ovirt/
Cheers :).
Thank you very much, Petercheco for your comment. In the previous article "Virtualization in Debian: Introduction", in a paragraph dedicated to the Open Virtualization Alliance, I mention oVirt as one of the software promoted by the OVA. I think oVirt is for big deployments. On the other hand, he asks for a workstation dedicated to him with 4 gigs of RAM as the recommended amount of memory. My friend and colleague Eduardo Noel "enoel.corebsd@gmail.com" has installed several virtualization servers based on CentOS 7, and he manages them wonderfully with oVirt.
excellent article my partner, another example of the quality you have
Thank you, friend Denis, for your comment and undeserved praise for me. We do what we can.
Although I still have the virt-commands test pending in my home lab, I cannot help but recognize that the article is simply great, very practical and extremely useful since it is focused on the terminal that is really my favorite for my profile of sysadmin.
Great everything related to the local or remote administration of VMs without using the "Virt-Manager" graphical interface.
Once again my friend Fico, you magnify yourself by selflessly sharing your knowledge of the Linux world.
Wong's effusive SLDs and I continue to study the Virt Qemu-KVM series more diligently.
Friend Wong: Comments like yours are the ones that force me to continue writing about SME Networks. Many may wonder why my emphasis on Qemu-KVM, and the answer is in my article https://blog.desdelinux.net/virtualizacion-debian-introduccion-redes-computadoras-las-pymes/#Open_Virtualization_Alliance_OVA. Less about him oVirt, which I consider appropriate for scenarios larger than an SME Network, I have dealt with the other programs promoted by the OVA. That simple
Why search outside the program repositories of each distribution that I board, if what I need to virtualize at the enterprise level is there?
My sincere thanks for your comments, friend Wong!