

|
Ubuntu 12.04 Precise Pangolin saw the light a few days ago. As we do with each release of this popular distro, here are some things you should do after making a installation from scratch. |
1. Run the Update Manager
It is likely that after Ubuntu 12.04 was released, new updates have appeared for the different packages that the ISO image distributed by Canonical comes with.
For this reason, after finishing the installation it is always recommended to run the Update Manager. You can do it by searching for it in Dash or by executing the following from a terminal:
sudo apt-get update sudo apt-get upgrade
2. Install Spanish Language
In the Dash I wrote Language and from there you will be able to add the language you prefer.
3. Install codecs, Flash, additional fonts, drivers, etc.
Due to legal issues, Ubuntu cannot include by default a series of packages that, on the other hand, are very necessary for any user: codecs to play MP3, WMV or encrypted DVDs, additional sources (widely used in Windows), Flash, drivers owners (to make better use of 3D functions or Wi-Fi), etc.
Fortunately, the Ubuntu installer allows you to install all of this from scratch. You just have to enable that option in one of the installer screens.
In case you haven't already done so, you can install them as follows:
Video card driver
Ubuntu should automatically detect and alert you to the availability of 3D drivers. In that case, you will see an icon for a video card on the top panel. Click on that icon and follow the instructions.
If Ubuntu doesn't detect your card, you can always install your 3D driver (nvidia or ati) by looking for the Hardware Configuration Tool.
Proprietary codecs and formats
If you are one of those who cannot live without listening to MP3, M4A and other proprietary formats, as well as you could not survive in this cruel world without being able to play your videos in MP4, WMV and other proprietary formats, there is a very simple solution. You just have to click on the button below:
or write in a terminal:
sudo apt-get install ubuntu-restricted-extras
To add support for encrypted DVDs (all "originals"), I opened a terminal and typed the following:
sudo apt-get install libdvdread4 sudo /usr/share/doc/libdvdread4/install-css.sh
4. Install additional repositories
Medibuntu
It is a repository of software packages that cannot be included in the Ubuntu distribution for reasons such as legal copyright, licensing or patent restrictions. Includes programs like: Google-Earth, Opera, Win32codecs, Msfonts.
sudo -E wget --output-document = / etc / apt / sources.list.d / medibuntu.list http://www.medibuntu.org/sources.list.d/$(lsb_release -cs) .list && sudo apt-get --quiet update && sudo apt-get --yes --quiet --allow-unauthenticated install medibuntu-keyring && sudo apt-get --quiet update
To add the Medibuntu packages in the Ubuntu Software Center:
sudo apt-get install app-install-data-medibuntu apport-hooks-medibuntu
GetDeb & Playdeb
GetDeb (formerly Ubuntu Click And Run) is a website where Deb packages and more current versions of packages that do not come in the usual Ubuntu repositories are manufactured and made available to the end user.
Playdeb, the game repository for Ubuntu, was created by the same people who gave us getdeb.net, the purpose of the project is to provide Ubuntu users with an unofficial repository with the latest versions of the games.
5. Install help tools to configure Ubuntu
Ubuntu Tweak
The most popular tool for configuring Ubuntu is Ubuntu Tweak. This wonder allows you to "tune" your Ubuntu and leave it as you like.
To install Ubuntu Tweak, I opened a terminal and typed:
sudo add-apt-repository ppa: tualatrix / ppa sudo apt-get update sudo apt-get install ubuntu-tweak
MyUnity
MyUnity allows you to configure Unity very easily.
6. Install compression applications
In order to compress and decompress some popular free and proprietary formats, you need to install the following packages:
sudo apt-get install rar unace p7zip-full p7zip-rar sharutils mpack lha arj
7. Install other package and configuration managers
Synaptic - is a graphical tool for package management based on GTK + and APT. Synaptic allows you to install, update or uninstall program packages in a versatile way.
It is not already installed by default (as they say by space on the CD)
Installation: Search Software Center: synaptic. Otherwise, you can enter the following command in a terminal ...
sudo apt-get install synaptic
aptitude - Command to install applications from the terminal
It is not necessary since we can always use the "apt-get" command, but here I leave it for those who want it:
Installation: Search Software Center: aptitude. Otherwise, you can enter the following command in a terminal ...
sudo apt-get install aptitude
gdeby - Installation of .deb packages
It is not necessary, since when installing the .deb with double click the Software Center opens. For the nostalgic:
Installation: search Software Center: gdebi. Otherwise, you can enter the following command in a terminal ...
sudo apt-get install gdebi
Dconf editor - It can be useful when configuring Gnome.
Installation: Search Software Center: dconf editor. Otherwise, you can enter the following command in a terminal ...
sudo apt-get install dconf-tools
To run it, I opened Dash and typed "dconf editor."
8. Find more applications in the Ubuntu Software Center
In case you can't find an application to do what you want or you don't like the applications that come by default in Ubuntu, you can go to the Ubuntu Software Center.
From there you will be able to install excellent applications with just a few clicks. Some popular picks are:
- OpenShot, video editor
- AbiWordSimple, lightweight text editor
- Thunderbird, email
- Chromium, web browser (free version of Google Chrome)
- Pidgin, cat
- Deluge, torrent
- VLCvideo
- XBMC, media center
- fileZilla,FTP
- GIMP, image editor (Photoshop type)
9. Change interface
To the traditional GNOME interface
If you are not a fan of Unity and want to use the traditional GNOME interface, please do the following:
- Log out
- Click on your username
- Look for the session menu at the bottom of the screen
- Change it from Ubuntu to Ubuntu Classic
- Click Login.
In case for some strange reason this option is not available, try running the following command first:
sudo apt-get install gnome-session-fallback
To GNOME 3 / GNOME Shell
If you want to try Gnome 3.2 with Gnome-Shell, instead of Unity.
Installation: search in Software Center: gnome shell. Otherwise, you can enter the following command in a terminal ...
sudo apt-get install gnome-shell
If you decided to install Gnome Shell, you may also be interested install the Gnome Shell 3.2 extensions.
cinnamon
Cinammon is a fork of Gnome 3 used and developed by the creators of Linux Mint that allows you to have a lower task bar with the classic Start Menu.

sudo add-apt-repository ppa: gwendal-lebihan-dev / cinnamon-stable sudo apt-get update sudo apt-get install cinnamon
10. Install Indicators and Quicklists
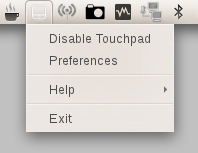
Indicators - You can install many indicators, which will appear on the top panel of your desktop. These indicators can display information about many things (weather, hardware sensors, ssh, system monitors, dropbox, virtualbox, etc.).
A complete list of indicators, along with a brief description of their installation, is available at Ask Ubuntu.

quicklist - Quicklists allow you to access common functionalities of the applications. They run through the bar that appears on the left on your desktop.
A complete list of quicklists, along with a brief description of their installation, is available at Ask Ubuntu.
11. Install Compiz Settings Manager & some extra plugins
Compiz is the one who makes those amazing stationery that leaves us all speechless. Unfortunately Ubuntu does not come with any graphical interface to configure Compiz. Also, it doesn't come with all the plugins installed.
To install them, I opened a terminal and typed:
sudo apt-get install compizconfig-settings-manager compiz-fusion-plugins-extra
12. Remove the global menu
To remove the so-called "global menu", which makes the applications menu appear on the top panel of your desktop, I simply opened a terminal and typed the following:
sudo apt-get remove appmenu-gtk3 appmenu-gtk appmenu-qt
Log out and log in again.
To revert the changes, open a terminal and enter:
sudo apt-get install appmenu-gtk3 appmenu-gtk appmenu-qt
If you are a lover of the global menu and you don't like that LibreOffice I don't support it, I opened a terminal and wrote the following:
sudo apt-get install lo-menubar
That should fix the problem.
That is really attention-grabbing, You're a very professional blogger. I have joined your feed and look forward to in quest of extra of your great post. Additionally, I have shared your website in my social networks
my homepage :: musicians
Excellent Sir Let's use Linux, I would like to know if I can install a C compiler for microchip PIC microcontrollers
Very good content, I would like to know how to install the cube program, which makes the screen to press alt + tab move the screen away and the desks move like a cube plz my email is jhsantonio@gmail.com
that cube is called compiz, it can be installed from synaptics, to be able to use it well you must have opengl 3d effects capacity on your video card, you must install the compiz manager as well
This page really is wonderful. thanks here i found many solutions. Add even more of your great knowledge,
Good to serve you!
A hug! Paul.
A question friend ... I am installing Ubuntu Server and I get a message that the program has no candidate for installation .. just as I wanted to install this link from another machine:
sudo apt-get install compizconfig-settings-manager compiz-fusion-plugins-extra
and the following appears:
The admin directory (/ var / lib / dpkg /) could not be locked, maybe some other process is using it?
you can tell me what happens or if you have any answer ..
Possibly the ubuntu market closed unexpectedly when you were installing something and then the files that prevent the simultaneous installation of programs were not deleted.
To solve the problem, you just have to open a terminal and enter:
sudo rm / var / lib / apt / lists / lock
sudo rm / var / lib / dpkg / lock
Let me know if that was solved.
Cheers! Paul.
thanks everything is going perfectly 🙂
Yeah !! Excellent, thanks. God Bless You (Tip: Add the Mass-Utils installation in the drivers)
thanks for the contribution …… very constructive
THANK YOU FRIEND, FROM SAN CARLOS COJEDES VENEZUELA, I AM AN ENTHUSIASTIC USER RECENTLY ARRIVED AT LINUX UBUNTU.
AS THEY SAY IN THE ANGLO-SAXON LANGUAGE. KEEP UP YOUR GOOD WORK.
KINGS PANDARES
Thanks Carlos!
Hug! Paul.
Excellent compilation for those of us who are new to Linux, I have a question and it is, is this also applicable for Kubuntu? because I understand that they are basically the same distributions but the only thing that changes is the KDE desktop for Gnome.
some things yes, and others no, many times the packages are called differently and the characteristics are not met ... without going any further ... unity in kubuntu does not exist
Greetings Friend The truth is that I want to start in Ubuntu with version 12.04 tls is valid for a novice, I want to install it on the entire disk but keeping my win xp documents is valid you know of some documentation about it
Greeting Julio Paez Venezuela
it helped me a lot !!! thanks
very good ,, but I have a problem with the ubuntu, is that the OS does not have brightness, and I do not see anything that solution I can give?
Hello. Look when I'm going to install the flash player in the terminal and when it asks for the password, it won't let me write it, what do I do?
Many thanks. Now my Ubuntu was a penny and I even find Unity more pleasant. Cheers
thousand thanks
Thanks for making free software possible for newbies. Hard to imagine the immense service that you render to this community. THANK YOU !!!
simply MAGNIFICENT, thanks for the contribution !!
you are a makina !!!
just what I was looking for, that I have a memory, that I do not remember from time to time.
Greetings.
Thanks very good!!
You're welcome! A hug! Paul.
You're welcome! A hug! Paul.
having repositories so "updated" creates instability and they will end up reinstalling the OS every 3 months. that does not suit anyone,
Thank you! Cheers! Paul.
and finally sudo rm -rf /
Thanks for the tutorial, it went very well
These are the asshole comments of people suitable to bullshit. For those of you who don't know, never type this command because it clears the root system. Buy a brain, gil!
a great help !! I was hesitating between ubuntu and mint because of the codecs, definitely ubuntu and thank you very much
Very good what you explain and show, and everything accommodated,: I like: ...
Colleagues I hope you can help me ...
The truth is that I am already very tired of so many problems that I have had with Ubuntu 12.04, I really don't want to go back to Windows.
I reinstalled ubuntu 12.04 because there were some errors in the signature (the truth is, I'm not sure what it means) and the only thing that occurred to me was to install OS 12.04 again, hoping that everything would be solved and I would be happy with ubuntu again.
Now again it has had failures and the truth is I don't know what to do anymore ... I get these errors (1) when I try to update from the terminal with update and upgrade because I can no longer open the update manager, synaptic and the software center.
(1) W: An error occurred during signature verification. The repository is out of date and old index files will be used. The GPG error is: http://extras.ubuntu.com precise Release: The following firms were invalid: BADSIG 16126D3A3E5C1192 Ubuntu Extras Archive Automatic Signing Key
W: GPG error: http://ppa.launchpad.net precise Release: The following firms were invalid: BADSIG 5AF549300FEB6DD9 Launchpad PPA for Florian Diesch
W: GPG error: http://ppa.launchpad.net precise Release: The following firms were invalid: BADSIG 6AF0E1940624A220 Launchpad PPA for TualatriX
W: Unable to get http://extras.ubuntu.com/ubuntu/dists/precise/Release
I thank you in advance for your support.
As the poster says, there is an error on line 57 of the
file /etc/apt/sources.list.
I opened a terminal and wrote the following command to open the file with gedit using administrator privileges:
sudo gedit /etc/apt/sources.list
Then, you have to enable the option to see the line numbers. Look in the gedit menu (I don't have it installed now and can't remember by heart, but I think it was the Format menu).
Once the lines are numbered, look for line 57.
Copy it and send it here so we can see what's wrong. It would also be useful if you could tell us which distro and version you are using.
Cheers! Paul.
When giving sudo apt-get update I get this:
E: Malformed line 57 in source list /etc/apt/sources.list (dist parse), E: Could not read source lists, E: Could not parse or open package lists or the status file. ' searching I found that commenting on line 57 would work but nothing.
That could be happening?
Thank you.
dmahec@yahoo.es
Finally after days struggling with this. Just download the Ubuntu 12.04 ISO, boot from CD and loading the OS gave me the alternative to uninstall the faulty 12.04 and reinstall again. The best surprise was that in addition to correcting all the bugs it kept many features such as restricted codecs, the language in Libre Office and many other things that saved me from doing it again!
Hello Gumax, I have the following problem… it is the whole procedure but when I force a version in my alternatives only version 295.40 and two versions 295.53 appear but there is no 295.33 and I cannot find how to load it. I would like to know if you have any ideas on how to solve this problem since I have searched all over the web and cannot find anything.
From already thank you very much.
Uhmmm .. to think that when I used Ubuntu I did it because it was easier to install and that is why I recommended it, because many things were already configured. Then I abandoned Ubuntu in favor of Debian. To which they told me that it was very cumbersome to configure it. Uhmmm, again, the friendly distro for those who come because of how easy it is to install, I think it is not anymore. But it is a good experience to quit and migrate to another distro.
Thank you! I'm going to touch up things right now.
great!
Simply…
a magnificent job
Cheers(:
Thanks this is 100% usable and functional ...
Good tutorial even though I miss Ubuntu 10.10 with that I started in the free world and now I have Linux Mint 13 and it has gone well but I will never forget 10.10.
Excellent information, thank you very much.
Very good tutorial, thank you very much
Excellent contribution. Thank you so much
Great, really thank you very much, you helped me a lot, this page is good.
GREETINGS FROM HONDURAS TO ALL OF YOU.
I want to learn, I am migrating from windows to linux ubuntu. Thank you, any information is very useful to me
Thank you, thank you, the info helped me a lot
Thank you very much, the truth is a golden post. Highly recommended for people just starting out with Ubuntu
Hello good morning, it happens that I install ubuntu at the moment it restarts and runs the program, it asks me for a username and password.
I enter the name that I put and its resective password and it appears sixto@ubuntu.com: - $ what do I do
Hello, thankful for your post, I tell you when I put a smartphone in Ubuntu 12.04 it does not recognize it.
If you can help I will appreciate it.
a hug.
Hi Carlos!
For a few days we have made available a new question and answer service called Ask DesdeLinux. We suggest that you transfer this type of consultation there so that the entire community can help you with your problem.
A hug, Pablo.
Hi, Pablo,
I just wanted to say thank you!
You're welcome! Cheers! Paul.