Creating an app for Ubuntu Touch
Third part of this post series (Part, second) where we are building an application to Ubuntu Touch or for the same Ubuntu desktop. I am going to add a part that happened to me in the previous post, and that is that although we increased the variables of the failures, hits and points, then they were not shown on the screen, that is because we did not change the text property of the Labels:
Label {id: failures text: "Failures:" + nfaults color: "red"} Label {id: hits text: "hits:" + born} Label {id: points text: "Points:" + npoints fontSize: "medium "}
Continuation of the game logic
Time
Well, as we already know, the progressBar shows the time we have to answer a question. To manage the time we will use a Timer, the timer is an element that is repeated at an interval of x milliseconds, in this case each interval we will tell it to increase the progress of the ProgressBar; But before I look at whether it has reached the end of time or not, if it reaches the end, we must subtract a life.
You can see a line of code that we have not yet implemented (PopupUtils.open (dialog)), this line is to open the endgame dialogue in case we have no more lives (3 bugs eliminated), later in this post we will see how to do this dialogue.
Timer code (we can put it below the ProgressBar):
ProgressBar {id: time anchors.horizontalCenter: parent.horizontalCenter minimumValue: 0 maximumValue: 300} Timer {id: simpletimer c: 100 repeat: true running: true onTriggered: {if (time.value <time.maximumValue) time.value + = 1.0 else {nfaults = nfaults + 1 if (nfaults <3) {num = num + 1 Logic.nextQuestion (num) time.value = time.minimumValue} else {simpletimer.stop () PopupUtils.open (dialog)}} }}
As we can see, in onTriggered we put the code that will increase the progressbar adding 1 unit every 100 (interval) milli-seconds. Note that we have added two attributes to the ProgressBar, minimumValue and maximumValue, which, as you can see, is the maximum value and the minimum value.
To start and stop the timer:
simpletimer.start () simpletimer.stop ()
Options (50%, Freeze and Next)
First let's create three variables that control that the options can only be used once:
property int percent: 0 property int with: 0 property int next: 0
50%
Button {id: b50 text: "50%" onClicked: {if (percent == 0) {var correct = aDocument.contents.questions [num] .correcta if (correct == 1) {resp2.enabled = false resp3. enabled = false} else if (correct == 2) {resp1.enabled = false resp4.enabled = false} else if (correct == 3) {resp1.enabled = false resp4.enabled = false} else {resp2.enabled = false resp1.enabled = false} percent = 1}}
With enabled = false what we do is put the button so that it cannot be pressed, in such a way that we obtain the correct answer with aDocument.contents.questions [num]. Correct and from here depending on which one is correct «we eliminate »Two buttons that are not.
Freeze
Button {id: bCon text: "Freeze" onClicked: {if (with == 0) simpletimer.stop () with = 1}}
This is one of the easy ones, we just have to stop the timer with simpletimer.stop (), yes, we must turn it on again (and set the progressBar to 0) when we go through the question.
Next
Button {id: bNext text: "Next" onClicked: {if (next == 0) {num = num + 1 Logic.nextQuestion (num) next = 1}}}
We use the function that we already created to pass the question (nextQuestion).
Dialogues
To end the game we will use a Dialog, either because we have won (there are no more questions) or because we have lost (we have made 3 mistakes), to use the dialogs we must import the module:
import Ubuntu.Components.Popups 0.1
We are going to create the dialog that tells us that we have lost:
Component {id: dialog Dialog {id: dialogue title: "Game Over!" text: "You lost all lives :(" Button {text: "Quit" onClicked: Qt.quit ()} Button {text: "Start over" color: UbuntuColors.orange onClicked: {num = 0; Logica.nextQuestion ( num) npoints = 0 births = 0 PopupUtils.close (dialogue)}}}}
We have two buttons, one to close the application (Qt.quit ()) and another to start the game over. We initialize the variables to 0 and close the dialog.
To open the dialog:
PopupUtils.open (dialog)
To close it:
PopupUtils.close (dialogue)
Let's see the dialogue at the end of the game:
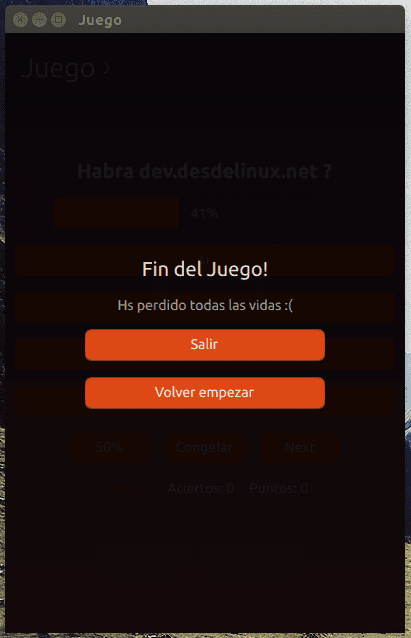
We can create a dialog exactly the same by changing the identifier and the text where it says that we have won.
Designing the question aggregate
When we design it in GTK, we create a dialog, but this time we will do it in a Tab, anyway it will have the same structure:
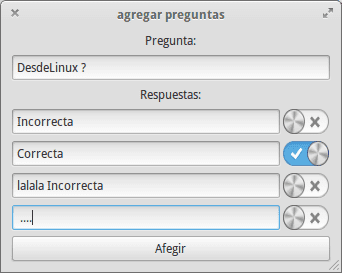
As we can see, we will use a Label, a TextArea to write the question, 4 TextField and 4 Switch; finally, a Button to add the question. Let's just look at the code:
import QtQuick 2.0 import Ubuntu.Components 0.1 Tab {title: i18n.tr ("+ Questions") Page {id: pageAdd Column {anchors.top: pageAdd.top anchors.topMargin: 50 spacing: 15 width: parent.width height: parent.height - 50 Label {id: question text: "Add a question to the database:" anchors.horizontalCenter: parent.horizontalCenter fontSize: "large"} TextArea {width: parent.width - 20 height: units.gu (12) contentWidth: units.gu (30) contentHeight: units.gu (60) anchors.horizontalCenter: parent.horizontalCenter} Row {spacing: 15 anchors.horizontalCenter: parent.horizontalCenter TextField {placeholderText: "Response 1" width: 300} Switch {checked: false}} Row {spacing: 15 anchors.horizontalCenter: parent.horizontalCenter TextField {placeholderText: "Response 2" width: 300} Switch {checked: false}} Row {spacing: 15 anchors.horizontalCenter: parent. horizontalCenter TextField {placeholderText: "Response 3" width: 300} Switch {checked: false}} Row {spacing: 15 anchors.horizontalCenter: parent.horizontalCenter TextField {placeholderText: "Response 4" width: 300} Switch {checked: false}} Button {text: "Add +" anchors.horizontalCenter: parent.horizontalCenter width: parent.width - 20}}}}
Let's see how it looks:
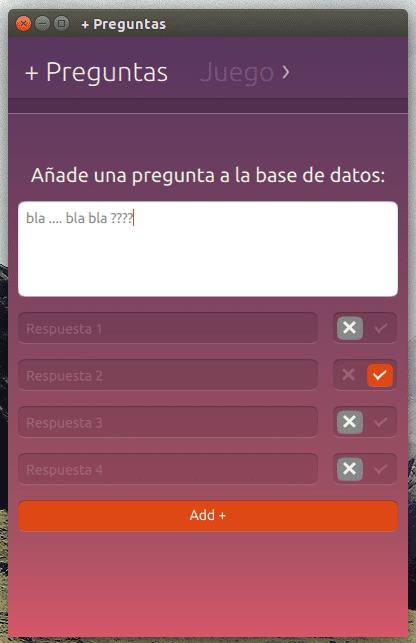
If we now test the Switches, we will see that we can mark them all as the correct question, and naturally only one can be, therefore we will do the following: we will be able to provide an identifier to each switch (also to the textfields since we will have to obtain the content to save it to the database) according to your answer, and when we click it we will put all the others in checked = false mode:
Row {spacing: 15 anchors.horizontalCenter: parent.horizontalCenter TextField {id: res1 placeholderText: "Response 1" width: 300} Switch {id: sw1 checked: false onClicked: {if (sw1.checked == true) {sw2. checked = false sw3.checked = false sw4.checked = false}}}}
If we try it now we will see how we can only mark one.
Very good and well explained articles.
by the way, you recommend some books, YouTube channels or Blogs that are in Spanish to learn how to develop in QML for Ubuntu.
Well, in Spanish there are surely some tutorials on YouTube, or the odd blog, but the truth is that there is little material.
I see that you connect through a nokia if it is a symbian of the last, you can also create applications with QML, in fact it is how I learned, here is the nokia development website: http://developer.nokia.com/ (there are tutorials, complete projects ...)
Excellent post series, thanks for the input.
Thanks for the tutorial,
But I don't understand how the questions and answers are added in the database.
With the add button.
Thanks for everything.