We return to the series of tutorials on how to create our own operating system. I suppose you will like this chapter a lot because we can finally interact with our operating system. Today we will read the keyboard input. For this, the scheme is similar to that of the timer. We have to use IRQs anyway so we will start the same as with the timer.
ND_IRQ_InstallHandler (1, & ND_Keyboard_Handler);
Our keyboard handler, however, is somewhat more complex since we are reading the keys and depositing them in a buffer.
extern "C" void ND_Keyboard_Handler (struct regs * r) {unsigned char scancode = ND :: Keyboard :: GetChar (); if (scancode! = 255) {ND :: Screen :: PutChar (scancode); stringBuffer [stringPos] = scancode; stringPos ++; }}
http://gist.github.com/634afddcb3e977ea202d
We can check how we call a function called ND :: Keyboard :: GetChar. There we obtain the character and then if it is not an empty character (here I have used 255, we would have to use a better system) we put the character on the screen and store it in a simple buffer of chars (this is also subject to improvement, the current system may overflow).
nsigned char ND :: Keyboard :: GetChar () {unsigned char scancode; scancode = (unsigned char) ND :: Ports :: InputB (0x60); if (scancode & ND_KEYBOARD_KEY_RELEASE) {return 255; } else {return en_US [scancode]; }} char * ND :: Keyboard :: GetString () {while (stringBuffer [stringPos-1]! = '\ n') {} stringPos = 0; return stringBuffer; }
http://gist.github.com/2d4f13e0b1a281c66884
Here we can see how the key that has been pressed is obtained. At 0x60 there will always be the last key pressed. In fact, it can be read directly without having to use the IRQ, but then we will not know how to identify when a change has occurred. There we check with the AND operation that the code we obtained corresponds to a key that has been released.
In that case we return 255 (because we will ignore it later) and otherwise the key has been pressed. In that case we return the position of an array called en_US. What information does this array contain? This array is what we would call a keymap or a character map. As you will know, different languages have different keyboards and they are not supported as they overwrite the keys. Thus en_US will give us the key corresponding to each code and it will work on an American keyboard.
unsigned char en_US [128] = {0,27, '1', '2', '3', '4', '5', '6', '7', '8', '9', '0 ',' - ',' = ',' \ b ',' \ t ',' q ',' w ',' e ',' r ',' t ',' y ',' u ',' i ',' o ',' p ',' [','] ',' \ n ', 0, / * Ctrl * /' a ',' s', 'd', 'f', 'g', 'h', 'j', 'k', 'l', ';', '\' ',' ``, 0, / * Left Shift * / '\\', 'z', 'x', 'c', 'v', 'b', 'n', 'm', ',', '.', '/', 0, / * Right shift * / '*', 0, / * Alt * / '', 0, / * Caps lock * / 0,0,0,0,0,0,0,0,0,0, / * F1-F10 keys * / 0, / * Num lock * / 0, / * Scroll lock * / 0, / * Home key * / 0, / * Up arrow * / 0, / * Page up * / '-', 0, / * Left arrow * / 0, 0, / * Right arrow * / '+', 0, / * End key * / 0, / * Down arrow * / 0, / * Page down * / 0, / * Insert key * / 0, / * Delete key * / 0,0,0, 0, 0, 11, / * F12-F0 Keys * / XNUMX};
http://gist.github.com/bf52085aec05f3070b65
There was also a defined function that got a phrase. The purpose is simply to more easily access the strings from the applications that need it, at the moment only one. I'm talking about NextShellLite, a reduced version of the possible future shell that NextDivel would have. The purpose of NextShellLite is only to provide a reduced shell to gradually test new features. I am not going to put the shell code here but I have included it within the NextDivel code.
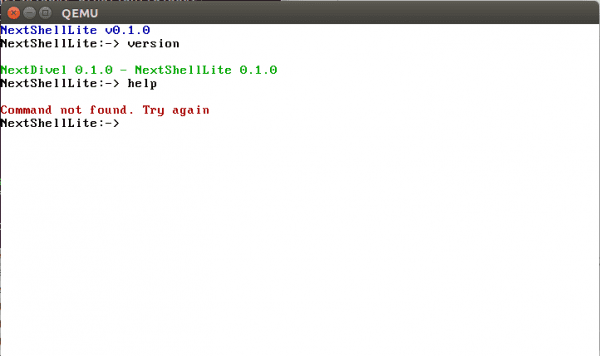
At the moment it does not work as a separate program but as a function called by the kernel, mainly because we have not yet added the option to run executables. And of course, some pictures of how the shell works with the new keyboard input functions.

excellent tutor! thanks 🙂
The truth is that I never followed the tutorial because in the first part it gave me an error when trying to compile but I don't remember what error it was
Sorry for my crass ignorance ... from where are these codes written? From the terminal ??
The codes are part of the source code. I do not put it complete because otherwise the post is all code and nothing explanation. I recommend that you read the tutorials from the beginning if you want to follow it. You can also check the full source code here (http://github.com/AdrianArroyoCalle/next-divel)
How would the improvement be so that overflow does not occur?
Kady, have you checked the repository code yet? There the maximum size is established, as well as functions to control it, there you can make the change in size or implement a reasonable way to free the buffer when it becomes saturated
I leave the link for you to check it https://github.com/AdrianArroyoCalle/next-divel/blob/master/src/start/ND_Keyboard.cpp
Hello very interesting, are you going to continue with this «series» of Emulating Linus Torvals?
Can you recommend any book, information to be able to make a kernel like this?
Regards!!
Hi. Thanks for the tutorial. Please, can you recommend a book on this that you have made that is not "Operating Systems" by Tanenbaum? Thank you very much in advance.
Greetings.