Hello friends! Today I share something I learned this week playing with GIMP.
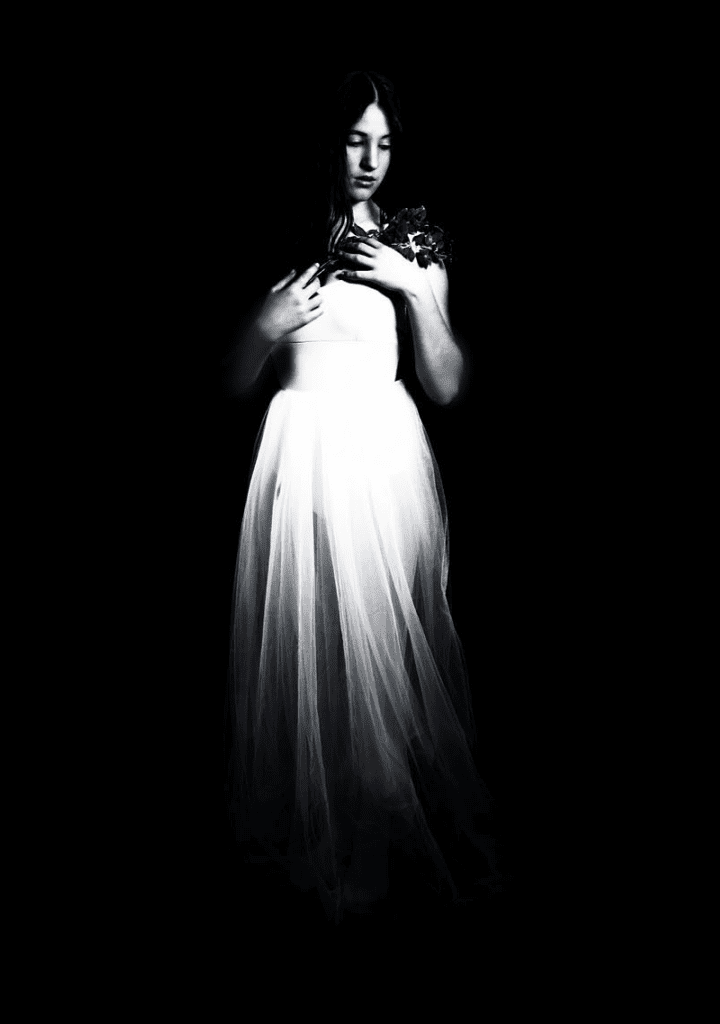
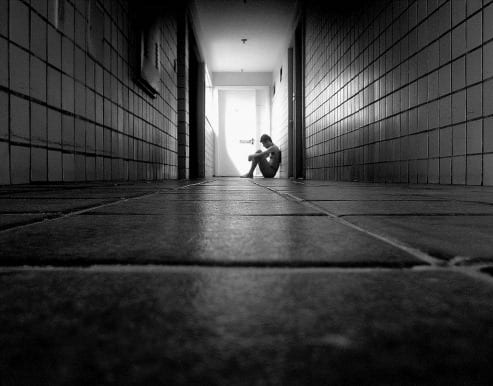
The idea is simple: mix two different images, one inside the other, to capture the lyrics of a song in it. The first step was to find some images that inspired me, so I searched, searched and searched ... until I found the ones that convinced me.
Working…
Once I got the images (of 'San G') I started my work with GIMP
I. First I opened the layered images: from the menu File »Open as layers ... O well Ctrl + Alt + O
Then I added one more layer of white, leaving the image of the woman in higher order, in the middle of the man and below the white layer.
II. I changed the opacity of the top layer to see where the bottom layer (which is smaller in size) was located. Then I used the tool MOVER M on the middle layer, taking care to choose the option to move the layer, positioning it in the right place.
III. Once the layers were ordered, I selected with the tool Select by color Shift + O the black background of the main image. Then I chose the man's layer to work with, looking away from the top layer (clicking with the pointer on the eye that appears in it) to see what I'm doing. So with the selection on this layer what I do is erase it, so that it is cut to the shape of the woman's dress.
IV. Good. With all this done, I began to do a series of trial and error tests, playing with the values of the modes of each layer, until I got the desired image (Yes, I know, it is a bit tedious and I miss my method; how each mode works. Then obviously you have to read the manual why this is so). I leave the order and modes of each layer:
- Top Layer (Female) - Mode: Multiply - Opacity: 100%
- Middle Layer (Male) - Mode: Normal - Opacity: 100
- Bottom Layer (white background) - Mode: Normal - Opacity: 100%
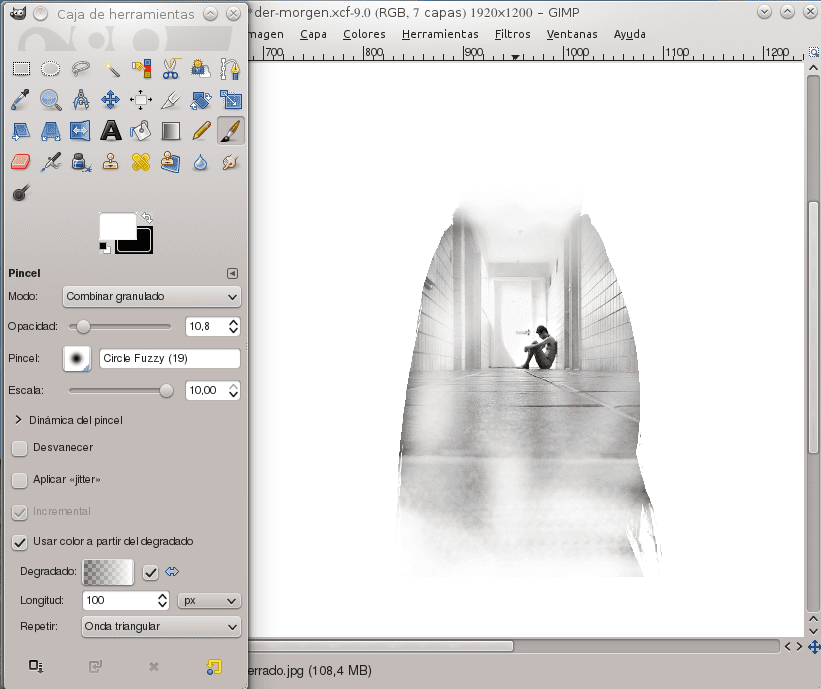
V. But he wasn't ready yet. The edges of the middle image were very dark and contrasted a lot with the woman's dress, giving an ugly result. After trying several methods, I found the right tool. I used the brush P to paint the dark parts of the image and lighten them a bit. I show you a picture of the brush settings.
VI. I finally saved the finished image. Then to write the text I just inserted the image in a text document of LibreOffice Writer and then in preview I took a screenshot with Ksnapshot.
I leave you the finished image.

Thanks for reading, I hope you liked it. Any questions you have, ask.
Until next time!
mmm, interesting, so at first reading I did not understand, but I am going to see it in more detail, I would normally erase the contours of image 1 by hand with degraded rubber and paste it on the woman, but there are always several techniques to achieve the same result
regards
Nooo haha!
You have to try changing the layer modes or even the brushes as well, in addition to their transparency. It makes things a lot easier for you.
I always try, if possible, to use the selection tool to erase. Little by little I am discovering new things, like this that I present here.
I recommend that you read the manual a bit (I left the link in the post) to learn more about the layer modes. It is very simple because it explains everything with examples.
One last thing. I always use and abuse clear layers. Anything I paste I do on a new layer, so if I'm wrong, in the worst case I just have to erase that layer and work on it again. Remember that some tools do not allow you to undo the work in parts, and the option to undo is not infinite either.
Well, I thought it was something else that couldn't be done in Photoshop, but still, good tuto (actually, it's pretty fussy working with layers in GIMP).
The truth is that what I do I am learning little by little, I only use GIMP to improve some photos or create these things. It's like a hobby.
And I don't even know Photoshop by sight, so I can't compare the two. That's why I didn't quite understand that "it's quite fussy to work with layers in GIMP". The new version of GIMP (2.8) I know has an improvement with the layers to group them and work them together, but I have not tried yet (I continue with 2.6).
hello internauta shupacabras, how do you have to press control + w to make it go well
That's good! Keep uploading Gimp tutorials, I love this program
Thank you!
Excellent tutor!
Good thank you!
I like very much
hello netizens would someone know how to open the gimp