General index of the series: Computer Networks for SMEs: Introduction
The fundamental purpose of this article is to show how we can achieve a DNS and DHCP server in openSUSE via its superb YaST configuration tool, and all -or almost- through its graphical interface.
We promise you a complete installation via graphical interface, with the exception -Every rule has its exception, right?- of a pair of consoles to check the correct operation of the pair Bind9 + ISC-DHCP-Server, configured using the YaST - Yet Another Setup Tool which is a set of very good tools for software management and system configuration.
The first service -and the most important in our personal criteria- that must be implemented in a SME Network, is the service DNS - DHCP. If we do not want to manually configure the network parameters of each of the workstations, we must not do without the DHCP service, as explained later. There is also the time service or NTP.
DNS: background
In April 2013 we published in DesdeLinux a series of 5 articles dedicated to implementing a primary DNS on Debian:
- Primary Master DNS for a LAN on Debian 6.0 (I)
- Primary Master DNS for a LAN on Debian 6.0 (II)
- Primary Master DNS for a LAN on Debian 6.0 (III)
- Primary Master DNS for a LAN on Debian 6.0 (IV)
- Primary Master DNS for a LAN on Debian 6.0 (V)
A compendium of the above articles in HTML format was even offered for download.Although they were written -back then- With the Debian "Squeeze" release, the definitions and concepts covered in them remain fully valid.
That is why we are not going to do a formal Introduction to the DNS issue. Read these articles if you have any questions, and they also provide links to specialized DNS literature.
En openSUSE, the most important folders and files related to this service are:
- archive /etc/named.conf
- binder /etc/named.d
- archive / etc / sysconfig / named
- program / usr / sbin / named-checkconf, / usr / sbin / named-checkzone, / usr / sbin / named-compilezone, / usr / sbin / named-journalprint
- binder / usr / share / doc / packages / bind /
- binder / var / lib / named /
- binder / var / lib / named / dyn /
- archive /etc/init.d/named
- symbolic link / usr / sbin / rcnamed
DHCP
The purpose of the Dynamic Host Configuration Protocol - Dynamic Host Configuration Protocol (DHCP), is to assign the configuration parameters for a network centrally -through a DHCP server- instead of manually configuring each workstation. A computer configured using DHCP has no control over its static IP address. This client computer is configured in such a way that it allows its network configuration automatically, according to the server's directives.
DHCP service makes life easier for Network Administrators. By configuring the DHCP server, you can define parameters such as domain name, gateway, time or time server, DNS servers, WINS server if used, broadcast IP address - Broadcast, IP address and network mask of the client computer, name of the client computer, and many other parameters.
Any changes, even major changes to the parameters relating to IP addresses and network settings, can be implemented centrally, if we edit or change the DHCP server settings.
Normally, the DHCP server keeps a complete record of assigned IP addresses or leases, and usually the key parameter is the MAC address of each network card or NIC - Network Interface Card. In openSUSE, the IP addresses leased or leases granted by DHCP are saved in the file /var/lib/dhcp/db/dhcpd.leases.
The package dhcp-doc, which is installed in the folder / usr / share / doc / packages / dhcp-doc, offers very good documentation -in English- about this service.
The DHCP server configuration file is /etc/dhcpd.conf. Another DHCP configuration file is / etc / sysconfig / dhcpd, and is where you define for which network interface -or which network interfaces- the server will respond.
And since we are in the middle of the systemd, we also have the file /usr/lib/systemd/system/dhcpd.service.
As we promised not to use the console, we left the rest of the inquiries to lovers of the bash. For the record The Console Doesn't Bite.
Suggestions
Even though we promised not to use the console except a couple of times, we suggest run the following commands -as root- after the DNS - DHCP service has granted at least one dynamic IP address, which assumes they have completed the complete installation of both services and are in a free period of checks:
- systemctl status named.service
- systemctl status dhcpd.service
- systemctl status dhcp-server.service
- named-journalprint /var/lib/named/dyn/desdelinux.fanX.jnl
To the sick of «versionitis»We recommend you take a look -especially to the dates of the headings- to files:
- /etc/init.d/named
- /etc/init.d/nfs
- /etc/init.d/cifs
- /etc/init.d/rpmconfigcheck
and in general to all the files in the folder / Etc / init.d.
DNS queries made by Windows clients
Again, and in a console, run as the user root the command:
- journalctl -f
Spend some time watching Windows clients continually query DNS for sites outside of the Enterprise LAN. In the example developed in this article, no redirector is included - forward, for the explicit purpose of showing this feature of Microsoft® Windows operating systems.
The kernel that installs openSUSE with desktop environment
- It is our preference to use a core as stable as possible for the servers. Then we suggest the procedure to achieve it.
As we select an installation with the LXDE desktop, openSUSE installs by default the «kernel-desktop»Optimized for desktops.
If we later want to use the standard kernel - kernel-defaultWe only have to install it through the YaST Package Manager, restart the system, choose «Advanced options for openSUSE»On the home screen, and select the kernel-default. The versions of both kernels are the same.
Finally, we must remove the kernel-desktop through the same Package Manager, since the GRUB considers it more up-to-date than the kernel-default, and if it exists, it will always select it as the first option. Since we don't like to "mess around" the GRUBWe prefer to remove the desktop kernel, simply because we won't be using it anymore.
Note: When we remove the system from kernel-desktop, all installed versions of that kernel are automatically removed. We can check it again by choosing "Advanced options for openSUSE" on the home screen.
Important advice
- Do not embark on the adventure of implementing a DNS - DHCP service with any operating system, without first being clear about the fundamental theoretical concepts. With services as important to a network as DNS, conceptual errors pay dearly in a production environment.
Services that we can disable to save resources
By means of the YaST «Service Manager» module, once the entire installation is finished and in order to save hardware resources, we can disable a series of services that, in this particular case, are not necessary. Examples:
- cups: printing system Common Unix Printing System
- lvm2-lvmetad: Logical Volume Manager metadata daemon, only if we are not using logical volumes
- ModemManager: Modems Manager
Abbreviations
I'm an enemy of translations, ok?
- GRUB: command console GRand Unified Bautoloader
- NTP: Network Time Protocol. Protocol used for the synchronization of the clocks of different computers through the networks
- LAN: Local area network - Local Aarea Network
- SPF: "Sender Policy Framework«. Anti SPAM mechanism that allows a mail server to verify that the SMTP source is valid for the address of sending an email.
- TSIG: Transaction Signature - Transaction SIGnature. Defined in the RFC 2845 "Secret Key Transaction Authentication for DNS«
- UUID: Unique Universal Identifier - Universally Unique Identifier
Step-by-step installation through images
We captured a total of 71 screens to reflect a Step by Step as faithful as possible. In each of the installation screens, openSUSE facilitates our work with the existence of a Help button - Help-usually located in the lower left.
We will not give a description of each screenshot as it is considered redundant. As the saying goes, «A picture is worth a thousand words«.

Image 01 - DNS and DHCP in openSUSE
Image 02 - DNS and DHCP in openSUSE
Image 03 - DNS and DHCP in openSUSE

Image 04 - DNS and DHCP in openSUSE
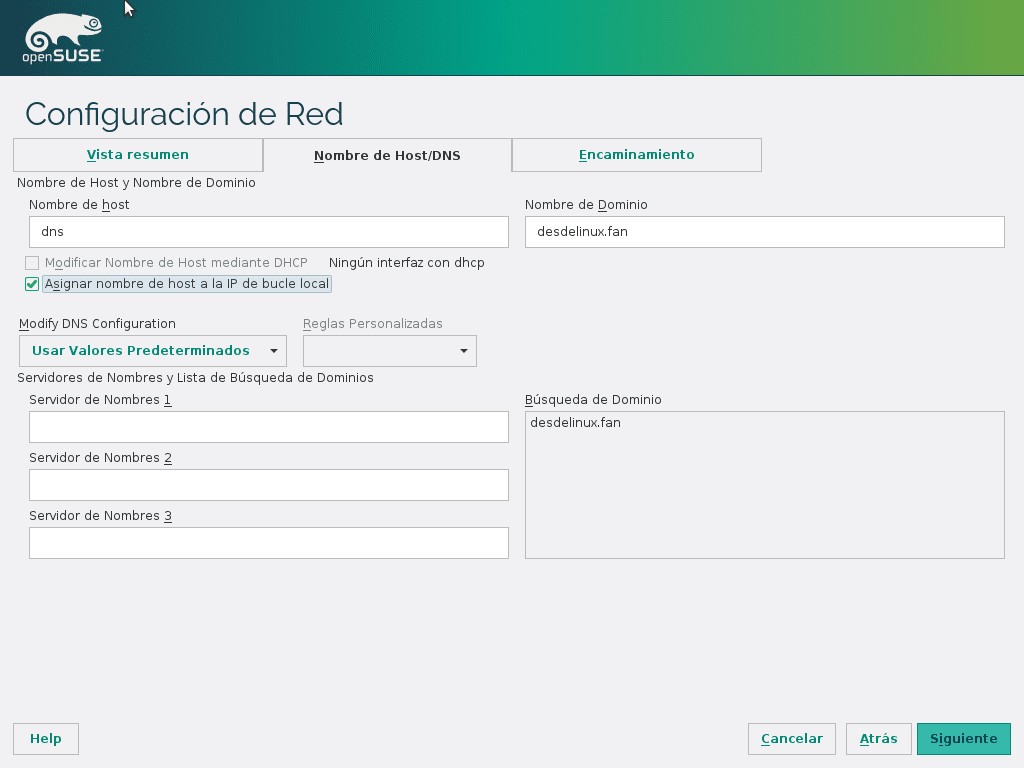
Image 05 - DNS and DHCP in openSUSE
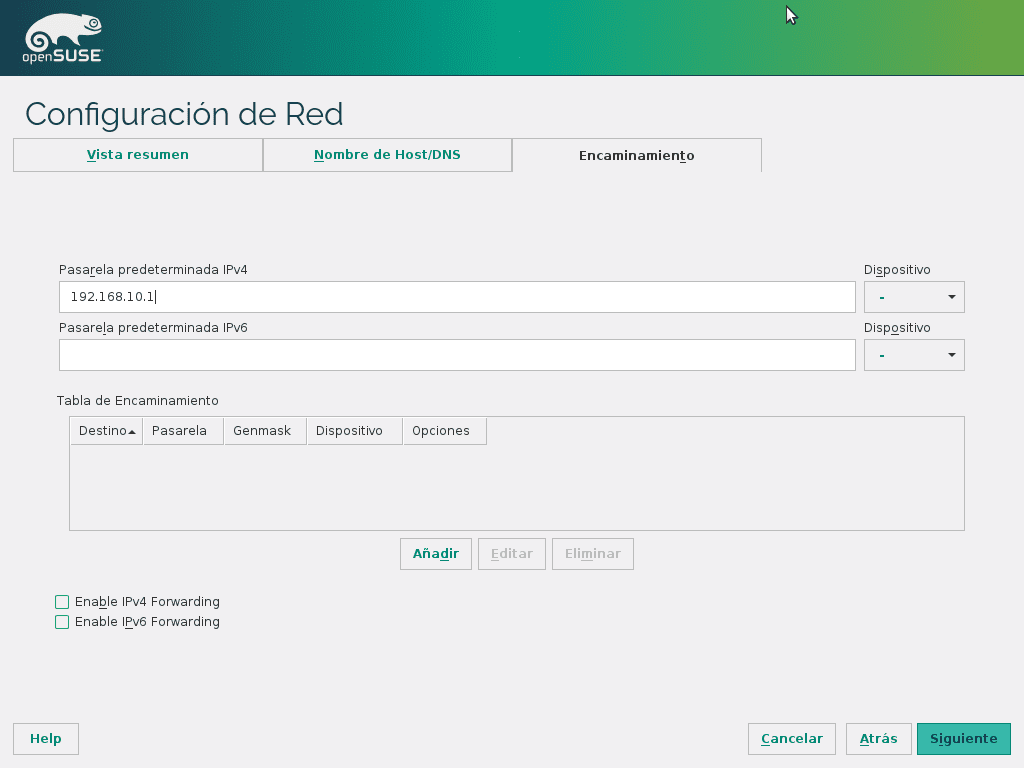
Image 06 - DNS and DHCP in openSUSE
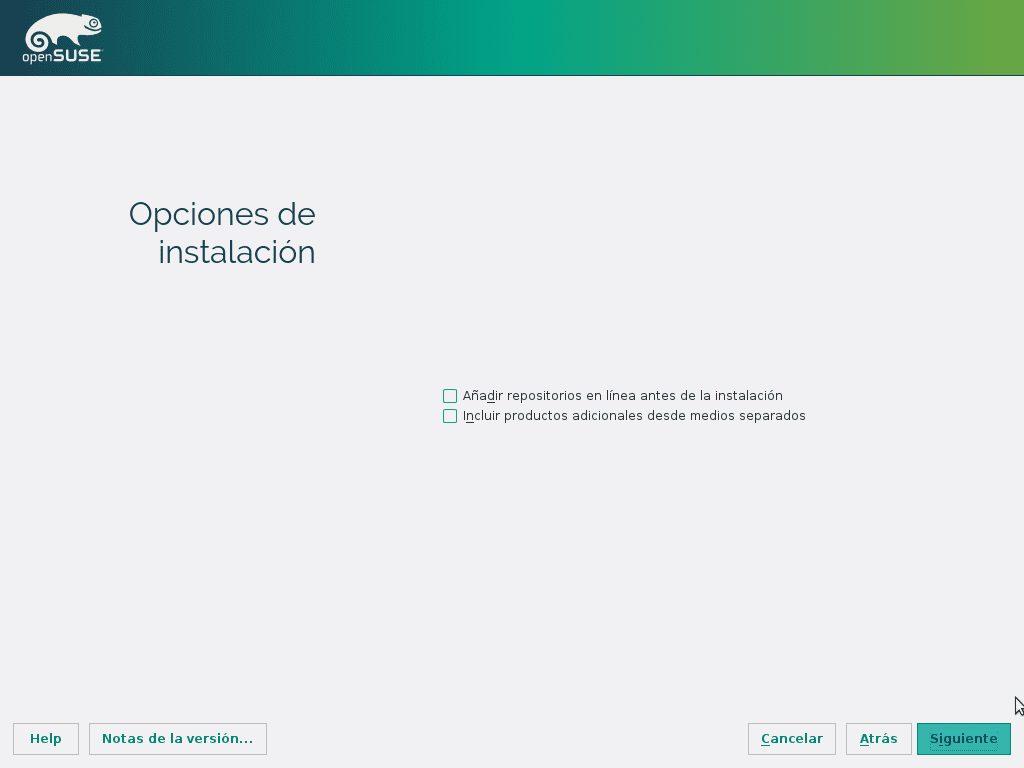
Image 07 - DNS and DHCP in openSUSE

Image 08 - DNS and DHCP in openSUSE
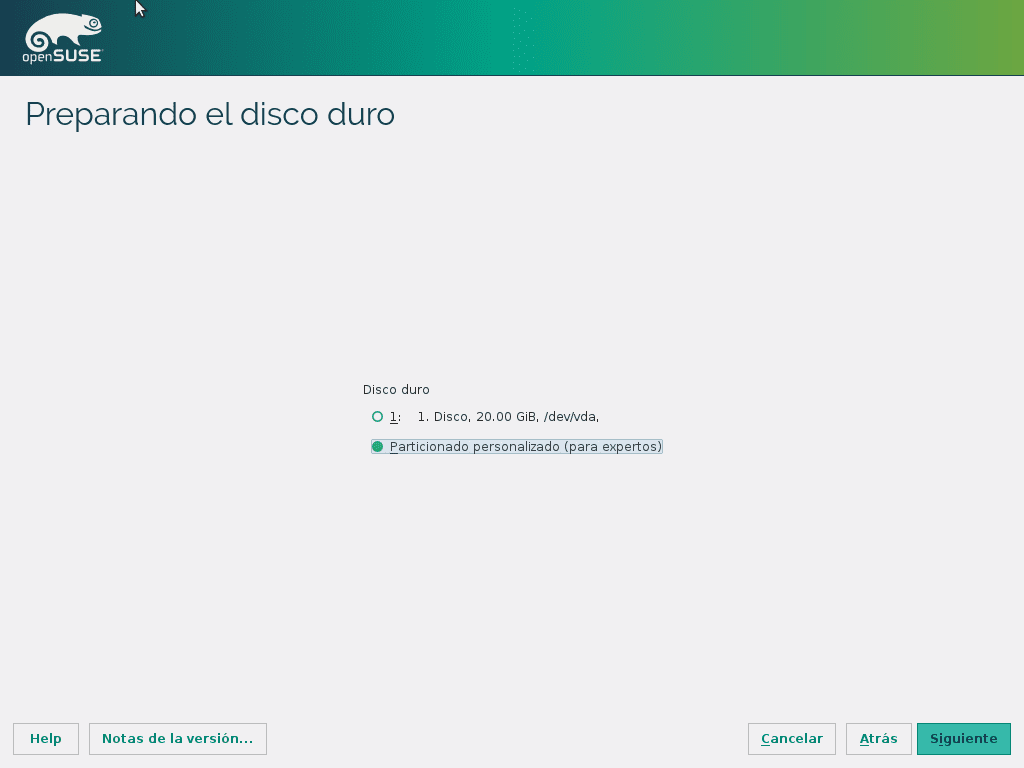
Image 09 - DNS and DHCP in openSUSE
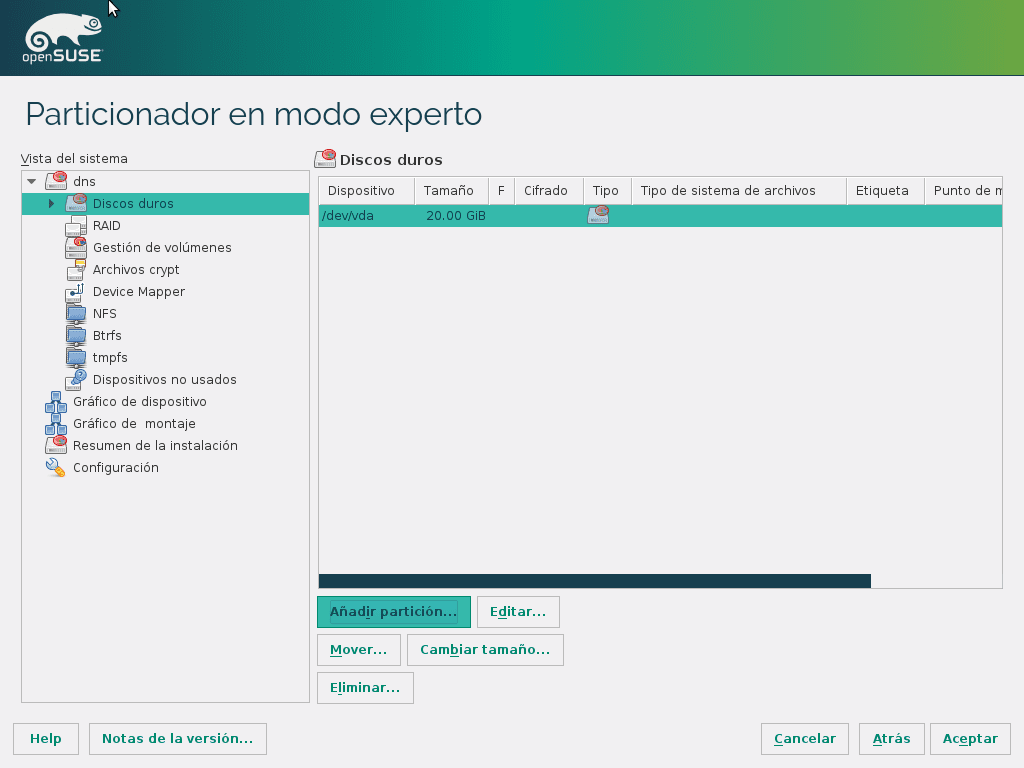
Image 10 - DNS and DHCP in openSUSE

Image 11 - DNS and DHCP in openSUSE
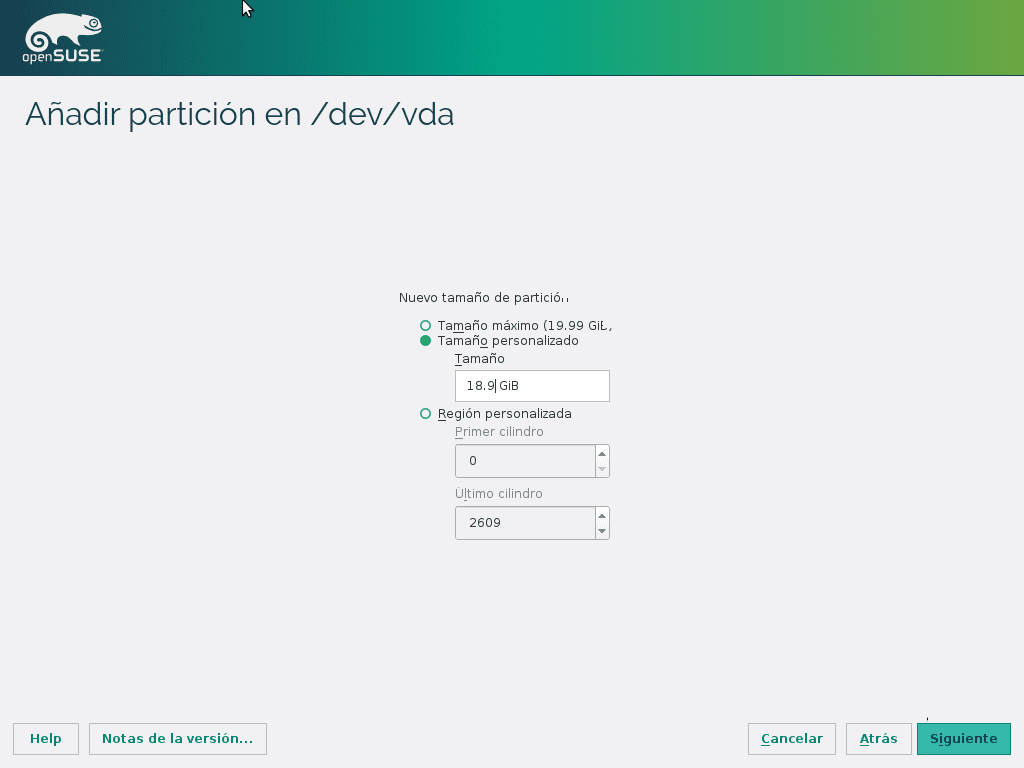
Image 12 - DNS and DHCP in openSUSE

Image 13 - DNS and DHCP in openSUSE
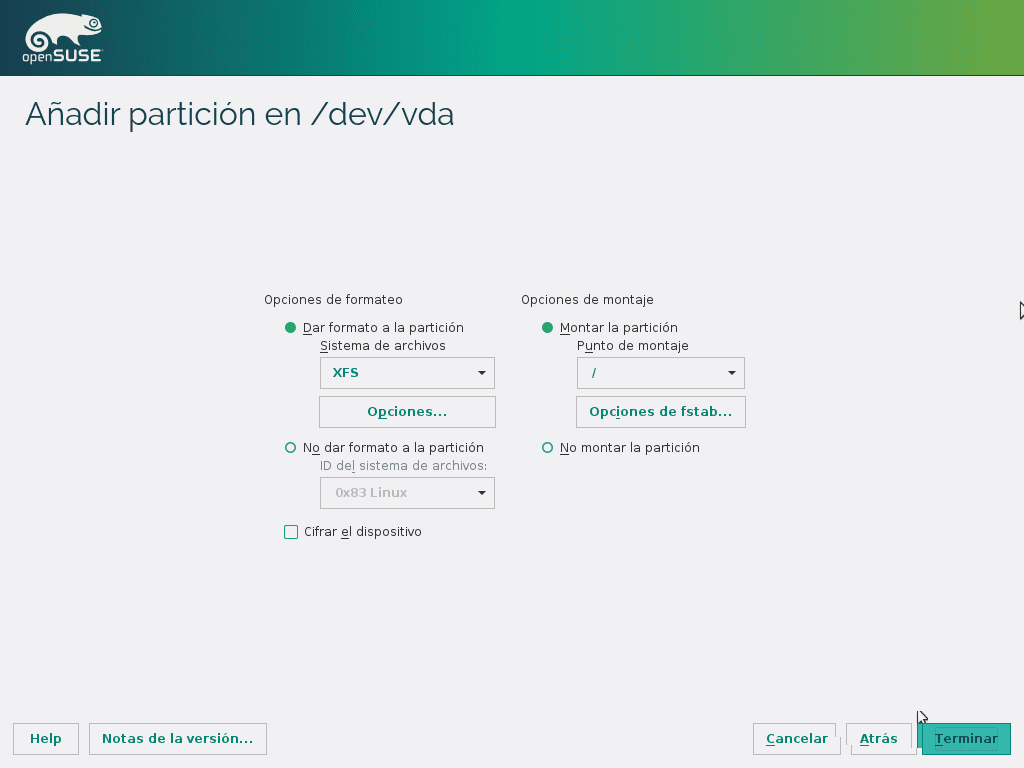
Image 14 - DNS and DHCP in openSUSE
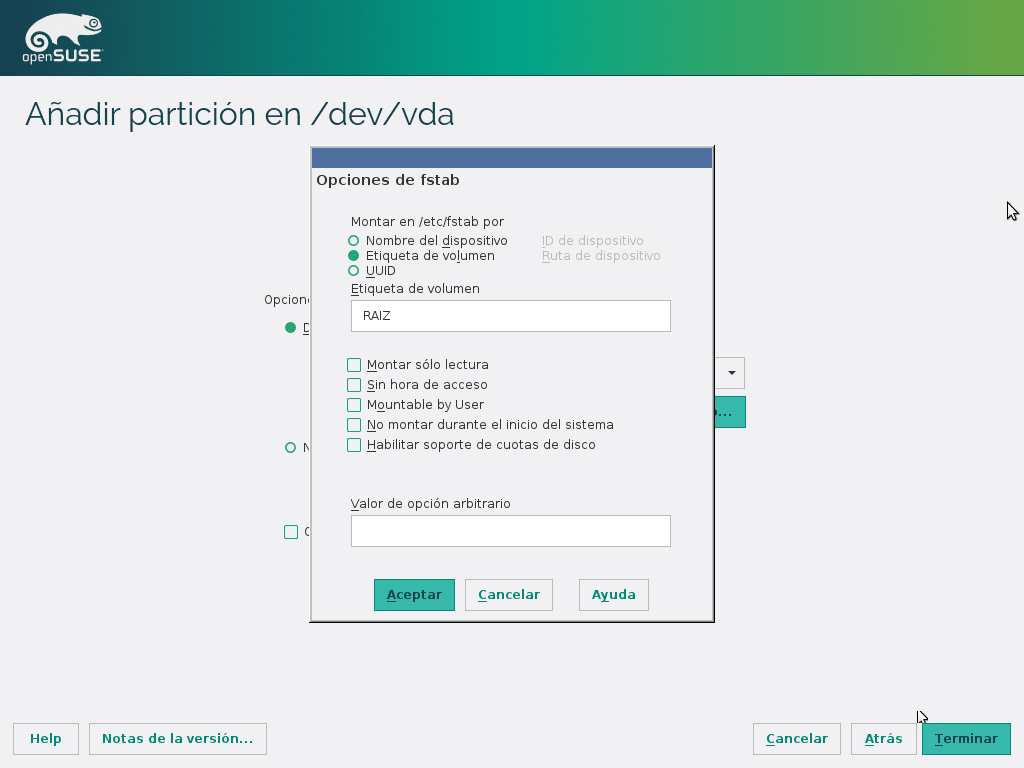
Image 15 - DNS and DHCP in openSUSE

Image 16 - DNS and DHCP in openSUSE
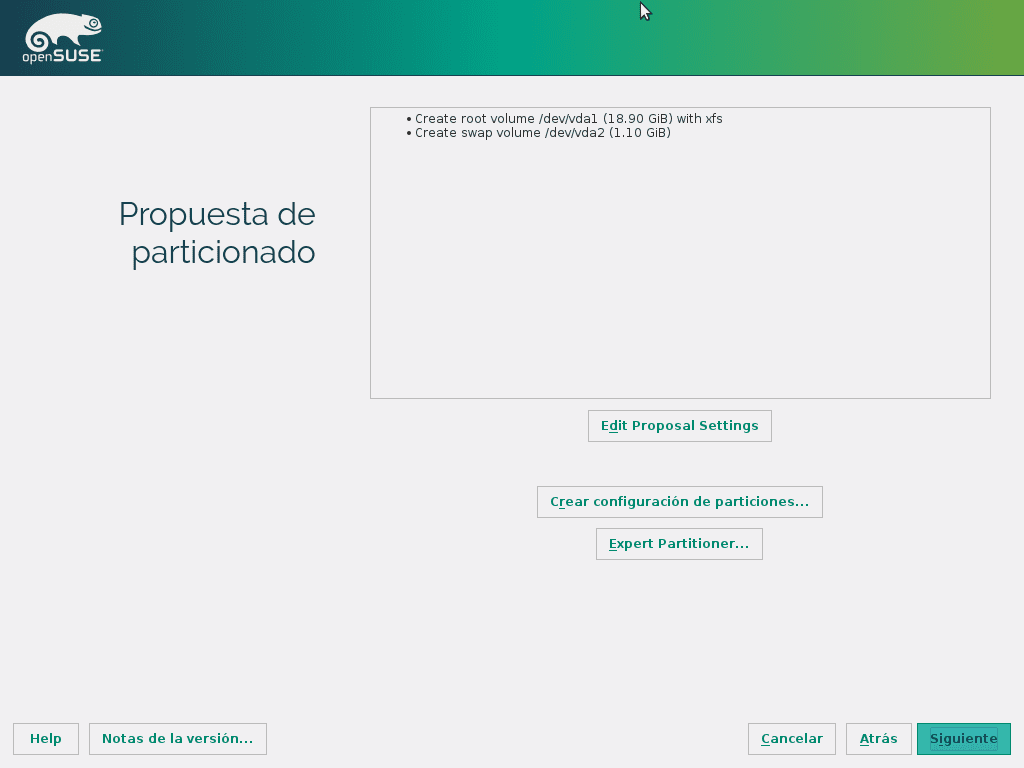
Image 17 - DNS and DHCP in openSUSE
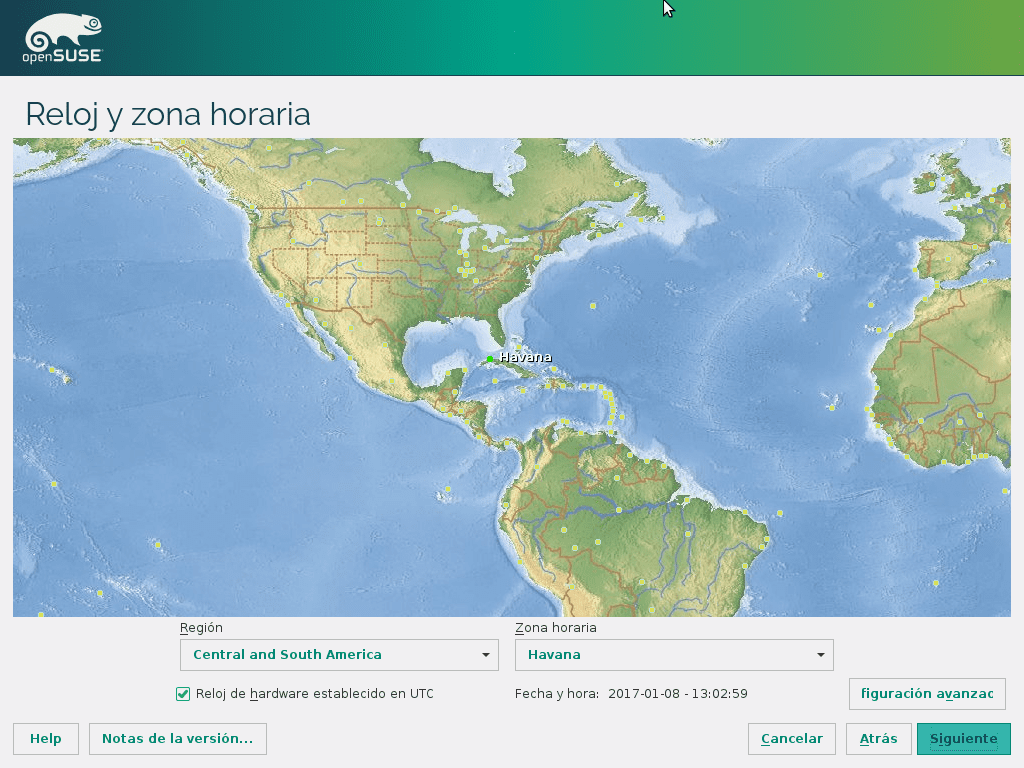
Image 18 - DNS and DHCP in openSUSE

Image 19 - DNS and DHCP in openSUSE
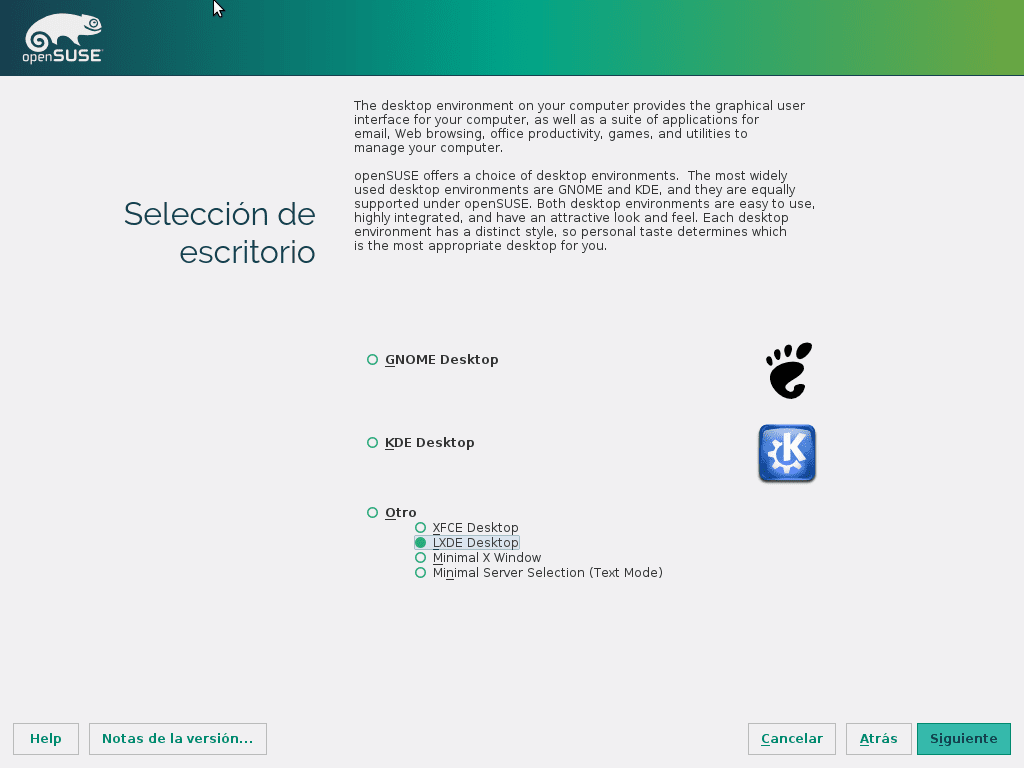
Image 20 - DNS and DHCP in openSUSE
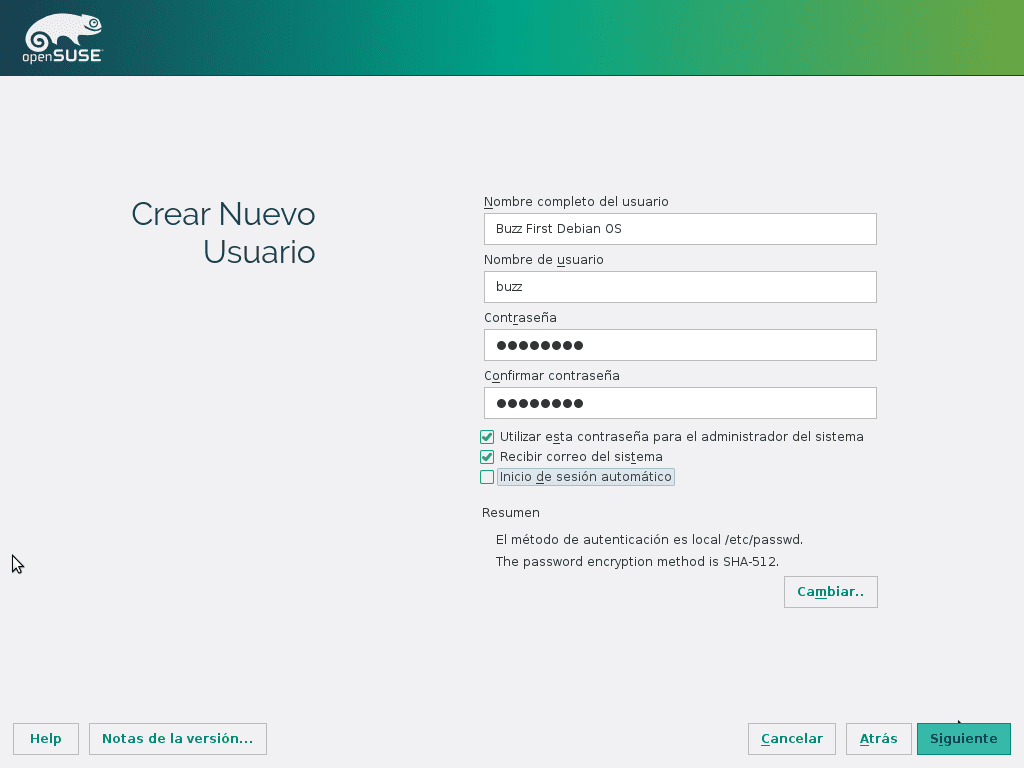
Image 21 - DNS and DHCP in openSUSE
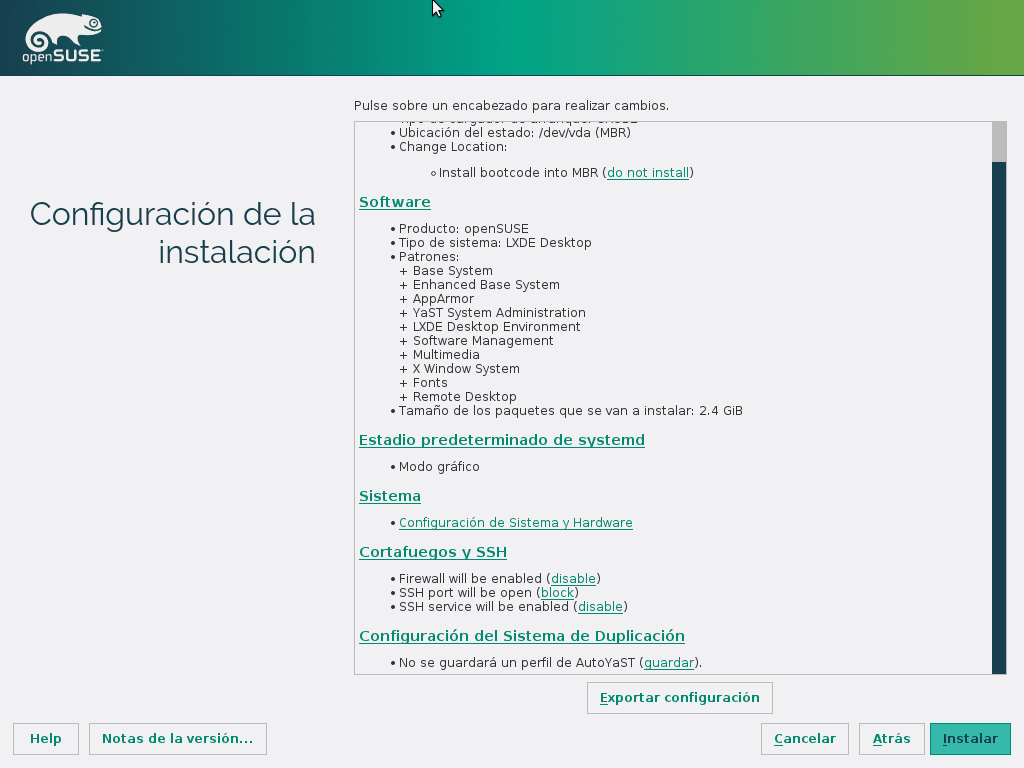
Image 22 - DNS and DHCP in openSUSE
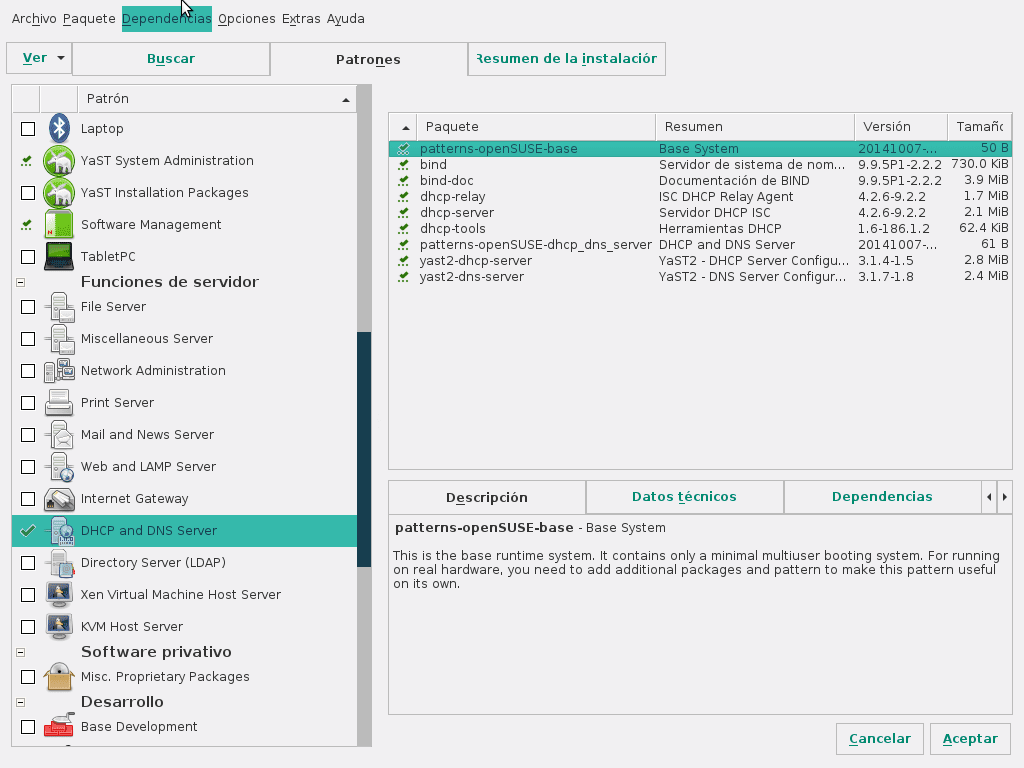
Image 23 - DNS and DHCP in openSUSE
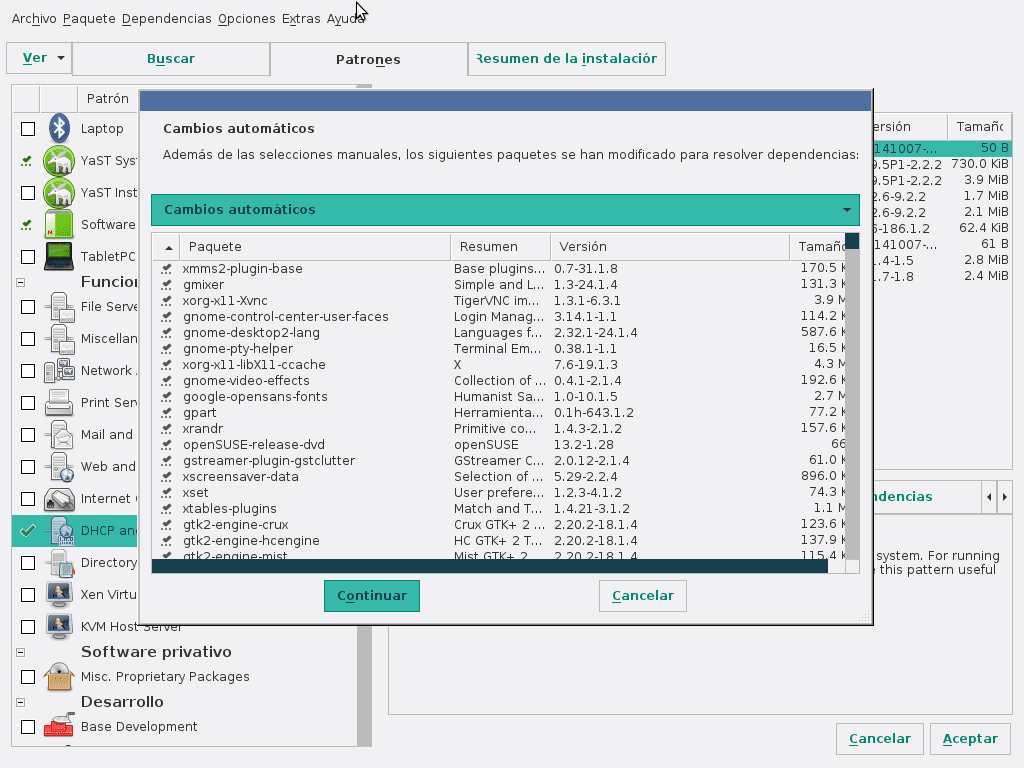
Image 24 - DNS and DHCP in openSUSE

Image 25 - DNS and DHCP in openSUSE
Image 26 - DNS and DHCP in openSUSE
Image 27 - DNS and DHCP in openSUSE
Image 28 - DNS and DHCP in openSUSE
Image 29 - DNS and DHCP in openSUSE

Image 30 - DNS and DHCP in openSUSE

Image 31 - DNS and DHCP in openSUSE
Image 32 - DNS and DHCP in openSUSE

Image 33 - DNS and DHCP in openSUSE
Image 34 - DNS and DHCP in openSUSE
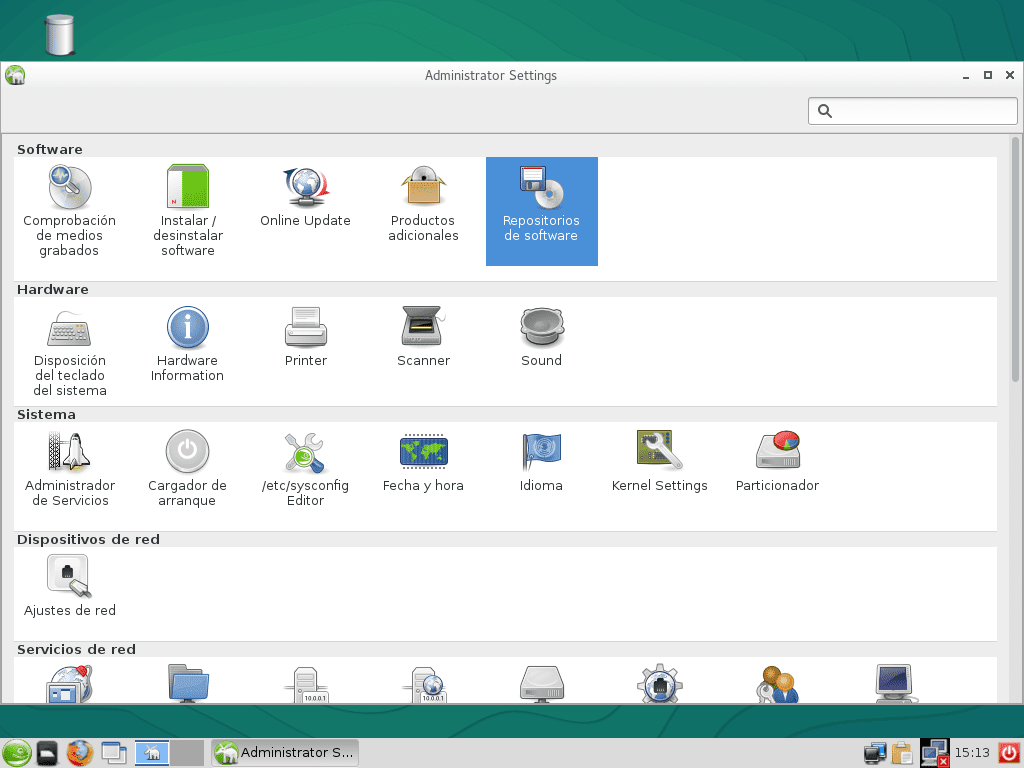
Image 35 - DNS and DHCP in openSUSE
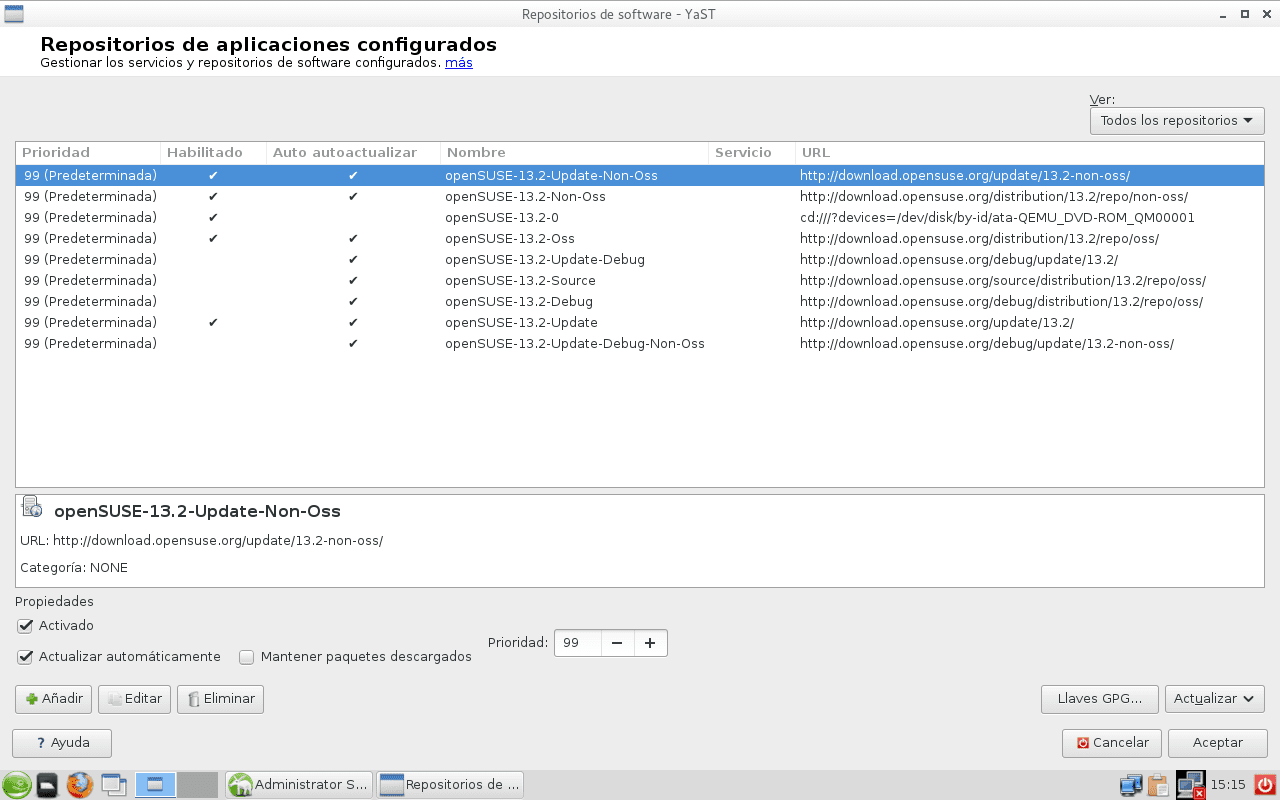
Image 36 - DNS and DHCP in openSUSE
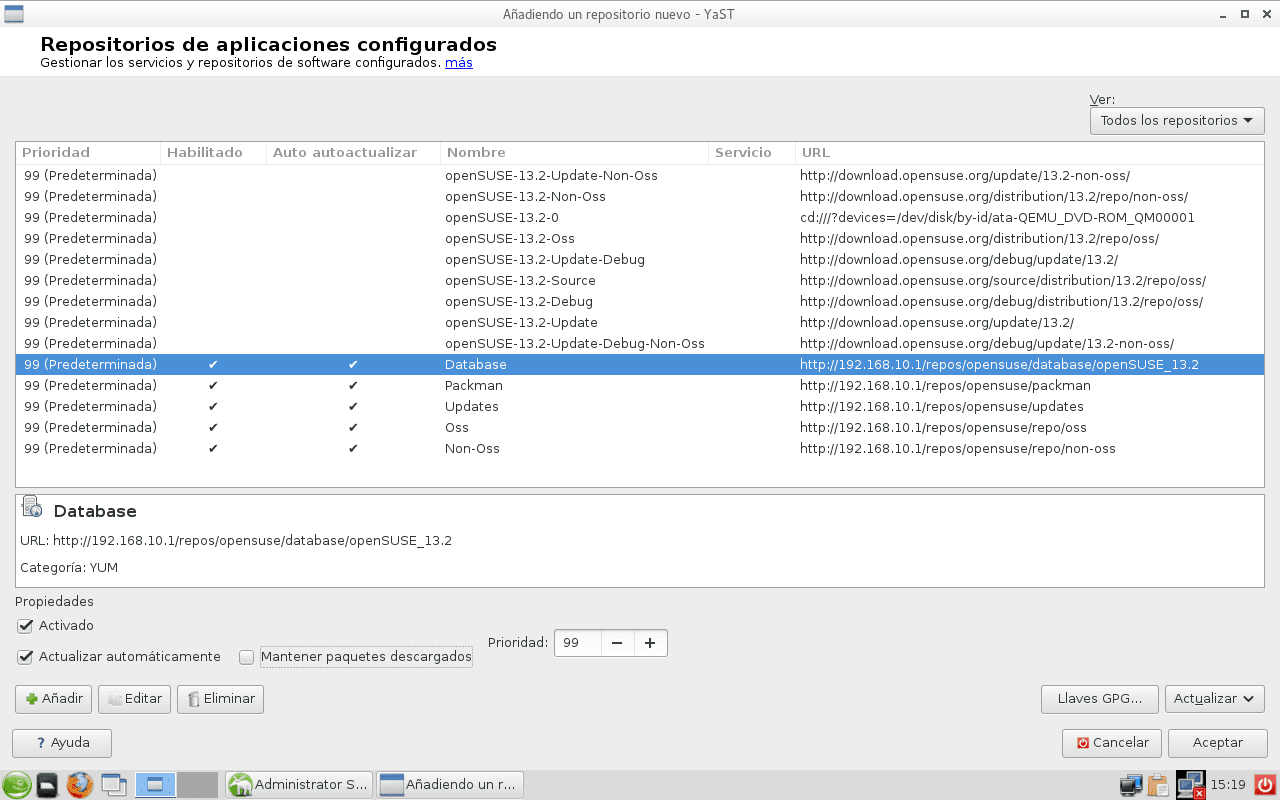
Image 37 - DNS and DHCP in openSUSE

Image 38 - DNS and DHCP in openSUSE

Image 39 - DNS and DHCP in openSUSE

Image 40 - DNS and DHCP in openSUSE
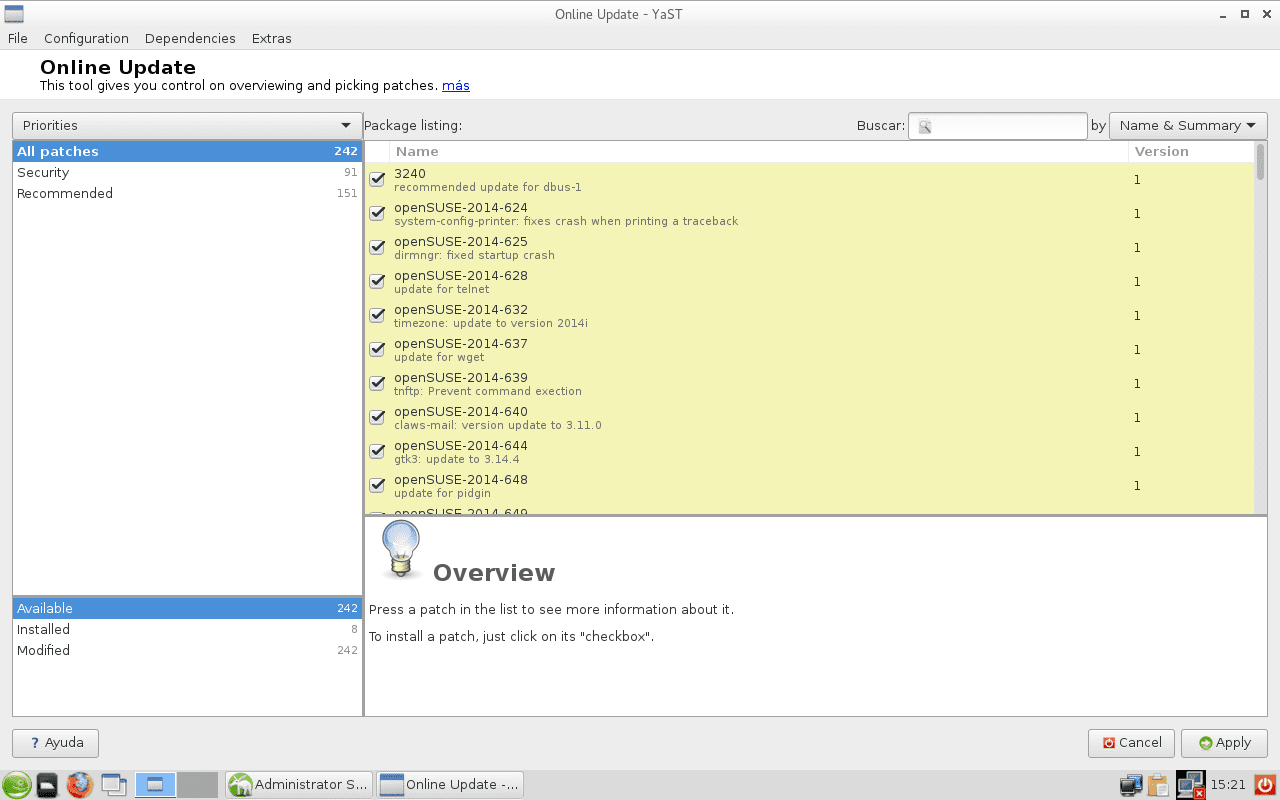
Image 41 - DNS and DHCP in openSUSE
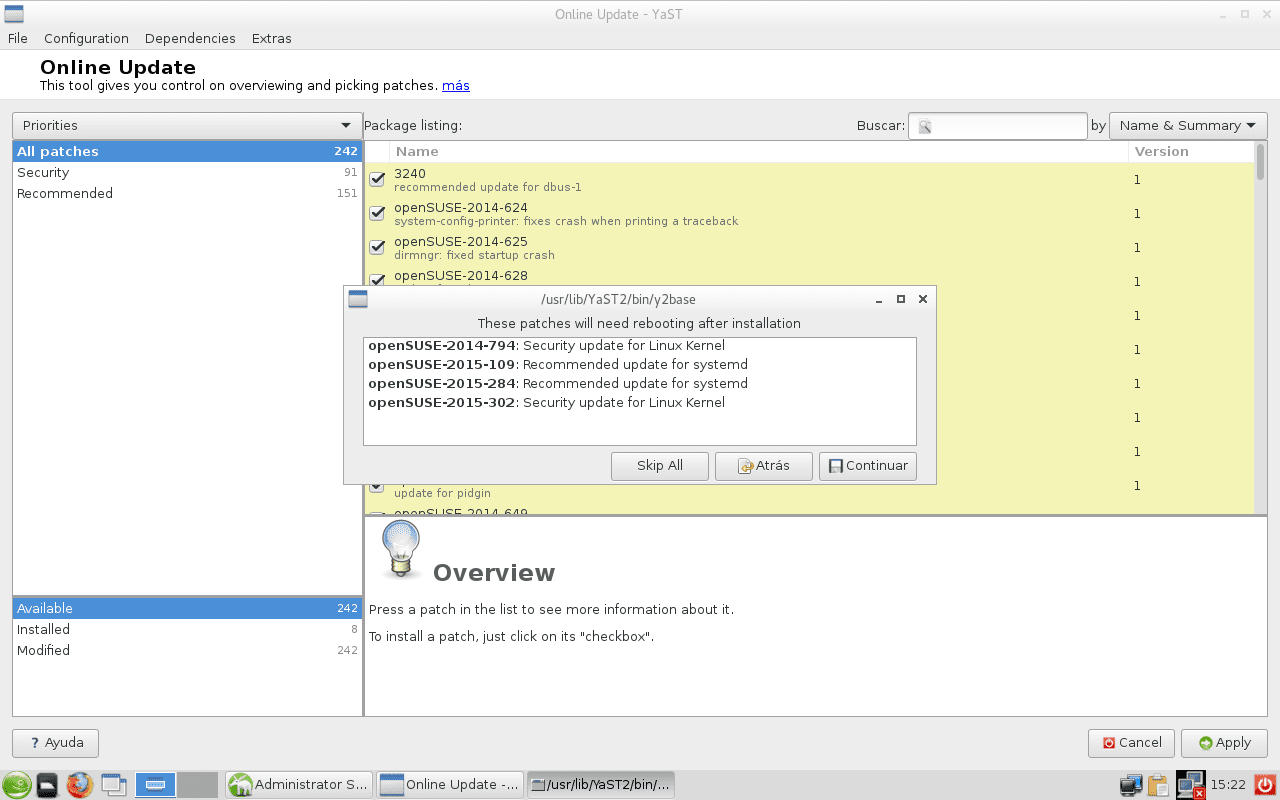
Image 42 - DNS and DHCP in openSUSE
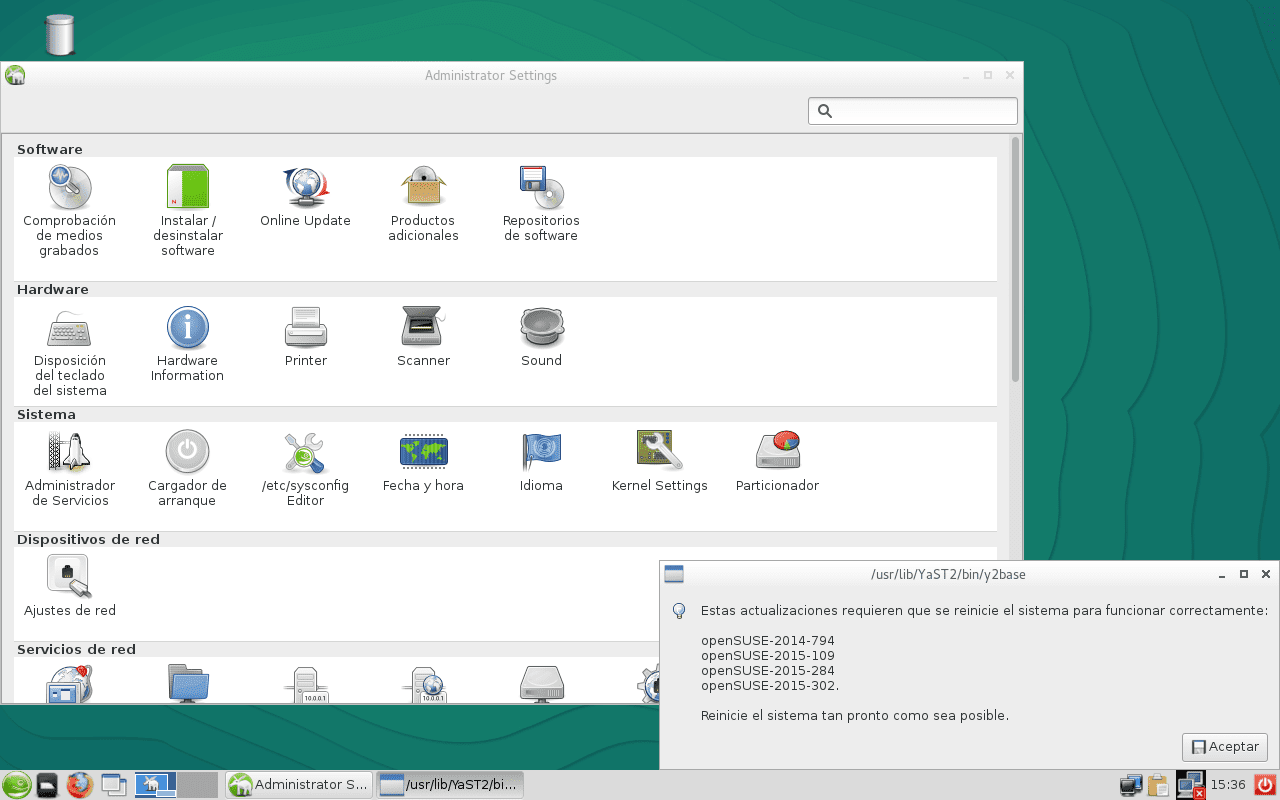
Image 43 - DNS and DHCP in openSUSE

Image 44 - DNS and DHCP in openSUSE
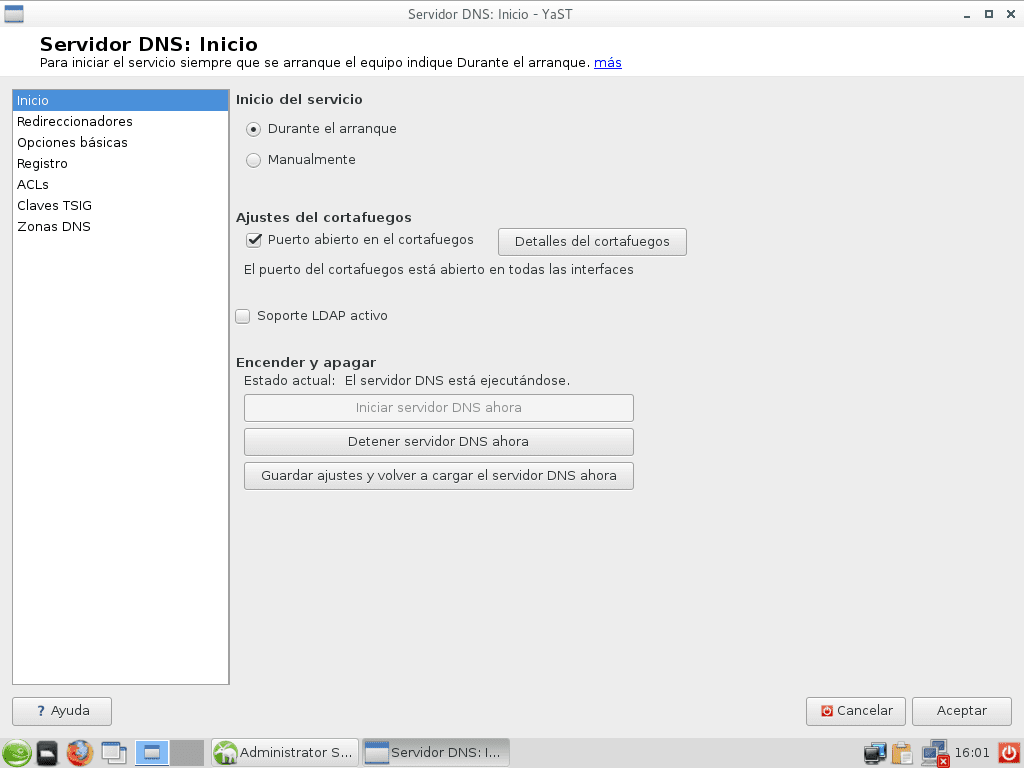
Image 45 - DNS and DHCP in openSUSE

Image 46 - DNS and DHCP in openSUSE

Image 47 - DNS and DHCP in openSUSE

Image 48 - DNS and DHCP in openSUSE
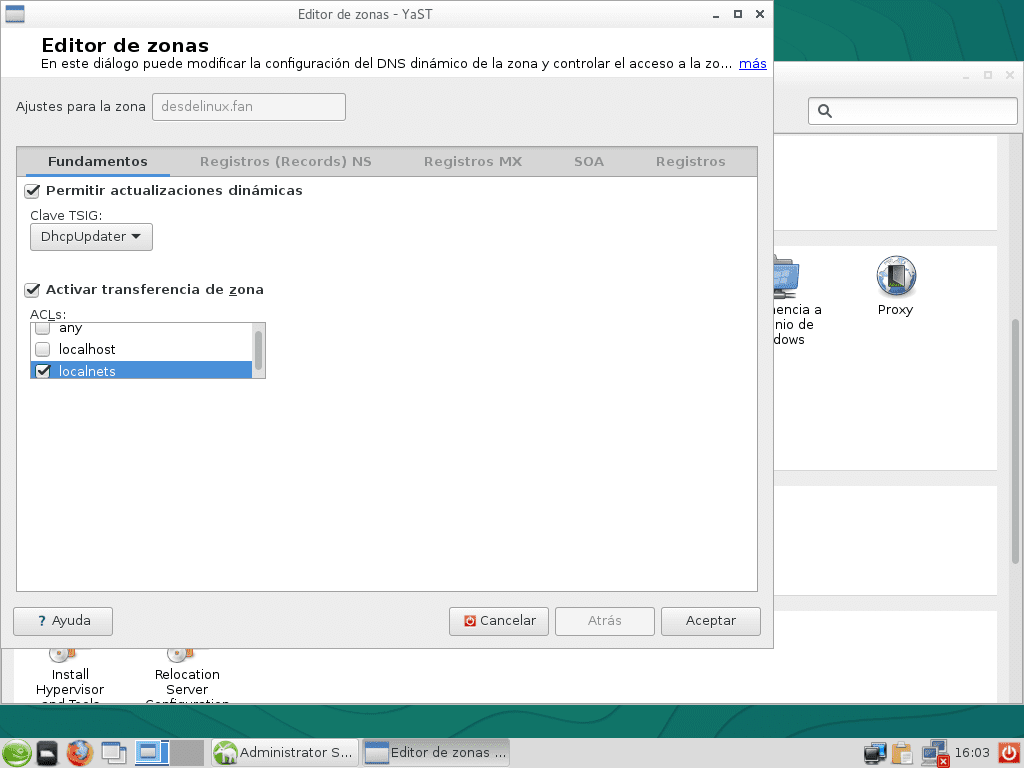
Image 49 - DNS and DHCP in openSUSE
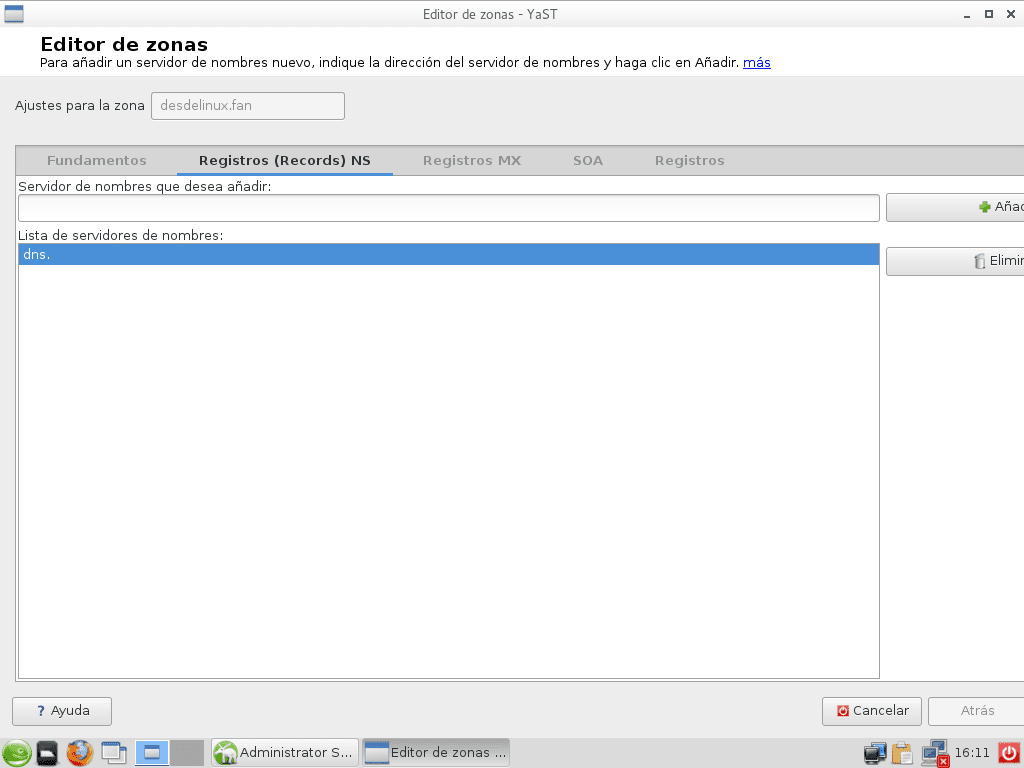
Image 50 - DNS and DHCP in openSUSE
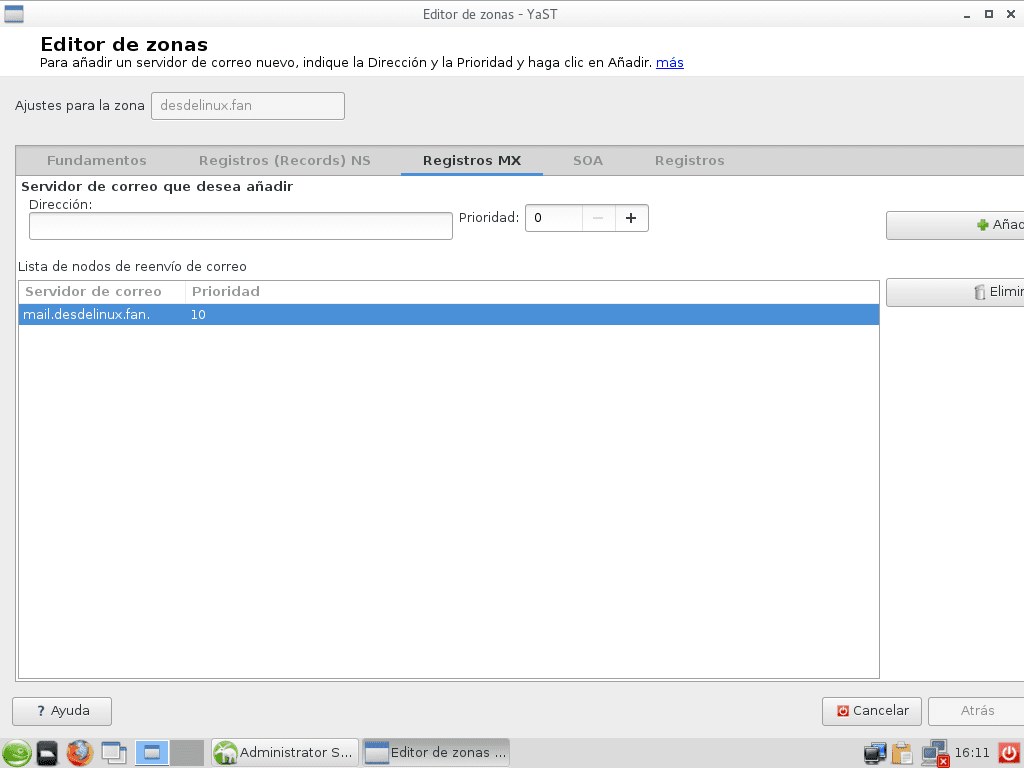
Image 51 - DNS and DHCP in openSUSE
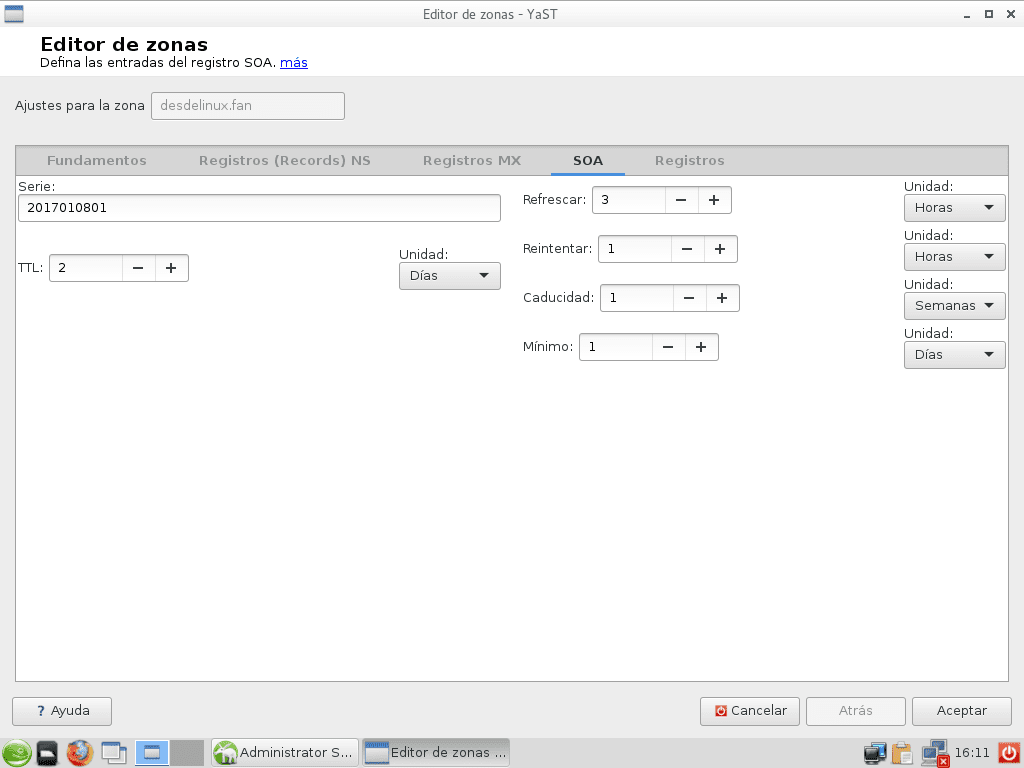
Image 52 - DNS and DHCP in openSUSE
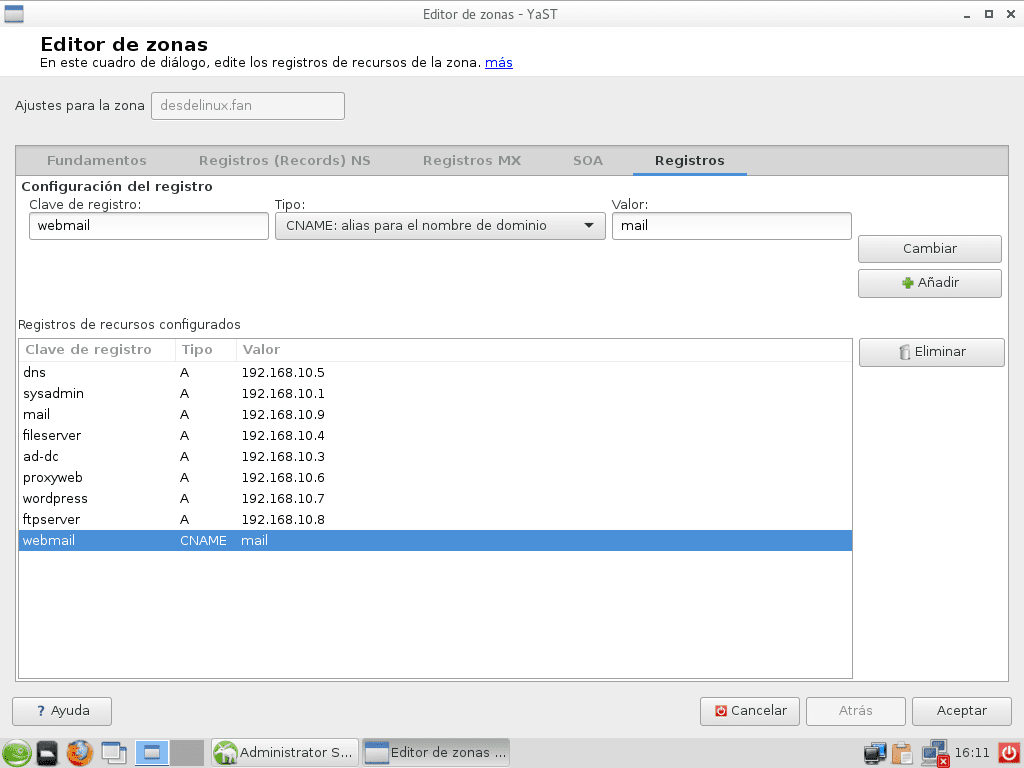
Image 53 - DNS and DHCP in openSUSE
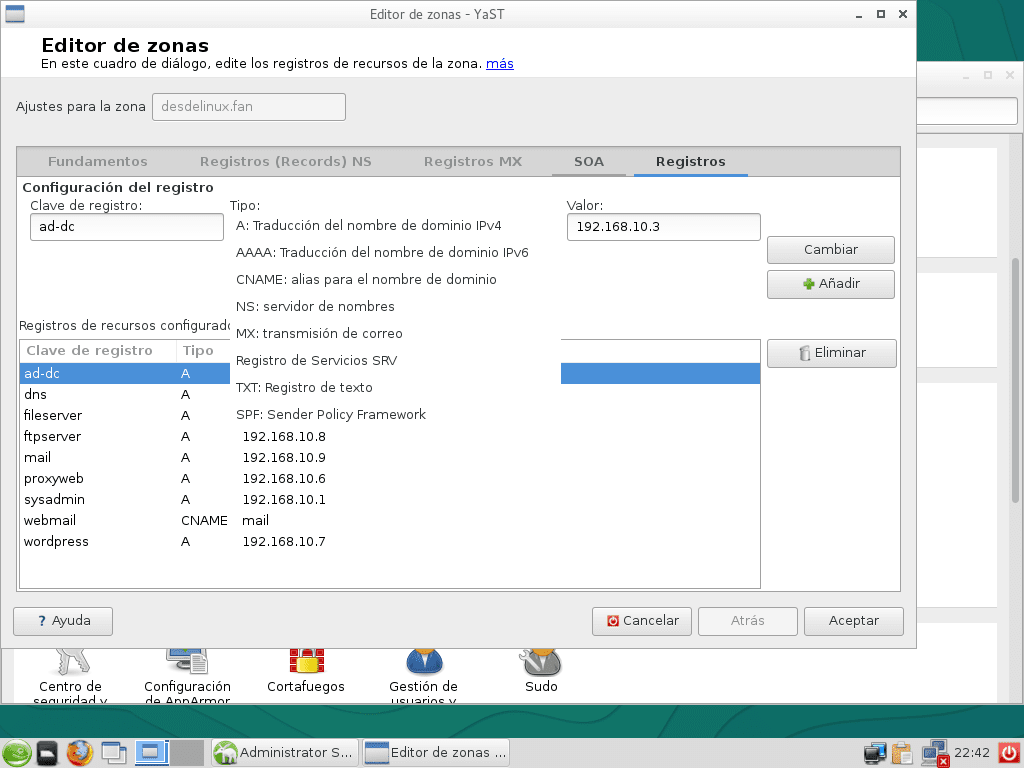
Image 53-A - DNS and DHCP in openSUSE
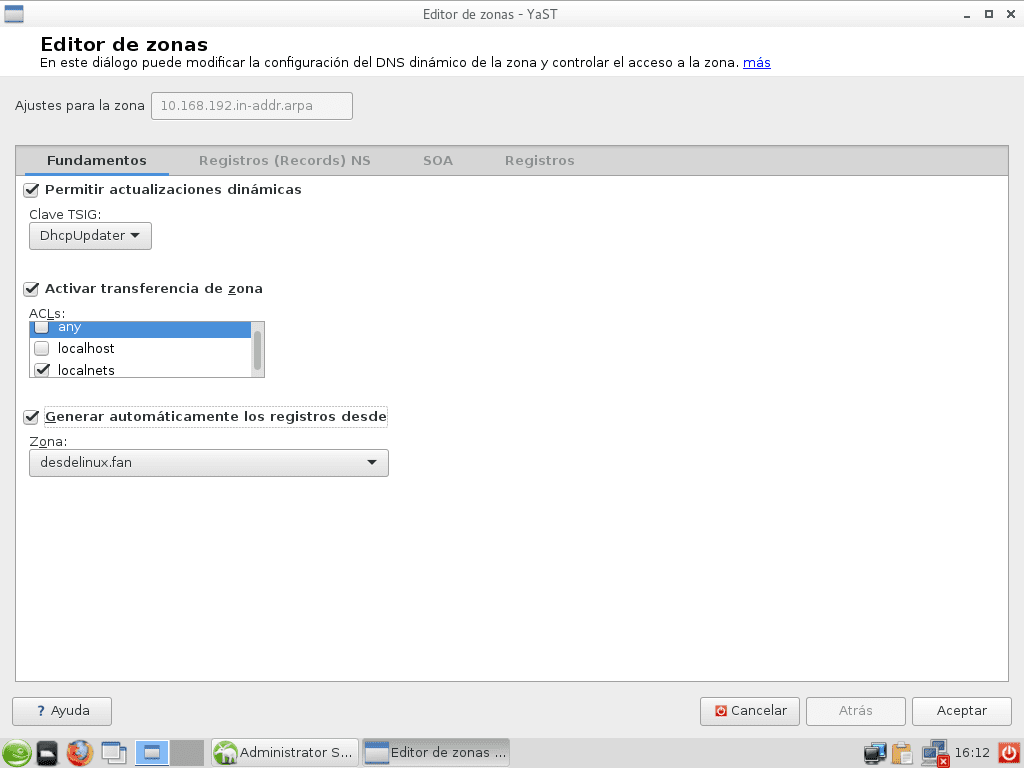
Image 54 - DNS and DHCP in openSUSE
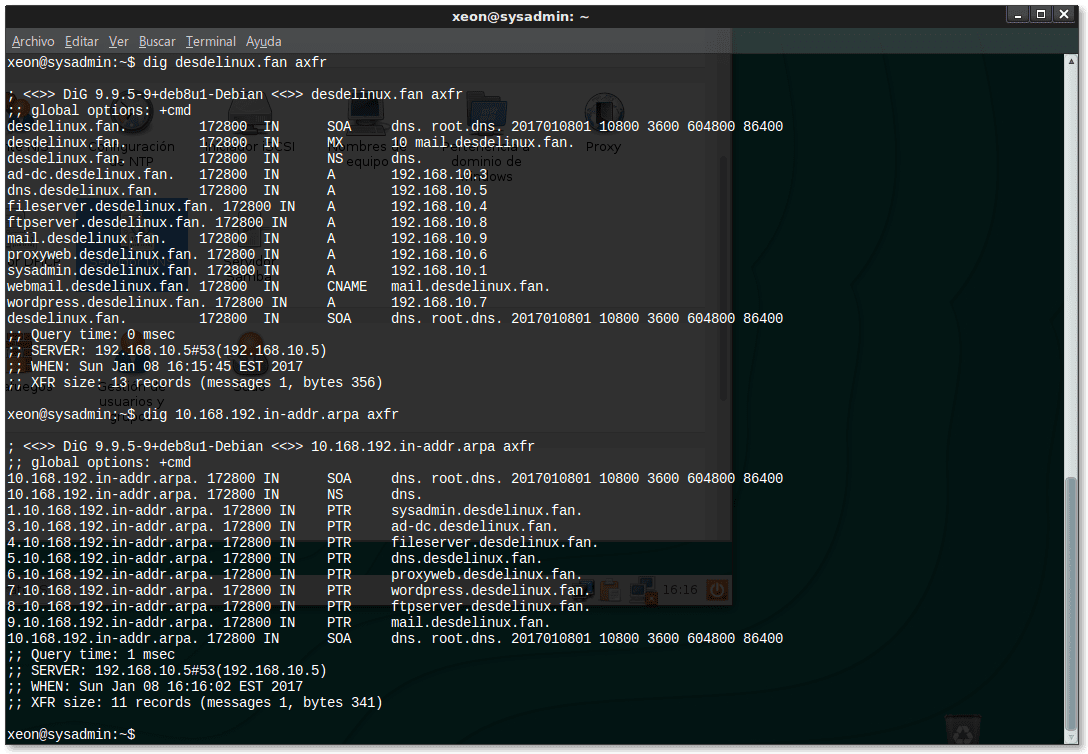
Image 55 - DNS and DHCP in openSUSE

Image 56 - DNS and DHCP in openSUSE

Image 57 - DNS and DHCP in openSUSE
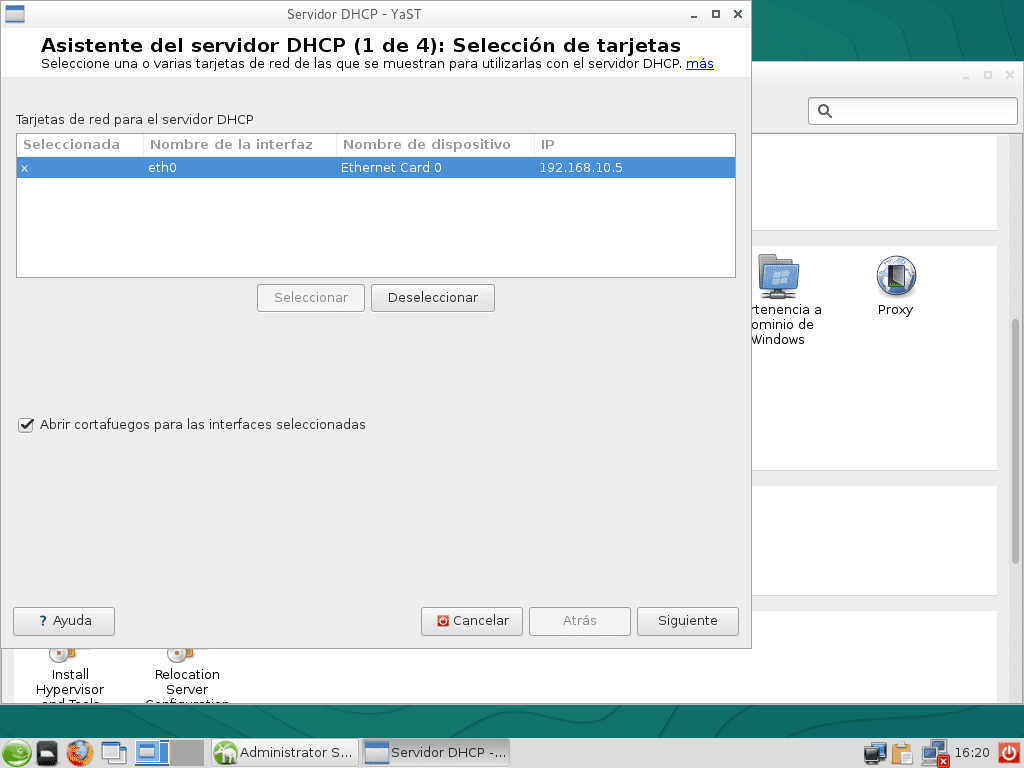
Image 58 - DNS and DHCP in openSUSE
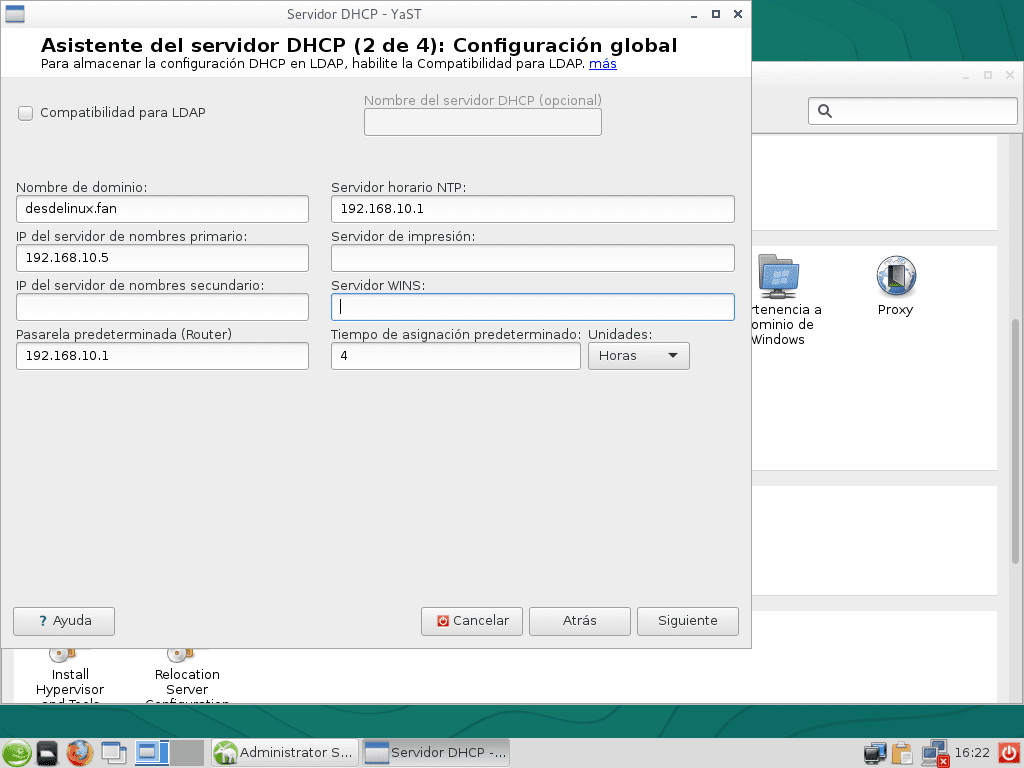
Image 59 - DNS and DHCP in openSUSE
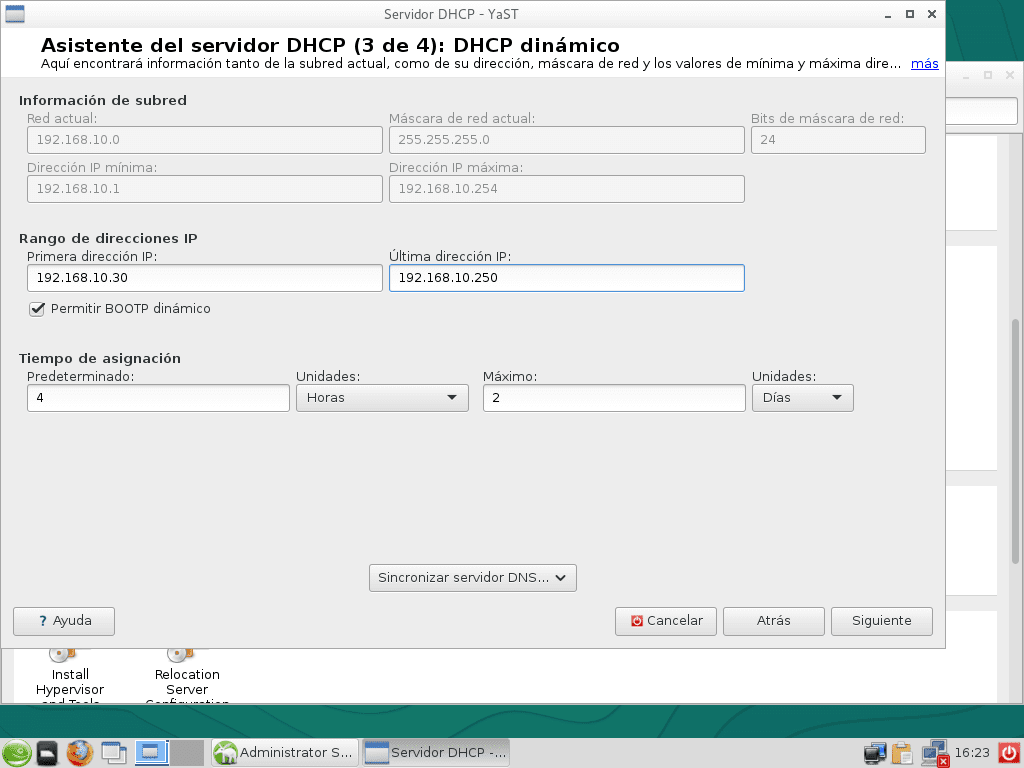
Image 60 - DNS and DHCP in openSUSE

Image 61 - DNS and DHCP in openSUSE
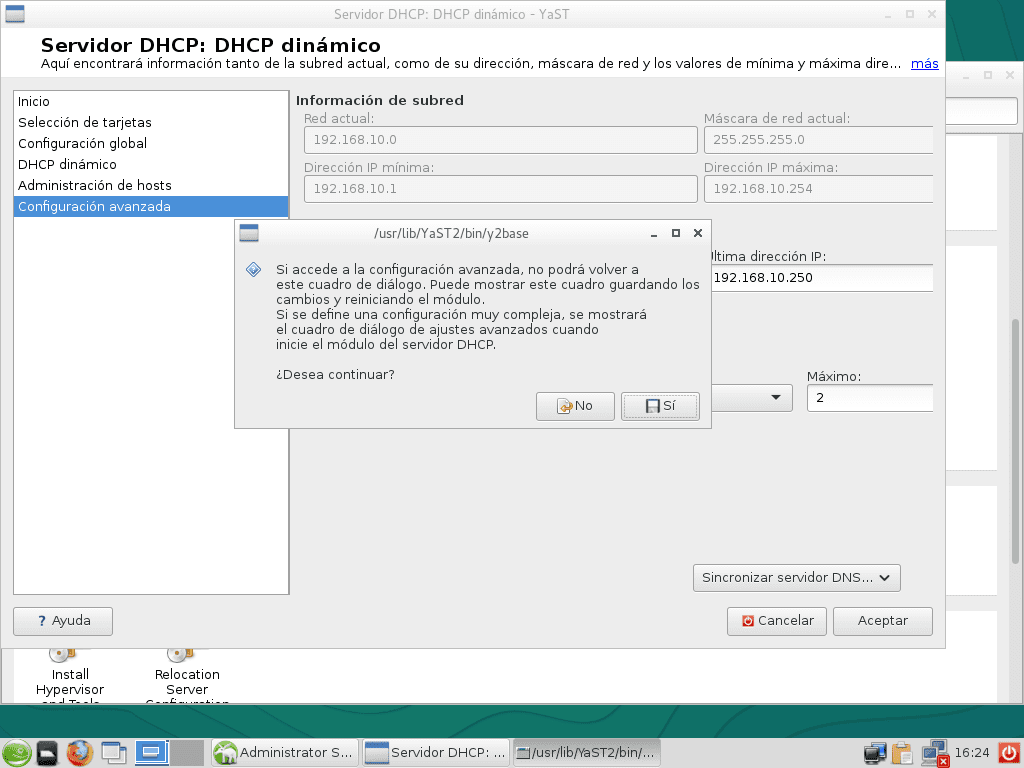
Image 62 - DNS and DHCP in openSUSE
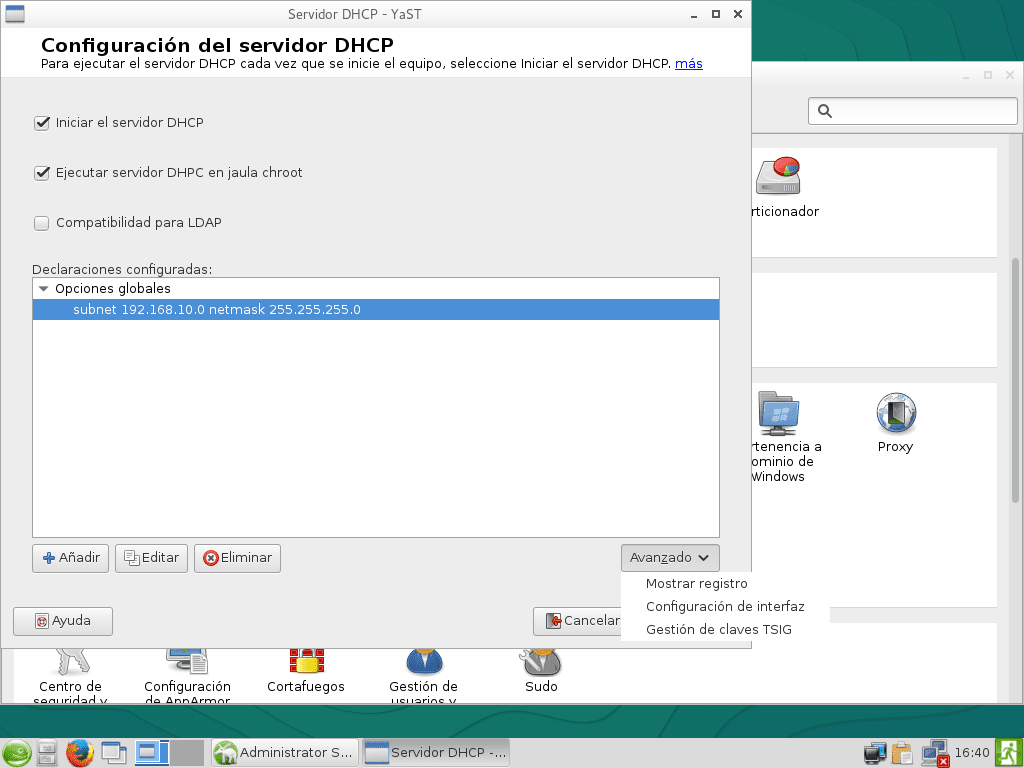
Image 63 - DNS and DHCP in openSUSE
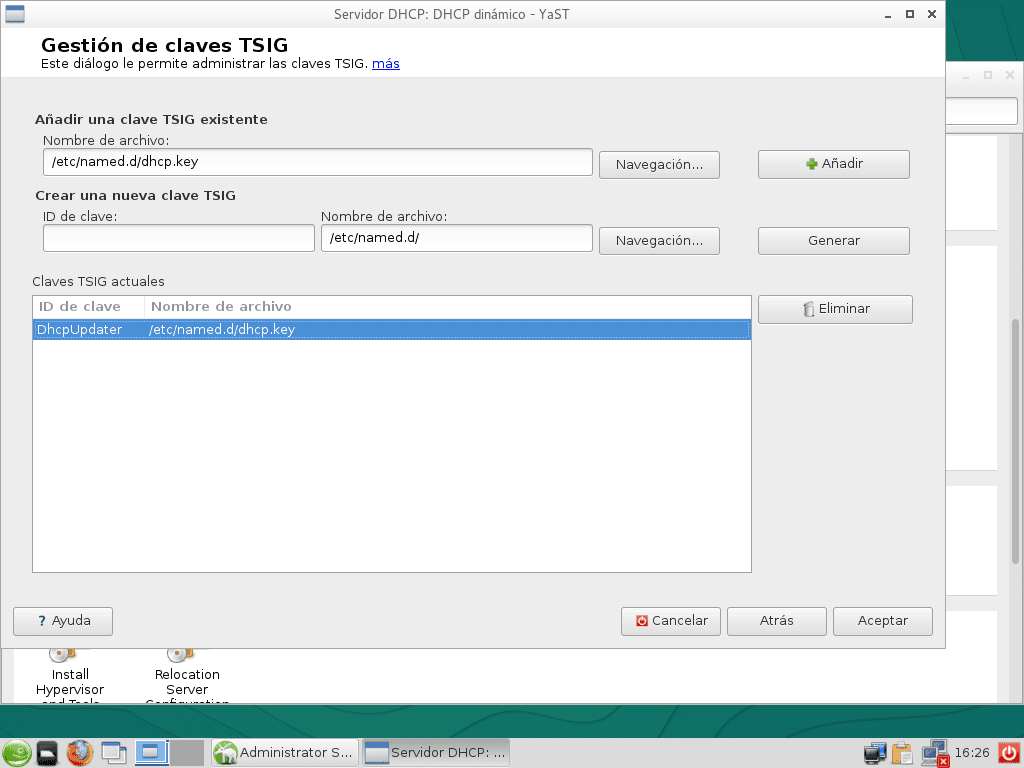
Image 64 - DNS and DHCP in openSUSE
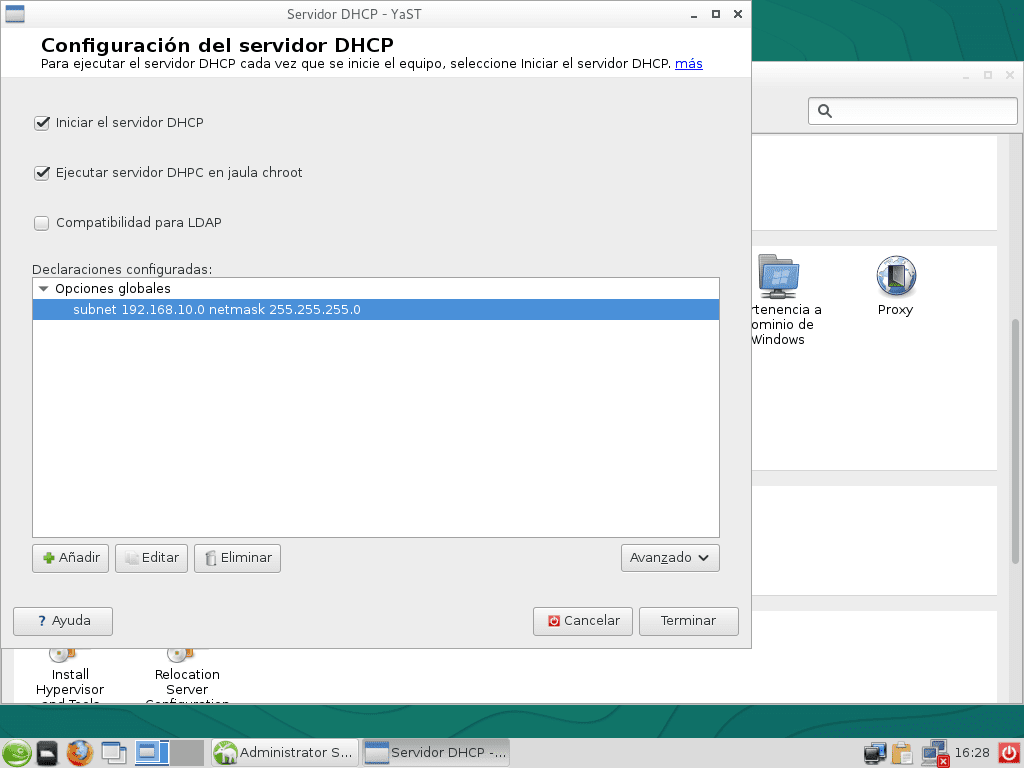
Image 65 - DNS and DHCP in openSUSE
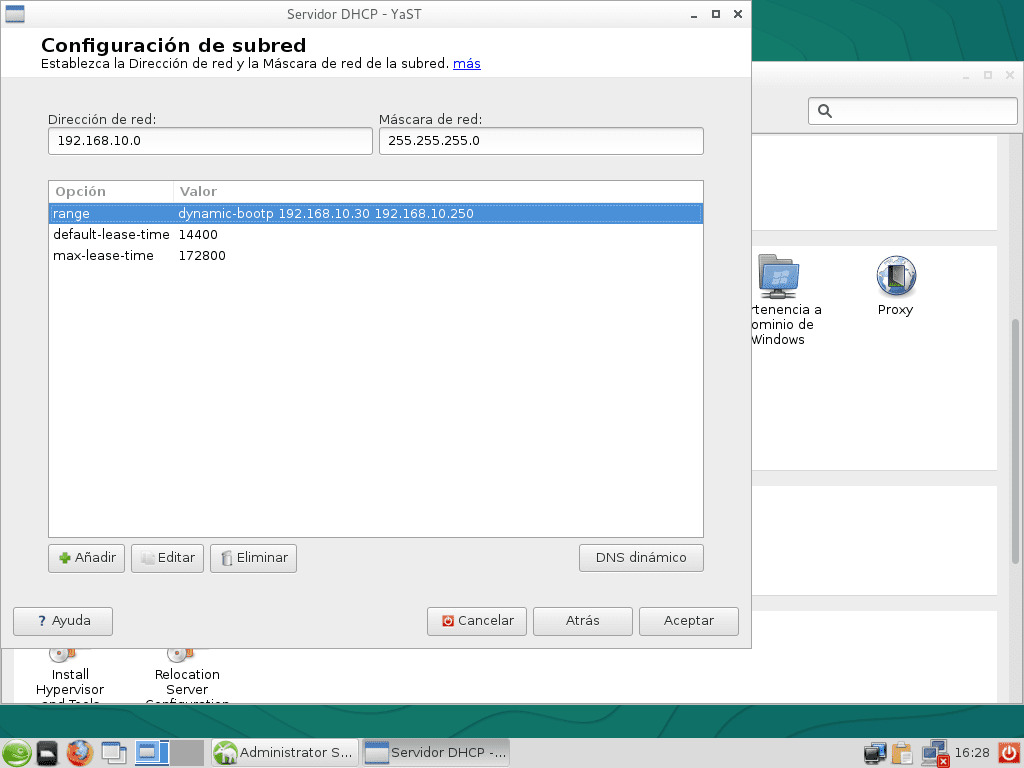
Image 66 - DNS and DHCP in openSUSE
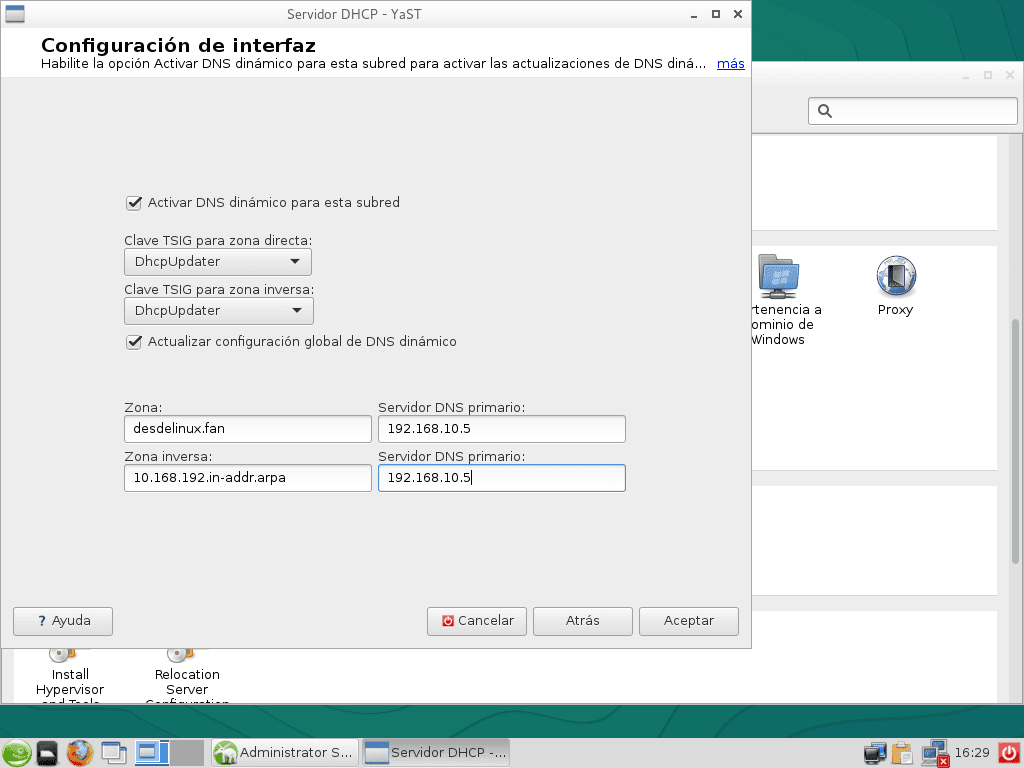
Image 67 - DNS and DHCP in openSUSE
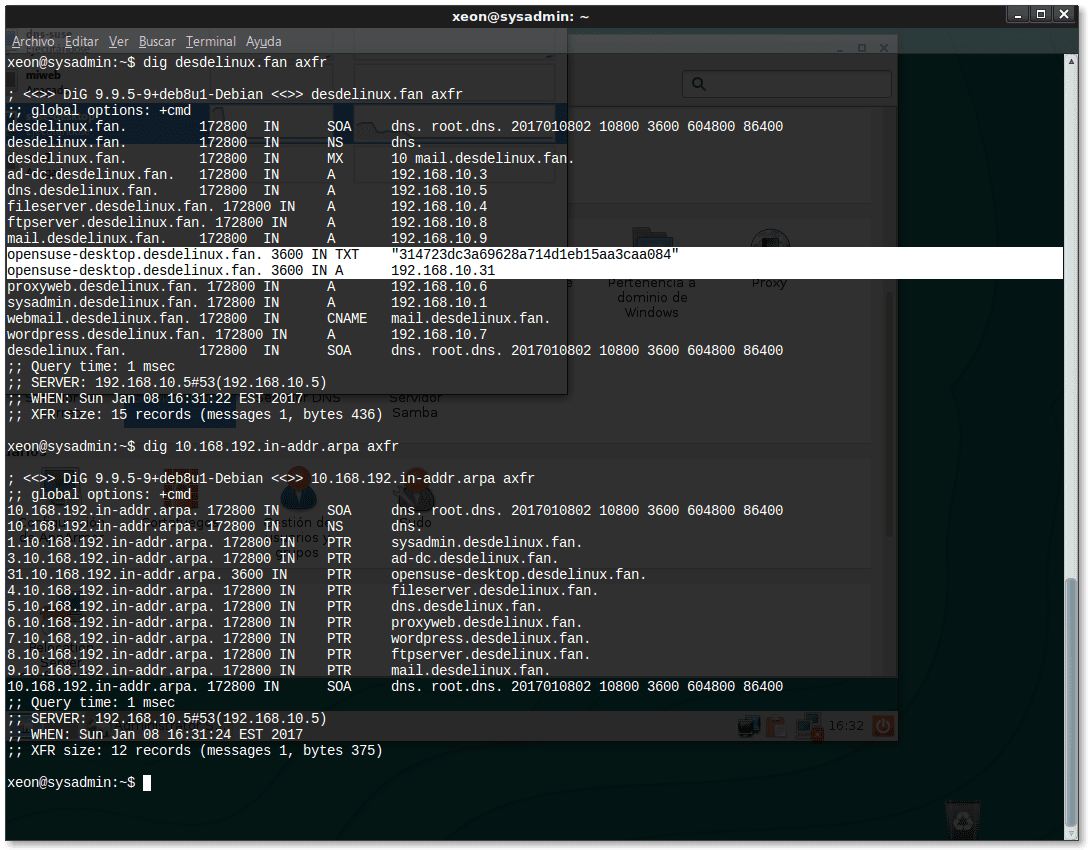
Image 68 - DNS and DHCP in openSUSE

Image 69 - DNS and DHCP in openSUSE

Image 70 - DNS and DHCP in openSUSE

Image 71 - DNS and DHCP in openSUSE
Installation support
As a means of installation we can use a DVD image like the one we used to make this post openSUSE-13.2-DVD-x86_64.iso, or a more advanced version. If the equipment does not have a DVD player, or if it is more convenient for us to use a memory - pen drive, we can do it as indicated in the article Auto-start memory for installing Debian, CentOS, or openSUSE. After installing the operating system, to prepare a memory you can install and use the program Imagewriter by SUSE Studio.
However we suggest test initially on a virtual machine.
Installation, declaration of repositories and system update
- We suggest for virtual server dns.desdelinux.fan about 768 megabytes of RAM and a 20 GiB hard drive. The memory is because we will do it with a graphical interface.
- In the 05 imageRegarding the Network Configuration, we do not declare any Name Server because that function is the one to be installed. If you declare some other server, it will be considered as a redirector - forward, and we want to implement the service in this way to check the insistence of Microsoft® Operating Systems in their search for sites on the Internet.
- We create a very personalized configuration of partitions according to our particular taste. Feel free to choose and implement the one you prefer.
- Imagen 15: "Fstab options". We choose that the partitions are mounted according to their LABEL - LABEL and not according to its UUID, which is the default option. After installing the system read the contents of the file / etc / fstab.
- The NTP server to synchronize the time is precisely the Host Hypervisor where the DNS - DHCP server runs.
- In the same way that we selected the LXDE desktop because it perfectly fits our needs, you can choose any other one offered by the installer of the openSUSE.
- The name of the chosen user «buzz»Is to honor our favorite distribution. But nothing. 😉
- In the 22 imageNote that we open the SSH port in the Firewall, and also enable the SSH service.
- Please take your time when choosing the software to install. The magnificent Package Manager, as shown in the 23 image.
- Images 35, 36, 37 and 38: After installing the operating system from the DVD or other media, the first thing we must do is declare the repositories to update our system, whether they are local or on the Internet. In our case, we disable the different repositories that openSUSE offers on its servers on the Internet, and we add ours that are Local. Namely, we have the repositories Database, Packman, Updates, Oss y non-oss, enough for the proposed work, and to make us a desk with all of the law. 😉
- Images 39 and 40: Starts and ends the update of the Package Manager of the YaST. On the first screen we leave the default selections. We just clicked the button Apply.
- Images 41, 42 and 43: After the Package Manager updates itself, it launches the screen with the packages from the rest of the system to be updated. In it, we also accept the default selections.
- Imagen 44: Classic screen to end a session in LXDE.
Installation and configuration of DNS and DHCP services in openSUSE
- Imagen 47: Let's not forget to generate the secret key for the dynamic update of the DNS zones, which are desdelinux.fan y 10.168.192.in-addr.harp.
- Imagen 49: Let's take a good look at the box that appears at the top «Settings for the zone desdelinux.fan«. We allow dynamic updates and zone transfer for the local network nothing else.
- Imagen 53: If we display the list «Type:»Of DNS records, we will find that we can declare the following:
- A: IPv4 domain name translation
- YYYY : IPv6 domain name translation
- CNAME: alias for the domain name
- NS: name server
- MX: mail transmission
- SRV: SRV service registry, widely used in Active Directory and other services
- TXT: Text registration
- SPF: Sender Policy Framework
- Imagen 54: openSUSE makes our lives easier by not having to declare reverse DNS records. We also allow dynamic reverse zone update and zone transfer for the local network.
- Imagen 55: After finishing the DNS configuration, nothing better than to check its operation and correct configuration, by means of a couple of simple console commands.
- Imagen 56: Before configuring DHCP, we must assign to the network interface that we will select for that service - it can be one or more interfaces - a Zone in the Firewall. We select the Internal Zone which is that of our LAN.
- Images 61 and 62: To declare the dynamic DNS we must go to the «Expert DHCP Server Configuration«.
- Imagen 63: We select the subnet and click on the button «Advanced«, And select the option«TSIG key management«.
- Imagen 64: We select the TSIG key generated during the DNS configuration. If you didn't do it then, you can do it now and reconfigure the dynamic update of DNS zones according to the key generated here.
- Imagen 65: We return to the selected subnet and now we click on the button «Edit«.
- Imagen 66: We select the Range of our interest and click on «Dynamic DNS«.
- Imagen 68: We started the team opensuse-desktop.desdelinux.fan which is the object of our next article, the one that we install and configure with the dns.desdelinux.fan running, and we check with a couple of simple console commands that DHCP correctly updated DNS, and that the forward and reverse DNS records for that client are returned.
Join us on the next adventure!
Thank you very much for the contribution, I start to do it to the letter, they often worked
You're welcome Rulf. The big job is to help those who do not like the Console or Terminal very much, and for those who have just arrived in our world from Windows -or are thinking of taking the leap- and see that there are distros that offer the possibility of configuring complex services using a graphical interface.
Very good article!!!
I agree with you that it can be the starting point for those who want to migrate from Windows.
A big hug
Let's be clear that without these services there is no worthwhile network, when we talk about DNS and DHCP, we talk about the complete support and the total base of a network, it does not matter if it is SME or not, it seems incredible that we complain about not having information at hand and FICO is giving it to us in a selfless way. We have no idea of the value of this contribution to the world of Linux and more to those of us who believe and trust free software. It takes a lot of work to make posts like these, which are not average, they go far beyond what our minds can imagine. Personally, I am surprised by so few comments and so few visits to a topic that it possibly gives us the entrance to any company or rather ensures us work anywhere once we master it.
FICO continues with your contributions that many of us will follow in your footsteps. Thank you !!!
Thank you very much to ALL of you for your very good, accurate, and timely comments. It is very true that it is the main service in any network, including the Internet itself.
Great and exhausting work Federico, another step by step that I follow, and without a doubt everything ends as you say, the degree of detail of your articles makes you see the experience you have in the area. Thank you very much for such a good contribution.
Thanks for commenting, Lagarto !!!. Wait for the next one on CentOS 7 with the same services, but this time, to console. It is very tiring to make a post of this type with images, although I hope newcomers from the Windows world liked it. 😉
Hello Federico, what a great, laborious, useful and very important article about DNS and DHCP services you just published. All highly explained and in tremendous detail through numerous images.
Great how to configure the DHCP server to allow dynamic updating of DNS records for both the forward and reverse zones, using the same TSIG key generated in the DNS server configuration.
And to top it all in a distribution for "graphical" servers like openSUSE (which I have never worked with and now this post motivates me to study it) which can be very useful for Windows sysadmis who decide to make a "smooth" migration to Linux .
Nothing that for articles like this is worth following the rest of the posts that you plan to continue publishing about the series "SMEs".
Hello Wong !!!. You already got to this post. I see that you have been surprised by some graphical facilities of the YaST. That's right friend. It is conceived in such a way that those who come from Windows do not feel excluded initially due to the use of the console in Linux.
My personal opinion is that it is easier to implement, configure and manage a DNS - DHCP pair through the console. But I do not stop recognizing the benefits of this distro.
openSUSE, and its main sponsor, SUSE, are general-purpose distros that come with powerful YaST to make life easier for service administrators.
I am very happy that you continue to read and study the PYMES series. I wait for you in my next installments. Cheers!!!.
Despite having been "entangled" for a while due to business issues, this distro shows the quality and commitment of its engineers, I am not using it as a server but as a desktop, but I can attest to the facilities it offers, the current release model : Tumbleweed and Leap is very good, the first rolling for ... people who like to roll (: and Leap for more serious users, but to clarify that Leap has non-conservative package versions and is very convenient for a developer / sysadmin who wants to use current technologies Opensuse is definitely delivering a well above average product, an option to consider.
I have long preferred openSUSE Desktop for a Business Network. Now that I have tried it in services, it also fits me. I agree with you in everything.