Greetings to all. As I have been delaying in writing this article about Slackware 14, let me tell you that taking advantage of the fact that I am about to finish this last semester of my professional career in Computing and Information Technology and they are remodeling the computer room again, now I have the possibility of make the tutorial in a calmer and more detailed way.
In the previous article, I spoke about the experience I had with Slackware with such subjectivity that I got carried away and did not clarify out of sheer enthusiasm.
Now continuing this series of articles dedicated to this legendary distro, I will introduce you to how to install Slackware 14 with some details that you may have forgotten DMoZ (like some suggestions that appear when configuring certain components), and the occasional explanation with certain steps, especially with formatting.
Let's start
Phase 1: Kernel selection and pre-formatting
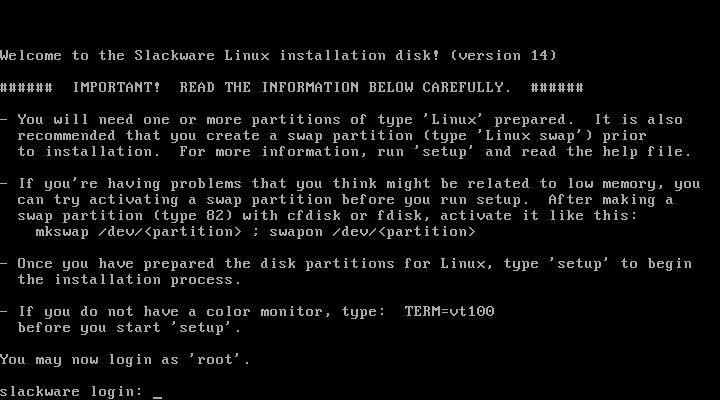
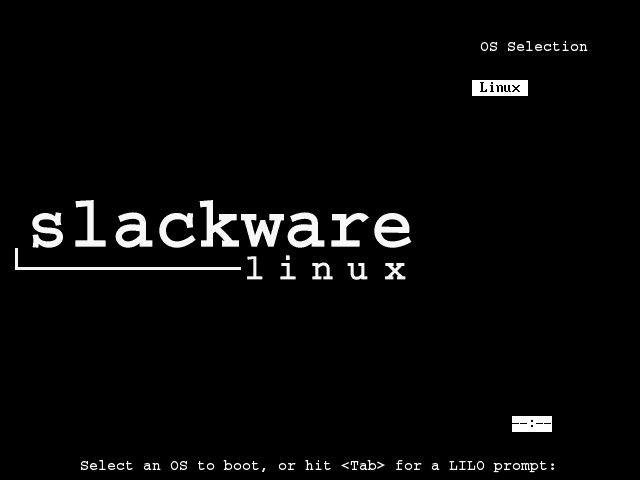
While many will see a screen with plain letters that they may not understand, it is because Slackware does not automatically start a kernel. This will surely appear to you:
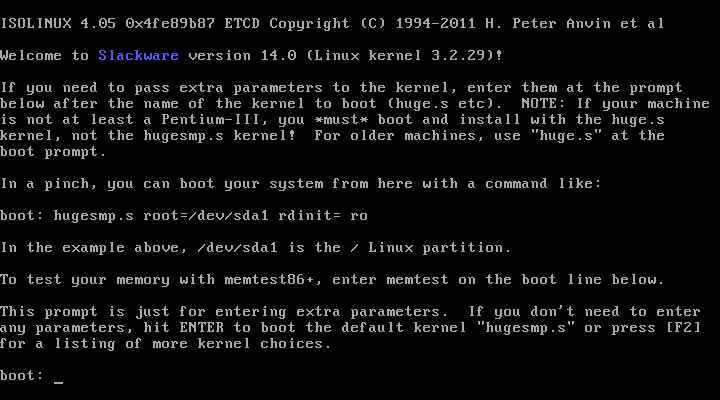
On the screen it explains that we have to choose between the kernel for obsolete Pentium III and lower PCs with just the console (typing huge.s), or "modern" PCs starting with Pentium IV and successors (hugesmps.s).
If our PC is decent enough to work, we write hugesmp.s and give it Enter to be able to use the kernel we choose.
On the next screen, it will show us which keyboard layout we will use:
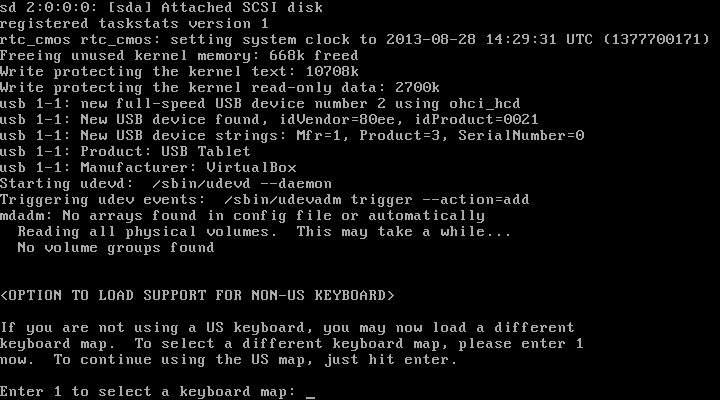
We write «1» to be able to enter the available options it has. A menu like this will appear: +
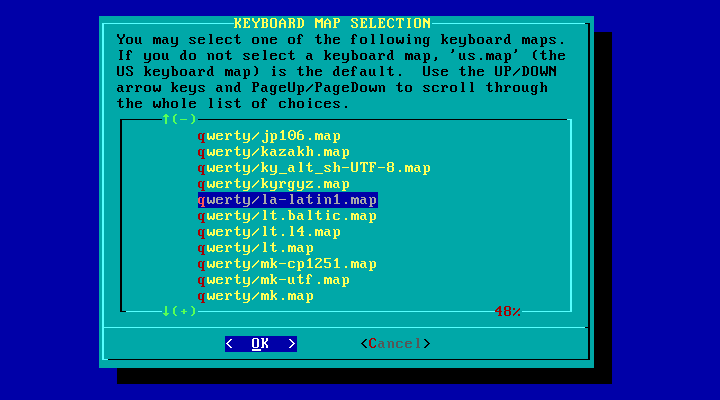
In my case, I chose the Latin keyboard layout, which I have been used to for a long time. We give Enter to our selection, and we began to test:
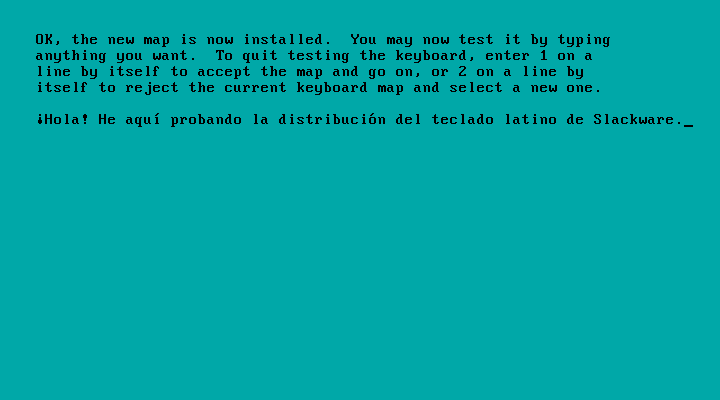
Apparently he is in a good mood. We give Enter, and then, we write 1 and give it Enter to confirm our choice of distribution; if not, we write «2», we give it Enter and we choose the keyboard layout we want.
Now, Slackware will ask us to log in as superuser (or ROOT):
We simply write "root", we give it Enter and immediately we will get a screen that will tell us if we use cfdisk or fdisk to format our disk. In my case, I wrote cfdisk so I have gotten used to this application.
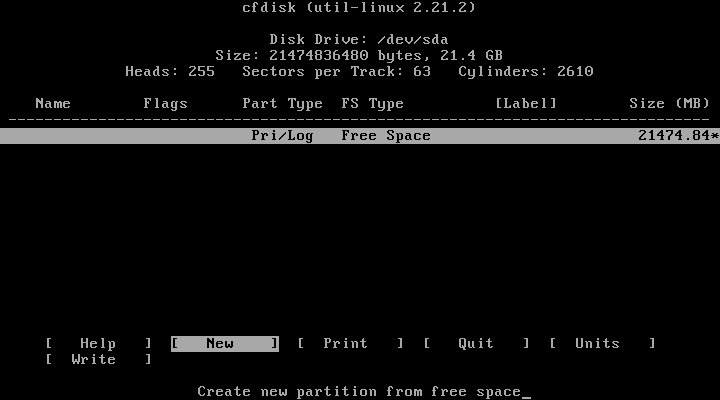
Well, using the simple rule of three, I designated this team with 20 GB of space that 90% was the main unit and 10% was the swap area. To be more precise, the configuration is as follows:
- SDA1 / Primary / Linux (option 83) / 90% of disk space.
- SDA5 / Logical / Linux Swap (option 82) / 10% of disk space.
With this format that I gave it, it was as follows:
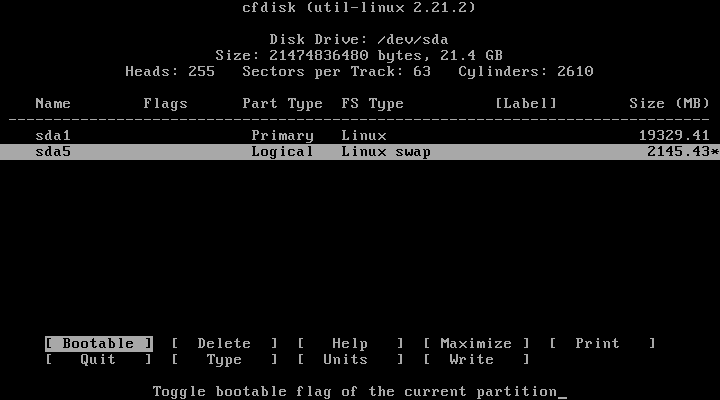
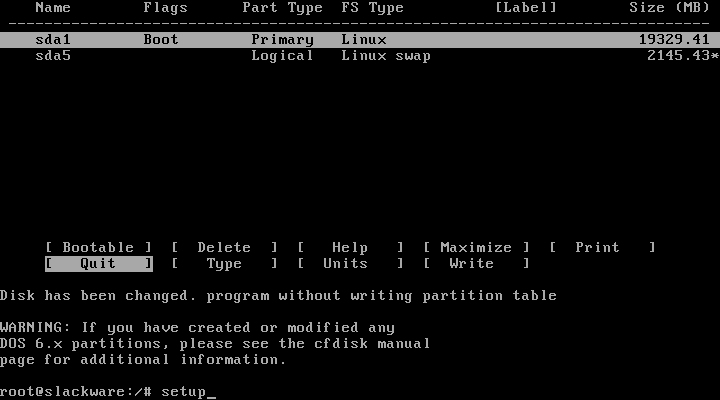
We choose the "bootable" option and designate it in the main or swap partition, we choose "write" to preset the format, we confirm by typing "yes" and we leave with choosing the "quit" option.
After having carried out this process of pre-setting the format, we simply write "setup" to continue with the next phase of the installation.
Phase 2: Final formatting, choice of components, root password, choice of GUI and choice of mirrors of our main repo
Here comes the "easier" part of the installation, which is very well detailed in terms of functions. The "wizard" is like this:

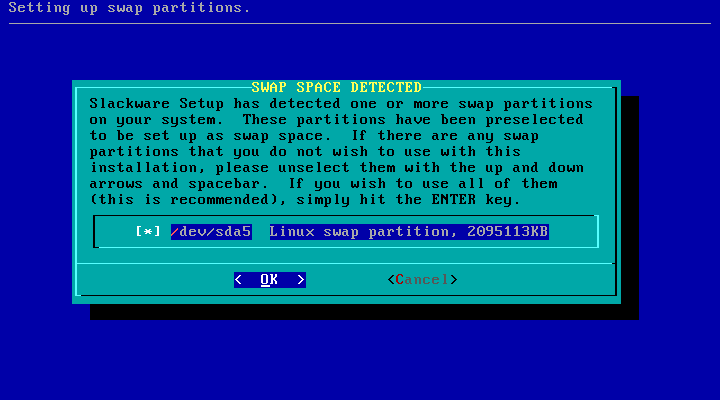
We choose the "ADDSWAP" option to be able to work with the installation in peace. We confirm our choice of our exchange area:
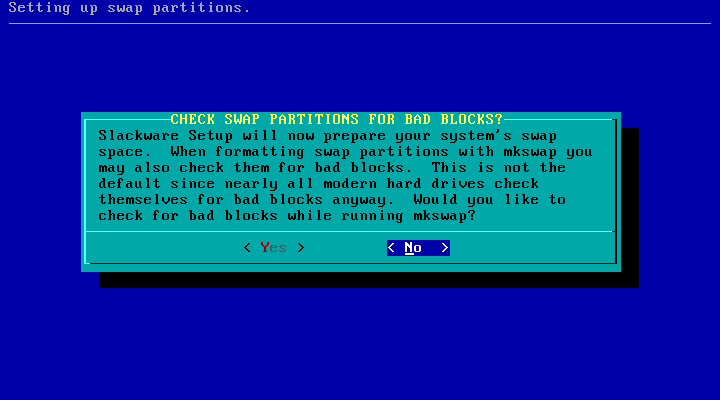
Now, a box appears asking us if we also want to run MKSWAP to check if our hard drive has bad sectors. Let's assume that our hard drive is completely fine and we say NO:
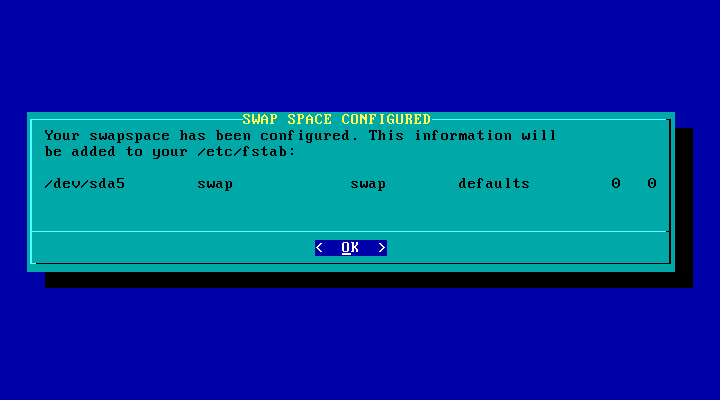
A box will appear in which you confirm that we have already made our configuration of our SWAP selection. We give OK:
Now, it will ask us to choose the partition that we have reserved for our data:
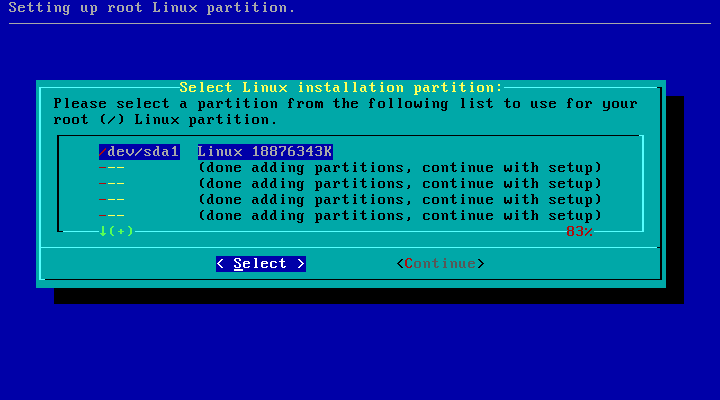
We select SELECT, then three options will appear: Format (format), Check (review or inspect), or Skip (do nothing). We choose the Format option in order to give it a format to work with:
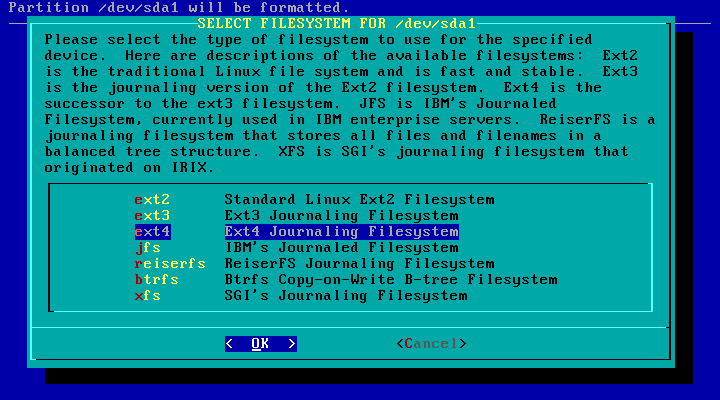
Generally, the EXT4 file system is recommended for convenience. We give OK to confirm the final formatting. We wait a few seconds until the following appears:

That means that our partition has already been completely formatted. We give OK.
Now, the wizard will give us to choose if we want to install Slackware from CD / DVD, through the network, and other options that it offers us:
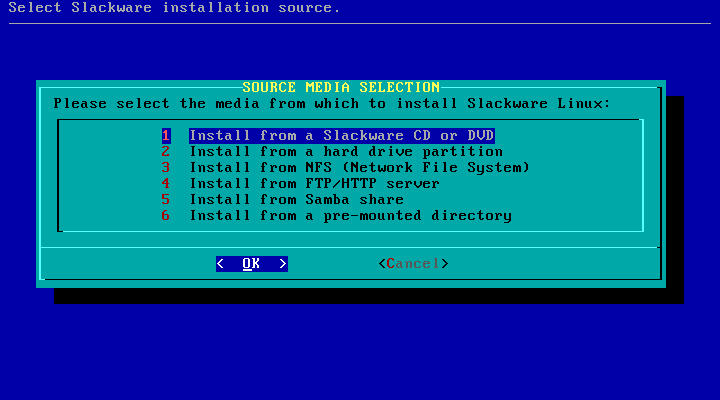
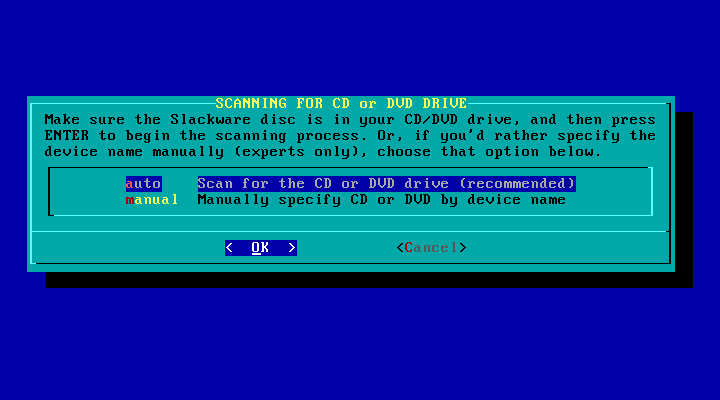
Since I'm using the 32-bit Slackware DVD, I won't have a problem choosing the packages. We give it OK, and it asks us if we want an «automatic» (auto) installation, or a «manual» (the hard way). If we don't want to complicate our lives, we choose "car."
After you have finished reviewing the packages you have, we will see a list of options for how we want to install Slackware very similar to the menu of options that Debian has, which is classified based on system components and not on the type of utility you use. We are gonna give.

With the arrows we move to choose the options, with the space bar we mark and unmark the options that we want to install and thus avoid installing 8 or 10 GB of components that we do not want to use.
After having thought and chosen about which options are essential for us, we click OK and it will immediately show us how we want the installation progress to be shown:
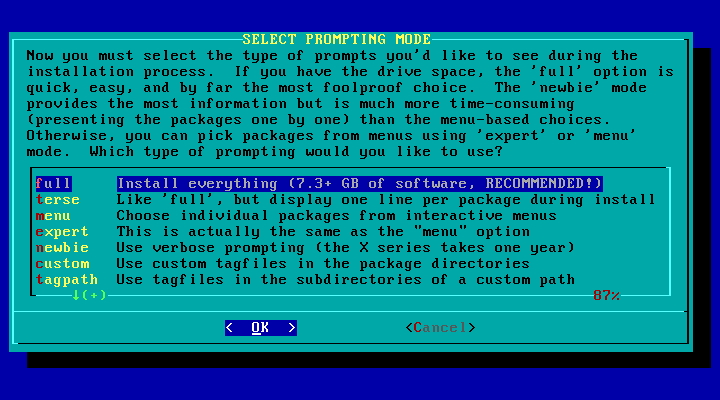
We give the option "full" to see the description of each package in which it is installed throughout the process.
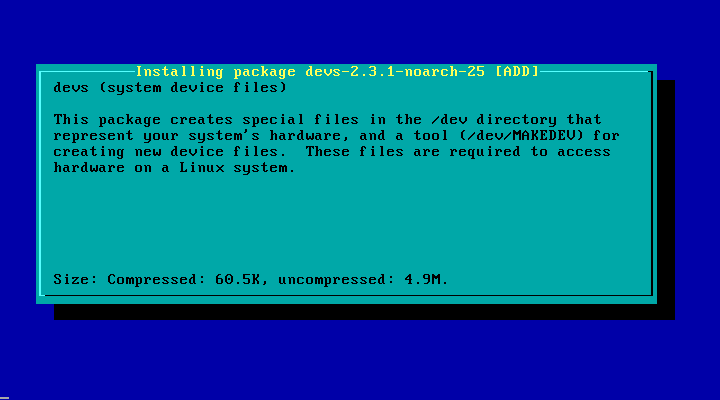
During the installation process, we will see that Slackware installs each package based on the order of the alphabet, and in turn, we will see a detailed description of each package that is installed (this can take from 20 minutes to three quarters of an hour, depending on the capacity of our PC, so I suggest that you take advantage of this period as best you can to do other tasks):
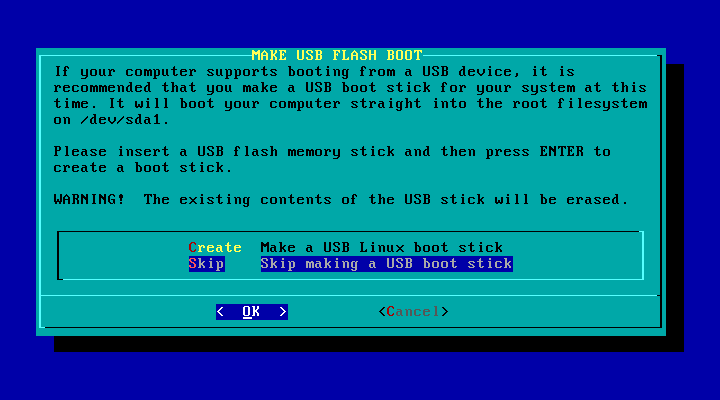
After having had a coffee, or killing time, it will ask us to do a USB boot. Obvienlo by choosing the Skip option.
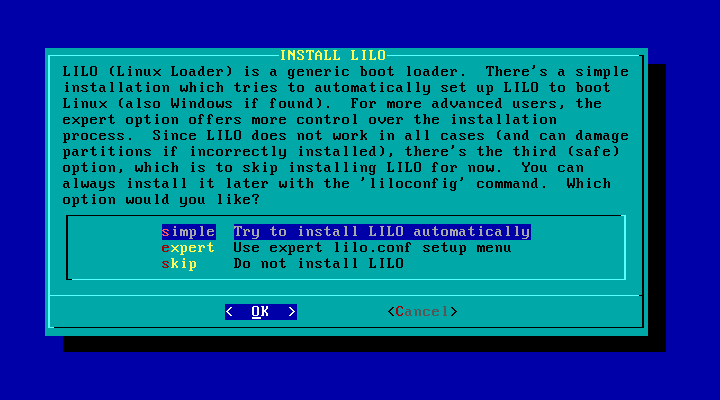
Now, it will ask us if we will install the LILO boot loader, which is quite similar to GRUB. In case you have one or more distros and use GRUB, choose the Skip option. However, if you don't have any more distro than Slackware or barely have a Windows partition, choose the Simple option if you don't want any more migraines (so far, I haven't covered LILO in depth, so in future posts about Slackware I'll post my "research" about it):
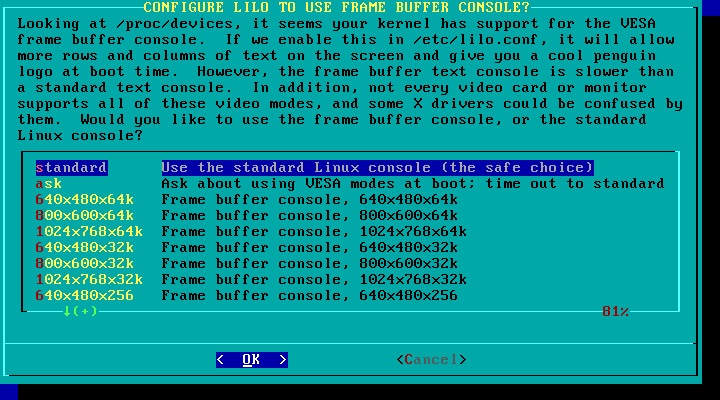
On the next screen, the pleasant wizard asks us what resolution we want Slackware to start to work by default.
Generally, if you use Intel Integrated Video, you have the option of choosing the recommended resolution for your monitor; if not, choose the Standard option:
After having chosen the appropriate resolution, we opted to choose the mouse options. We choose the PS / 2 port if we use that port; To use a Mouse with a USB port, choose the option with USB.
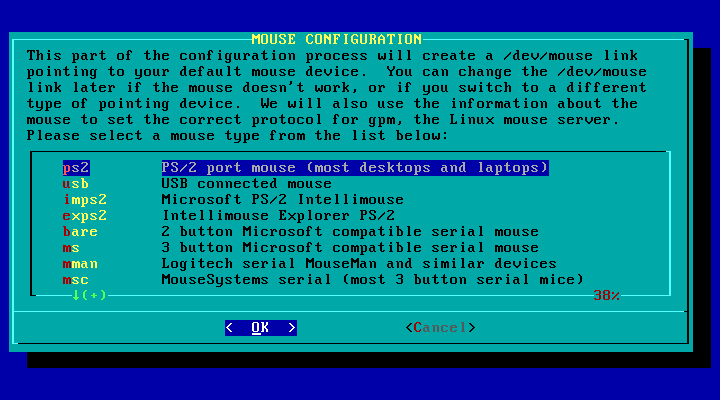
After confirming with which port we are going to work our mouse, what comes next is to configure the network.
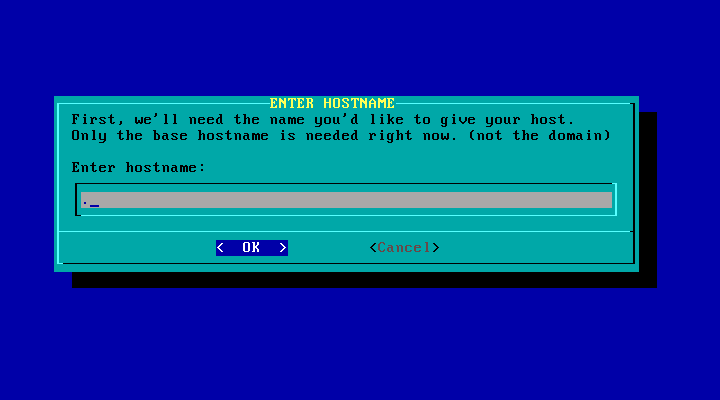
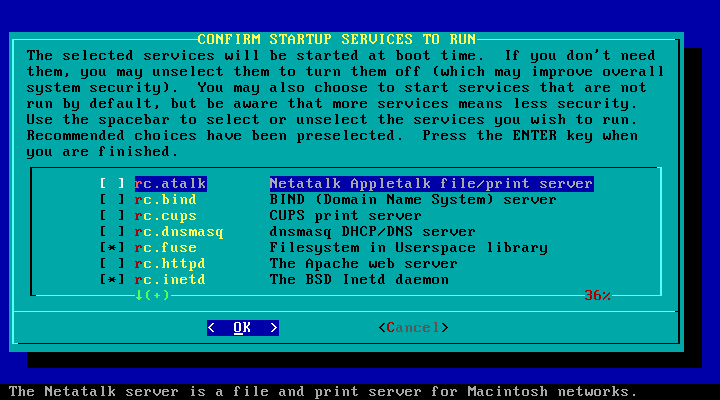
We write the name of the network, then we choose DHCP, we leave the host name with a ".", And we choose the network services we want.
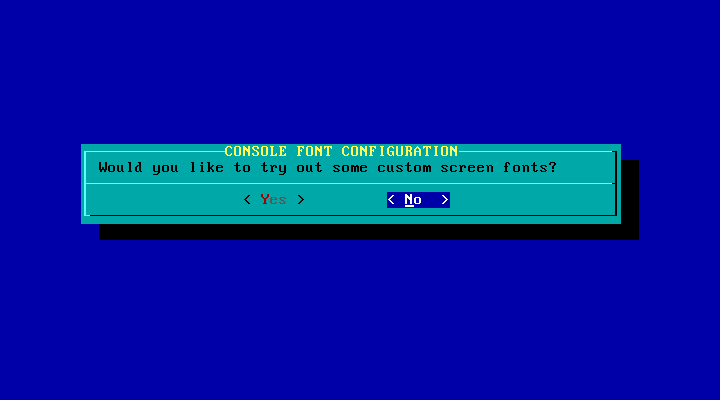
Another screen that will appear will be the choice of the console font. We say no if we don't want to, or if the default terminal font bores them, we choose yes:
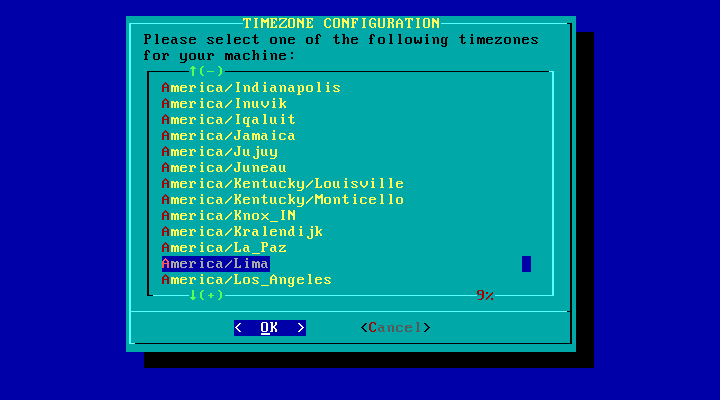
After doing this, it will ask us if we want to use the BIOS time of our PC or use the UTC format. In my case, I opted for the first option, and then I chose the time zone in which I am using (America / Lima):
Now, we have to choose the desktop environment:

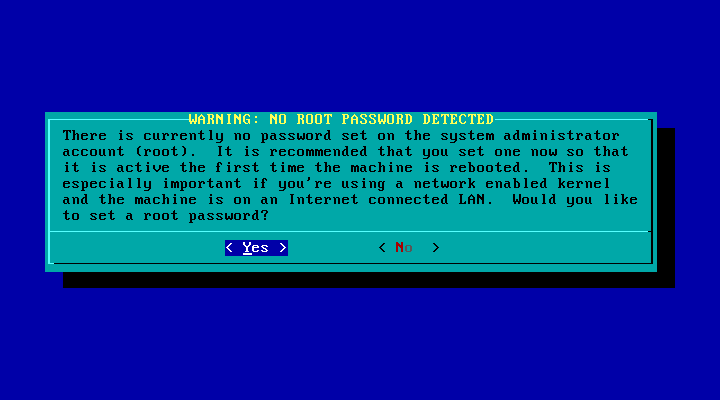
As I got a special love for KDE and because of how light it runs on this distro, I chose it. Now, we will configure the ROOT password:
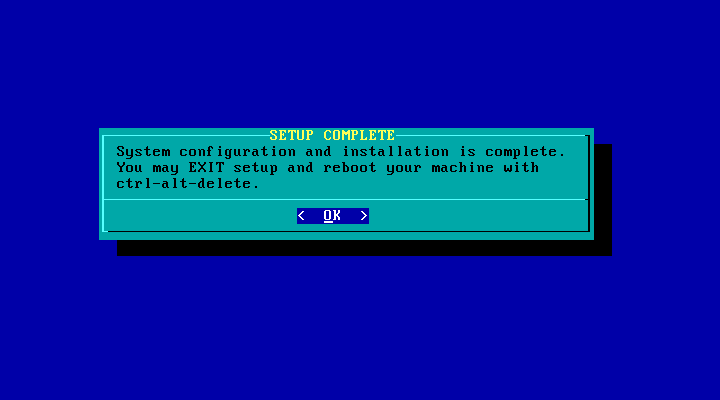
After giving a password to our Super user, it will tell us that the installation has already been carried out correctly.
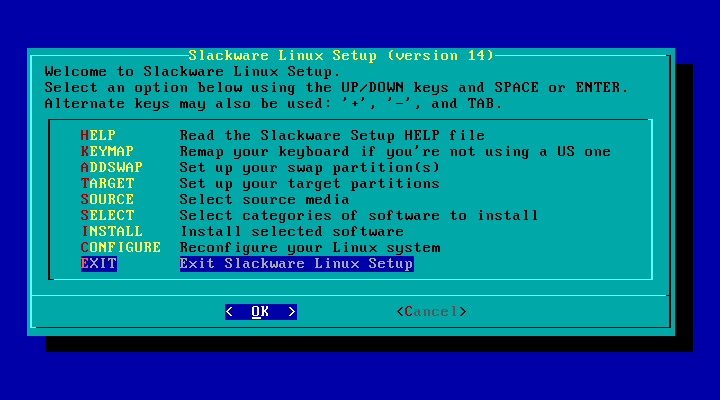
And since we have returned to the main menu, we give it EXIT, we write reboot in the console and our Slackware CD / DVD will be ejected (in my case, I used the DVD).
When restarting, the LILO menu will appear with the Slackware option:
After we have given Enter (out of impatience) or just let the system boot, it will ask for the ROOT password:
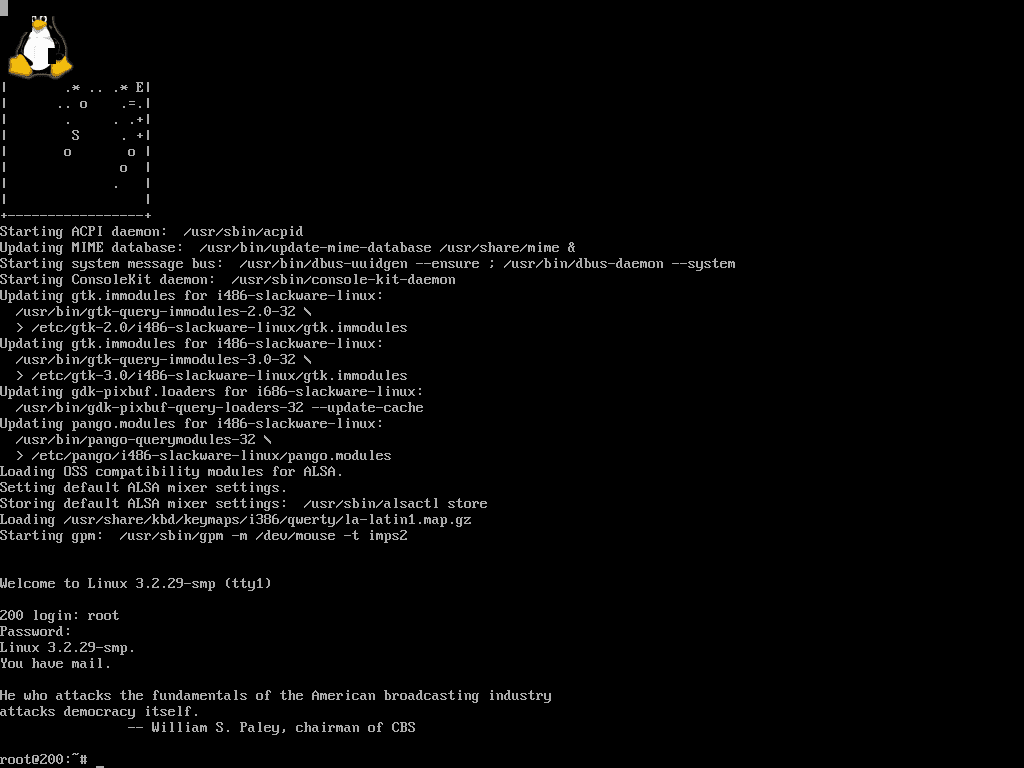
After that, we will be writing:
startx
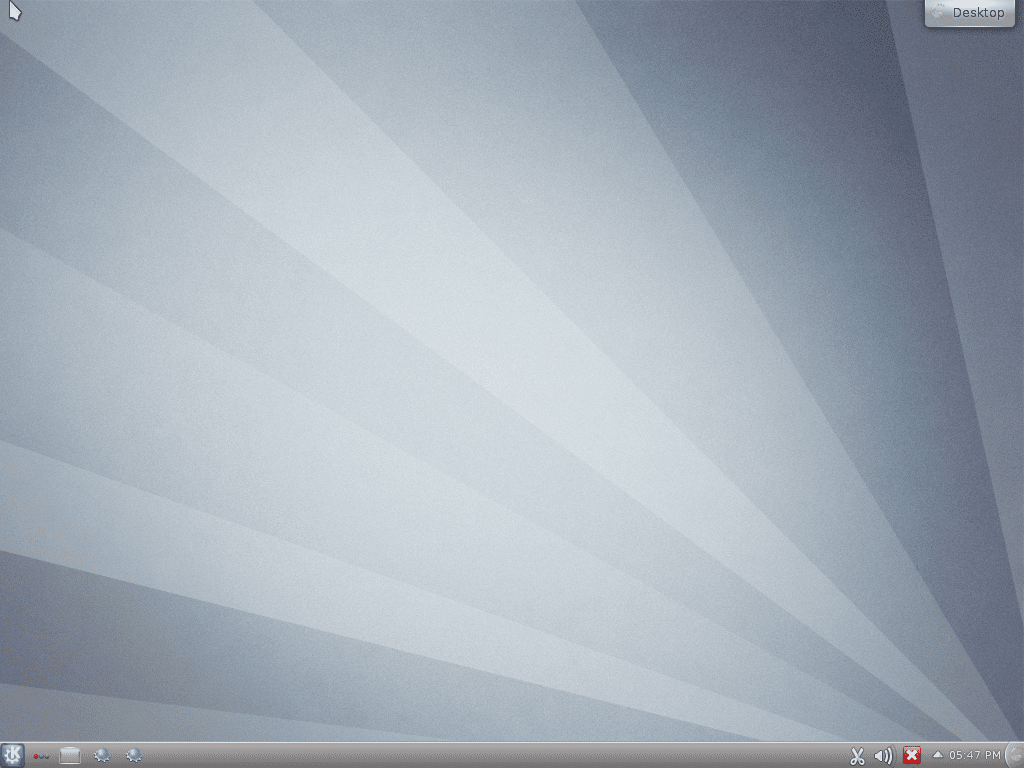
in the console to be able to launch our chosen GUI through X.org (in this case, KDE):
We do the key combination Alt + F2 to write in the box to execute «konsole», which is the console in which we will activate our main repo.
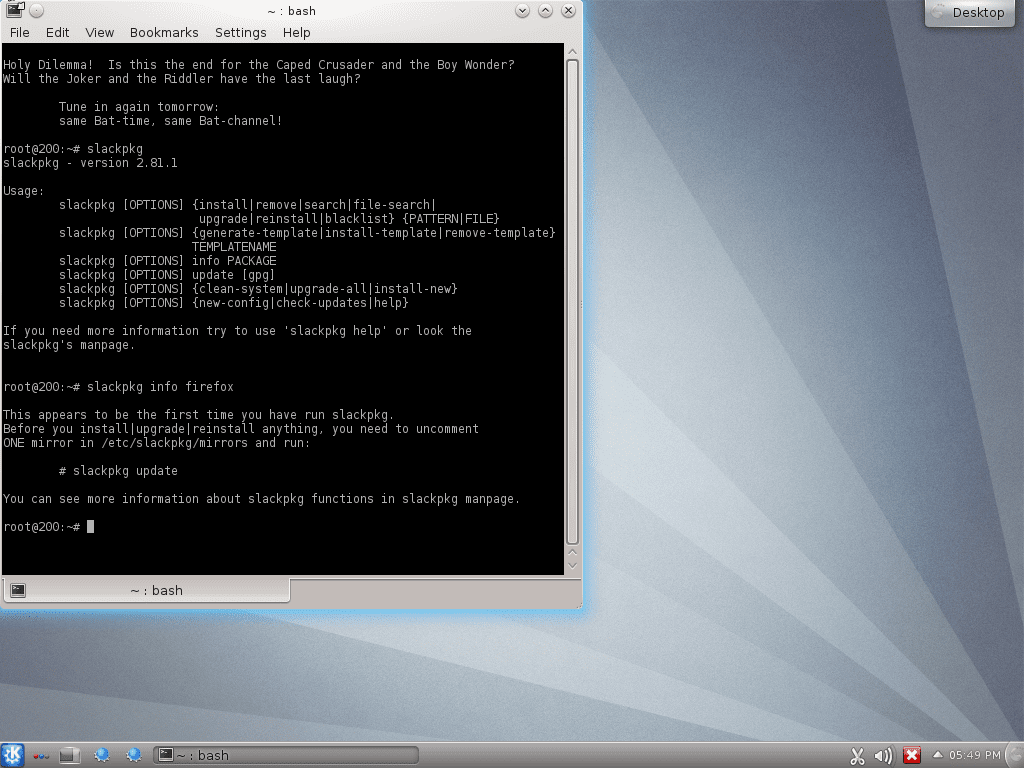
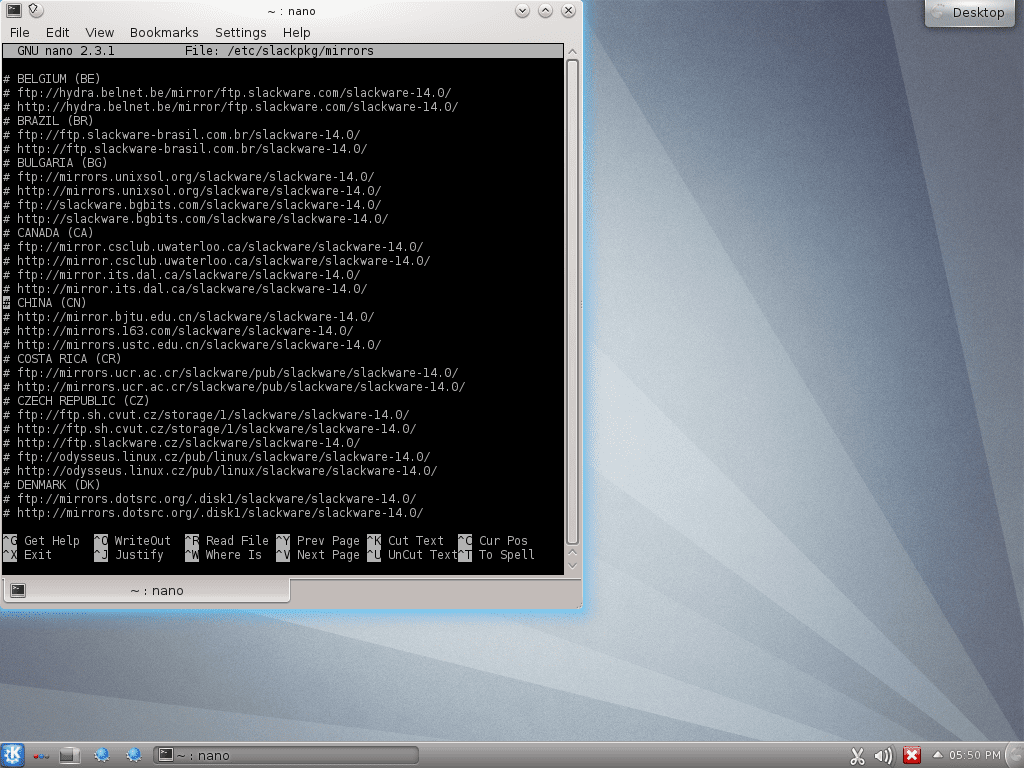
Although slackpkg explains a little about how it works, the truth is that when doing an action, it tells us that we have not configured the repo. To do so, we write in the console:
nano /etc/slackpkg/mirros
We will see several mirrors, which I chose a few from kernel.org and the like. What you have to do is uncomment the mirrors of your choice and nothing else:
And to finish this tutorial with a flourish, what we will do is type in the console:
slackpkg update
and so we activate our slackpkg.
That's all for today. In the next episode, I'll be explaining how to get Slackware ready to use, as well as giving feedback on how to use Slackbuilds and also how to install slapt-get, as well as translating Slackware into our language.
Before I go, I have to thank DMoZ for the Slackware tutorials they did, and they have really been of use to me.
Until the next post.
Continued ...
I'd rather shoot myself * - *.
Well, with Slackware it's not worth doing. With Gentoo or Linux From Scratch, yes.
Ah, Heretic !! LOL.
I used Gentoo, I always installed from a stage3 and never gave me a shot, it is true that it is frustrating sometimes, but the wait is worth it, when you see your PC literally fly.
If he flies with gentoo, with Arch you won't even see it happen ...
Well, Slackware is on par with Gentoo and Arch, but at least you will not be alone on the road thanks to its accompanying documentation.
I think it's the other way around. Like I never noticed more speed in Arch, once you start to install things it is like any other distro.
I think quite the opposite, and I'm not saying it because of the difficulty, but because in Slackware you don't have anything, it's not worth installing it much, once installed it comes with a lot of things installed by default, but when you want to install something, the only thing left is to compile it, for that I put any other distro and compile what I want.
I say, unless there is some advantage that is skipping me
Excellent your publication makes me curious to try slackware… ..
Reminds me of installing archlinux ...
It's practically the same 😀
Arch's installation was the same, until they removed the wizard. Now, it is installed practically by hand with simplified commands.
To me to Frugalware.
Well, it reminds me of the Android x86 installer
Nah, the Android one looks like WinXP mixed with any CLI install.
Not much has changed in terms of installation ... Good contribution
Good guide, really slackware is not as complicated as it seems, everything is quite explained step by step (and if not in the official documentation they clarify it more).
I would add that before starting a graphical session from root, create a current user with the adduser command, exit the root session, start with the new user and then "startx".
In the next post that follows this one, I'll do that and also add things like language change, sbopkg installation and slapt-get.
This was the first distortion they gave me to install .. it wasn't easy for me, hahaha it was version 9 if I remember correctly or 8, I don't know practically the installation has been the same since then, it hasn't changed at all.
How I wish Arch was like this, with an installer that remains the same over the years.
Hello compa, I was adding a user, and I did not add it to any group (wheel, floppy, audio, video, cdrom, plugdev, power, netdev, lp, scanner), could you explain how to configure it?
Thank you!
Good job, thanks for sharing 😀
Good post!
Until recently on my 2 computers (laptop and desktop) I only had Slackware -current, but to try other flavors I installed Arch (for the first time) for the laptop and Fedora for my desktop.
I was planning to change the distro of my desktop, my options to choose were, return to, Debian or Slackware, I think I will install Slackware again 🙂
This will help me a lot because I am thinking of installing Slackware on my netbook (which is my only machine). I honestly do not see the installation difficult, although if I had wanted you to show how the installation for "males" is done, that is, the complicated (expert) mode haha.
Anyway, good contribution and I look forward to the other contributions about Slackware.
For that difficulty you mention, there is Gentoo and / or Linux From Scratch. Slackware was the first distro that it occurred to him to put that assistant to avoid having to complicate his life with SLS.
No, no, I am not referring to that difficulty but I would have liked more if the "manual" or "expert" options offered by the Slackware wizard had been used because the truth calls my attention, but that is something that I'll see myself when I install it
Ah good. In itself, I would have to have a little more time or finish the semester of my degree to have a little more time to see the advanced options that it has.
Excellent, just excellent, I am currently doing some Wall, for openSUSE and Slackware.
I want to increase the number of users for each one, what better, making the distros more flirtatious 😀
I have the iso on my pc for a few days / weeks / months, also debian but at the moment I can't uninstall fedora (pretexts because I feel comfortable here) but I will install it in a virtual machine and it seems to me a very good distro, at least the installation is quick and sticks to kiss
Well, Slackware is the easiest KISS distro I've used so far.
I finally have an excuse… ahem… reason to try slak 😀 thanks !!!!!
In the next posts, I will be expanding the saga for additional configurations, in addition to doing another series of posts about Arch (or Parabola GNU / Linux-Libre) + MATE + Iceweasel
Well, for me like Debian in the latest versions there is none, I install in what a rooster crows.
I think it's a worthwhile distro, but I also think you need a lot of free time to make it 100 ... In the future I will install it * Ö *
Thanks for the mention Eliot,
The extra data that can be brought about Slack is always appreciated, I look forward to your notes about slapt-get, they will undoubtedly help several to make the leap to this distro that I fell in love with from the first moment.
Little by little I also bring extra notes ...
Cheers …
You're welcome, DMoZ. What's more, I took the trouble to read the help files carefully in order to clarify certain aspects of the Slackware installation (such as choosing the kernel and checking the integrity of the hard disk, which if I had not read it, then it would have taken me longer than it should).
And by the way, I had forgotten that I was also going to explain about the slacky.eu repo, which has a wide catalog of binaries ready to be installed and not have to compile the programs as it happens with slackbuilds.
Excelent brother,
It's not that Slackware is complicated, it's that a lot of information is needed in our language, but thanks to desdelinux, all that is changing =) …
Thank you for supporting the cause ...
Cheers !!! ...
You're welcome, compa. I do my best to ensure that Slackware is just as widely used as Slackware and is at least valued as such and without prejudice.
And here is a list of Slackware repos (they include slackbuilds) >> http://www.slackabduction.com/sse/repolist.php
Magnificent, include it in your next writings ...
Cheers !!! ...
Regards (first comment attempt on the site)
The times that I have installed Slackware (more for experimentation) the user folders (music, downloads and others) are not created until I start a graphical session in xfce, while doing it first with kde my folder remains empty. I don't know if it opens any way to generate them in kde or failing that with the terminal
The exact same thing has happened to me, I could not find information about it, yes, Xfce is tremendously fast and fully functional, the truth is an excellent distro, and more and more users are taking time to test it, I am one of those who think that up there are Debian, Gentoo, Slackware and Arch, then the others, which are unpredictable (some are not) so that novice users can turn to GNU / linux, learn, and also if you want, to be able to take a further leap towards those legendary distros.
Off-Topic: In the edition of this article, I also added the Slackware mascot but in the content of the article, but they removed it anyway. What is the reason for this? And who is in charge of editing articles?
I've always wanted to try this distro when you finish the article on how to get it ready, I'm going to try it.
Very grateful for the article, I had read another intro and I am waiting for the next chapters of the same, especially the one that is going to come (it is difficult for me to find information about the configuration / installation in Spanish).
Greetings.
In itself, there is very little interest in learning how to use this distro in Spanish. For now, I leave you a screenshot in which I installed screenfetch and was commenting from Firefox 15 >> https://blog.desdelinux.net/wp-content/uploads/2013/08/snapshot1.png?73b396
Well this blog talks about slack
http://ecoslackware.wordpress.com/
The best, by far. !!
Of that I have no doubt.
They have tempted me. The next PC I have, I give it a try.
My mother! I'm too old for these things Several years ago I tried to install it and never managed to start the graphics system.
Well, I took the trouble to search linuxquestions.com for many of my questions that I had with slackware, since the info in Spanish is quite poor.
Debian and Slackware are considered legendary for their years of existence.
The only problem I had with this beautiful distro was the installation of Pulse Audio, although I solved it, I was not very sure of its operation, the performance, not to mention, excellent.
To tell the truth, it is somewhat tedious in some cases, but I plan to use it because it is the simplest KISS distro I have used so far.
Excellent contribution @ eliotime3000, I hope to see the next post.
Greetings.
Excellent contribution… I will look forward to the next contribution.
I have been using Slackware for years, personally I think it is one of the easiest distros to install, and as they say here, it has kept its installation method almost intact from the beginning.
I use it even on servers, as it is a super stable distro.
Great post!
Regards,
Oscar
Hello! I followed the instructions to the letter, but I had to create the USB boot stick to start Slackware. I have read everything about LILO because in the process it showed me an error about it. To date I have not been able to get it to boot without the memory, has anyone had a similar problem? Regards.
I think that in 2013 there is no longer a difficult distribution to install, you just have to look for the documentation and read it carefully.
Something always doesn't have to work for me ...
In the end I run startx and it tells me: command not found
which may be??????
http://prntscr.com/23kssj
I prefer to try it with gentoo to see how it comes out xD even though I never got past stage3