
|
I guess the people who drive Linux servers they know and know about DenyHOSTS y Fail2ban. For those who do not know him I will explain a little about these two applications. |
We will install and configure these two applications to avoid subsequent headaches. First of all we will explain what these two applications are and what their function is:
Fail2Ban
It is a log analyzer that looks for failed registration attempts and blocks the IP's from which these attempts come. It is distributed under the GNU license and typically works on all systems that interface with an attack control system or a local firewall.
Fail2Ban has a great configuration and can also create rules for programs
own or third parties.
DenyHOSTS
It is a security tool written in python that monitors the access server logs to prevent brute force attacks on a virtual server. The program works by banning IP addresses that exceed a certain number of failed connection attempts.
These Linux applications - DenyHosts and Fail2ban - can be used separately or together. In my case, I have them both working together.
The installation and configuration of each one depends on the distribution you use. This post is oriented towards CentOS 6.3, although the differences between the other distros are not very marked.
Well then, let's get to work.
Fail2Ban Installation and Configuration
This application generates dynamic rules in the Linux firewall itself, and is responsible for creating live rules in IpTables.
Installation
For the installation a:
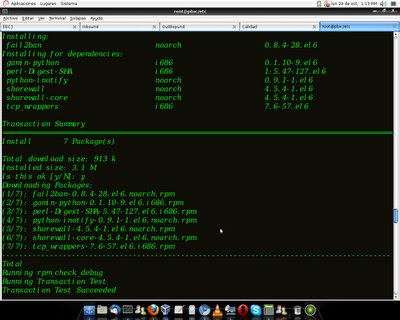
yum install fail2ban
If the package does not appear, we must add the necessary repository:
rpm -Uvh http://mirror.metrocast.net/fedora/epel/6/i386/epel-release-6-7.noarch.rpm
With this you should start installing the application along with its dependencies.
Now we have to configure Fail2Ban to analyze the logs we want and block
IP's, sending notifications via e-mail. For this we must modify the jail.conf file that we find in / etc / fail2ban
cd / etc / fail2ban
nanojail.conf
The following should be done in this file:
- Modify is the bantime value, this value determines the time in seconds that the attacker's IP will be blocked, by default the value comes in 600 seconds.
- Find the maxretry value that will be the number of times that an IP can have a failed authentication before being blocked.
- Add our ip's in the ignoreip parameter. Here the application will ignore our authenticated IPs in that parameter.
[DEFAULT]
# "ignoreip" can be an IP address, a CIDR mask or a DNS host. Fail2ban will not
# ban a host which matches an address in this list. Several addresses can be
# defined using space separator.
ignoreip = 127.0.0.1

# "bantime" is the number of seconds that a host is banned.
bantime = 600

# A host is banned if it has generated "maxretry" during the last "findtime"
# seconds.
findtime = 600

# "maxretry" is the number of failures before a host get banned.
maxretry = 3
An example of how it can look is as follows:
ignoreip = 127.0.0.1 190.25.242.75 192.168.1.0/24
bantime = 800
maxretry = 2
Configure Fail2Ban and SSH
To look for failed SSH login attempts, we modify the file until it looks like the following:
[ssh-iptables]
enabled = true
filter = sshd
action = iptables [name = SSH, port = 22, protocol = tcp] sendmail-whois [name = SSH, dest=FredySnake@outlook.com, sender = fail2ban @ localhost] logpath = / var / log / secure # This is the log that will analyze fail2ban
maxretry = 3 # any IP that has three or more failed attempts will be blocked.
bantime = 86400 # 24 hour ban time expressed in seconds
Do not forget that if you modify the port where SSH listens, you must also modify the port parameter.
This application not only works for unauthorized access in SSH, but also for apache, to read Asterisk logs, etc.
Installation and Configuration of DenyHOSTS

Its operation is based on the use of the /etc/hosts.deny file, that is, on blocking the addresses of the “attacking” hosts, creating a list of denied hosts.
The installation from the repositories can be obtained with the following command:
yum install denyhosts
The configuration file is located in /etc/denyhosts.conf
Before continuing, since as humans we can make mistakes and do the typical "Layer 8" when accessing any of the services and blocking ourselves. To avoid that, we edit the /etc/hosts.allow file and add the IPs of the machines from which we do not want to be restricted due to an access failure.
Modify denyhosts.conf file
In order not to go so far in the settings, in this file we are only going to edit and uncomment some parameters. These are:
SYNC_SERVER = http://xmlrpc.denyhosts.net:9911
SYNC_INTERVAL = 1h
SYNC_UPLOAD = yes
SYNC_DOWNLOAD = yes
SYNC_DOWNLOAD_THRESHOLD = 3
SYNC_DOWNLOAD_RESILIENCY = 5h
Thus, we will leave a configuration practically by default, but with great security against SSH attacks.
nano /etc/hosts.allow
Example:
sshd:127.0.0.1
sshd:192.168.1.10
sshd: 192.168.0. *
After this, we restart the service:
/etc/init.d/denyhosts restart
With this we are giving permission to an IP, an IP range and of course to our loopback interface. Something that I have not tried - therefore I do not know if it works - is to add DNSs to this file; that is, with services like DynDNS. If I do, I will tell you how it went.
With certain options and adjustments we will also make sure that after the period of time that we indicate in the DenyHOSTS configuration, the stored addresses are cleaned, and they are updated with other lists made by others -if we indicate it- giving permission to access the server of DenyHOSTS.
To purge the stored addresses from time to time, as configured, the daemon must be run with the –purge parameter:
/etc/init.d/denyhosts start --purge
In addition to this, we must include it at the start of the system:
chkconfig denyhosts on