
|
Have you ever taken your hard drive to use in another PC? Or have you missed your shows on a friend's machine? Well forget about carrying a hard drive in your backpack. Today I will tell you how convert tu current system in a live-usb/ cd easy and in just 4 steps. |
Steps to follow
1.- First we are going to install all the programs that we need in our machine (or in a virtual machine): language packages, audio and video codes etc; We configure our desktop, keyboard shortcuts, launchers and everything we can think of; We uninstall the proprietary drivers (or guest aditions) to avoid problems and run on very different machines
we update
2.- Now we will install RemasterSys. This tool will create a live cd of our system. There are other similar tools but this one works very well for me.
In Ubuntu it is installed like this:
We open terminal as ROOT and paste:
wget -O - http://www.remastersys.com/ubuntu/remastersys.gpg.key | apt-key add -
Then we add one of these repositories to source.list:
gedit /etc/apt/sources.list
We paste at the end the line corresponding to our version:
deb http://www.remastersys.com/ubuntu lucid main deb http://www.remastersys.com/ubuntu maverick main deb http://www.remastersys.com/ubuntu natty main deb http: //www.remastersys .com / ubuntu oneiric main deb http://www.remastersys.com/ubuntu precise main
Then the classic ...
apt-get update && apt-get install remastersys
3.- Next we will create an .iso image, our livecd.
sudo remastersys backup myCustomLinux.iso
Even though remastersys compresses your data a lot, you may not be able or wanting to empty your “vast” collection of files. In that case, use the dist parameter:
remastersys dist myLinuxCustom.iso
A kind of official distribution will be created but with more programs and without settings or personal data.
This will take a while and will drive your processor crazy, go for a spin. When finished you will see that it has created a user folder that contains, among other things, the image to burn:
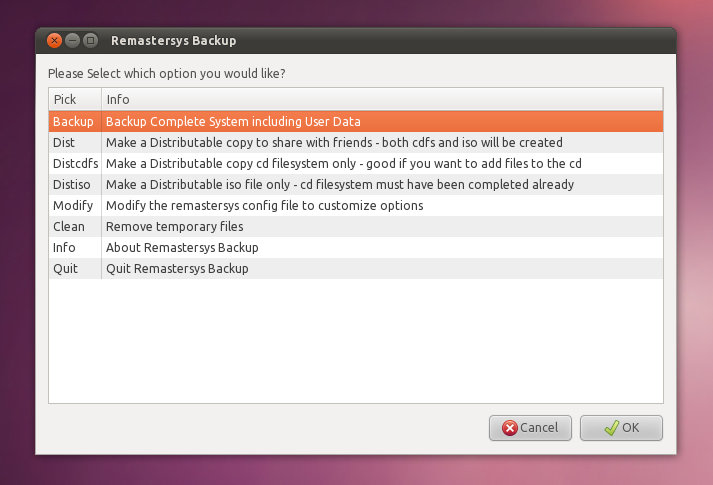
4.- Almost ready. That was the difficult part, although (as seen in the image above) the graphical interface can also be used. Now you just have to burn "MyPersonalizedLinux.iso" on a DVD. You can use brazier or k3b.
LIVE-USB: if you have already created a live-usb before you will know what to do now. Likewise, as a help you can consult the article on how to create a live-usb using Unetbootin.
5.- Finally, I recommend that you install some tools that can save you from an emergency:
foremost: to recover deleted files
the secure-delete suite: to destroy files that nobody should see
test-disk: to recover lost partitions (classic windowsero problem: the partition table is deleted and it gives the impression that "the disk was formatted").
clanav: antivirus for linux (to erase viruses from other systems)
Gparted, macchanger, aircrack, nmap, tor ... and many others.
@ Let's use Linux I already found it 😀
And how do I make the .iso not created in the home? since what is going to be backed up does not fit on the disk and I want it to be recorded in another: / and I put the path but nothing, it keeps saving it in / home / xxx
I recommend for LiveISO the Multisystem package in Ubuntu and derived with an excellent multilingual graphical interface and MULTIBOOT - the same more or less but to commands explained in prendrivelinux - instead of Unetbootin, even YUMI from MS WOS.
But is this tool still usable ??? The last time I entered the author's website, it communicated that it was going to discontinue the development of the tool.
It seems like you're right ... the main developer got fed up ... who knows what happened ...
This post is 10 months old so it may be out of date.
Hug! Paul.