General index of the series: Computer Networks for SMEs: Introduction
Hello friends!
You know what? Any other phrase for the beginning of an article, as I have tried in previous posts, does not seem the most appropriate, and that is why I return to my usual greeting, definitively and expanded, including the Readers that we know also belong to the Community .
Today is the first day of the year 2017 and we want to extend to all our readers, the most Sincere Congratulations on the New Year that has just begun:
- ! Congratulations and a Happy New Year to all!.
And as a Present for the beginning of the year, we bring to you the 2nd part -and final- of how we can remotely manage hypervisor on CentOS 7 created in the previous article in the series SME Networks, as we will call it from now on for short.
We will not offer many links between the lines, because we assume that the previous posts in the series «Computer Networks for SMEs«, And that they are already familiar with the names, acronyms and definitions. What are those pages ?:
- Computer Networks for SMEs: Introduction
- Workstation installation
- 6 Debian Desktops
- Virtualization on Debian: Introduction
- Qemu-Kvm + Virt-Manager on Debian
- virt-commands on Debian
- CentOS Presentation
- virsh command
- Virt-Manager and virsh: Remote Administration via SSH
- CentOS 7 Hypervisor I
We also recommend reading the following article, as it partially justifies the choice of Linux distributions that we have made for the aforementioned series of posts:
Remotely managing centos7 hypervisor
We will only use the console and the commands Virsh y virt-install. To make life easy for us because we DO NOT have DNS yet:
buzz @ sysadmin: ~ $ nano / etc / hosts
127.0.0.1 localhost 10.10.10.10 sysadmin.desdelinux.fan sysadmin 10.10.10.4 centos7.desdelinux.fan centos7 # The following lines are desirable for IPv6 capable hosts ::1 localhost ip6-localhost ip6-loopback ff02::1 ip6-allnodes ff02::2 ip6-allrouters # ------------ ------------------
We invoke the command Virsh from our workstation:
buzz @ sysadmin: ~ $ sudo virsh
[sudo] password for buzz: Welcome to virsh, the virtualization interactive terminal. Type: 'help' for help with commands 'quit' to quit
To avoid executing commands on the wrong hypervisor!
virsh#uri
qemu: / system
# We are in the local hypervisor or "sysadmin".
We connect with the remote hypervisor
virsh # connect qemu + ssh: // root @ centos7 / system
The authenticity of host 'centos7 (10.10.10.4)' can't be established. ECDSA key fingerprint is 71: b9: d9: f7: 30: 58: 07: 7f: a9: 78: 53: 21: 54: 67: 26: 4f. Are you sure you want to continue connecting (yes / no)? yes root @ centos7's password:
If the previous step returns an authentication error, you must delete the file /root/.ssh/known_hosts, and try again.
virsh#uri
qemu + ssh: // root @ centos7 / system
# We are already connected to the remote hypervisor
Storage on the remote hypervisor
virsh #pool-list
 Name State Autostart ------------------------------------------- default active yes

virsh #pool-info default
Name: default UUID: 71d42689-cfaf-4190-bad8-c395640ceee7 State: running Persistent: yes Autostart: yes Capacity: 155.43 GiB Allocation: 1.28 GiB Available: 154.15 GiB

virsh #pool-dumpxml default
default 71d42689-cfaf-4190-bad8-c395640ceee7 166896857088 1378762752 165518094336 / var / lib / libvirt / images 0711 0 0 system_u: object_r: virt_image_t: s0
We don't want machines to be saved in / var / lib / libvirt / images
virsh#exit
We create a new storage depot in centos7
buzz @ sysadmin: ~ $ ssh root @ centos7
root @ centos7's password:

[root @ centos7 ~] # mkdir / home / vms
[root @ centos7 ~] # exit
logout Connection to 10.10.10.4 closed.
We go back to sysadmin and to virsh
buzz @ sysadmin: ~ $ sudo virsh
Welcome to virsh, the virtualization interactive terminal. Type: 'help' for help with commands 'quit' to quit

virsh # connect qemu + ssh: // root @ centos7 / system
root @ centos7's password:

virsh#uri
qemu + ssh: // root @ centos7 / system
We do not want the automatic start of the deposit "default"
virsh # pool-autostart default --disable
Pool default unmarked as autostarted
We define a new storage bucket in the newly created / home / vms
virsh # pool-define-as --name centos7-vms --type dir --target / home / vms --source-format xfs
Pool centos7-vms defined

virsh # pool-list --all
 Name State Autostart ------------------------------------------- centos7-vms inactive no default active no

virsh # pool-start centos7-vms
Pool centos7-vms started

virsh # pool-list --all
 Name State Autostart ------------------------------------------- centos7-vms active no default active no

virsh # pool-autostart centos7-vms
Pool centos7-vms marked as autostarted

virsh # pool-info centos7-vms
Name: centos7-vms UUID: 6a9e0f8c-03dc-405b-8b52-f1899b632adc State: running Persistent: yes Autostart: yes Capacity: 155.43 GiB Allocation: 1.29 GiB Available: 154.15 GiB

virsh # pool-dumpxml centos7-vms
centos7-vms 6a9e0f8c-03dc-405b-8b52-f1899b632adc 166896857088 1381736448 165515120640 / home / vms 0755 0 0 unconfined_u: object_r: home_root_t: s0
We create the image of the virtual machine «wordpress»
Note: the ISO image of openSUSE we previously copied it to the storage repository centos7-vms. That is why it is listed below. It is evident that we want to install WordPress on the OpenSuSE distribution.
virsh # pool-refresh centos7-vms
Pool centos7-vms refreshed

virsh #vol-list centos7-vms
 Name Path ------------------------------------------------ ------------------------------ openSUSE-13.2-DVD-x86_64.iso /home/vms/openSUSE-13.2-DVD- x86_64.iso

virsh # vol-create-as --pool centos7-vms --name wordpress.raw --capacity 40G
Vol wordpress.raw created

virsh #vol-list centos7-vms
 Name Path ------------------------------------------------ ------------------------------ openSUSE-13.2-DVD-x86_64.iso /home/vms/openSUSE-13.2-DVD- x86_64.iso wordpress.raw /home/vms/wordpress.raw
Virtual Networks
We remove DHCP from the default network
virsh # net-list --all
 Name State Autostart Persistent ---------------------------------------------- ------------ default active yes yes

virsh #net-info default
Name: default UUID: 2a2ef469-3008-45f9-a165-ab1fb8f6277b Active: yes Persistent: yes Autostart: yes Bridge: virbr0
The "default" network is found like this
virsh # net-edit default
default 18ce4bbb-fddb-4300-9f13-65b4d999690c
And we will leave it like this
default 2a2ef469-3008-45f9-a165-ab1fb8f6277b
We apply the changes
virsh # net-destroy default
Network default destroyed

virsh # net-start default
Network default started

virsh # net-list --all
 Name State Autostart Persistent ---------------------------------------------- ------------ default active yes yes

virsh #net-info default
Name: default UUID: 2a2ef469-3008-45f9-a165-ab1fb8f6277b Active: yes Persistent: yes Autostart: yes Bridge: virbr0

virsh# quit
We create the virtual machine "wordpress" remotely
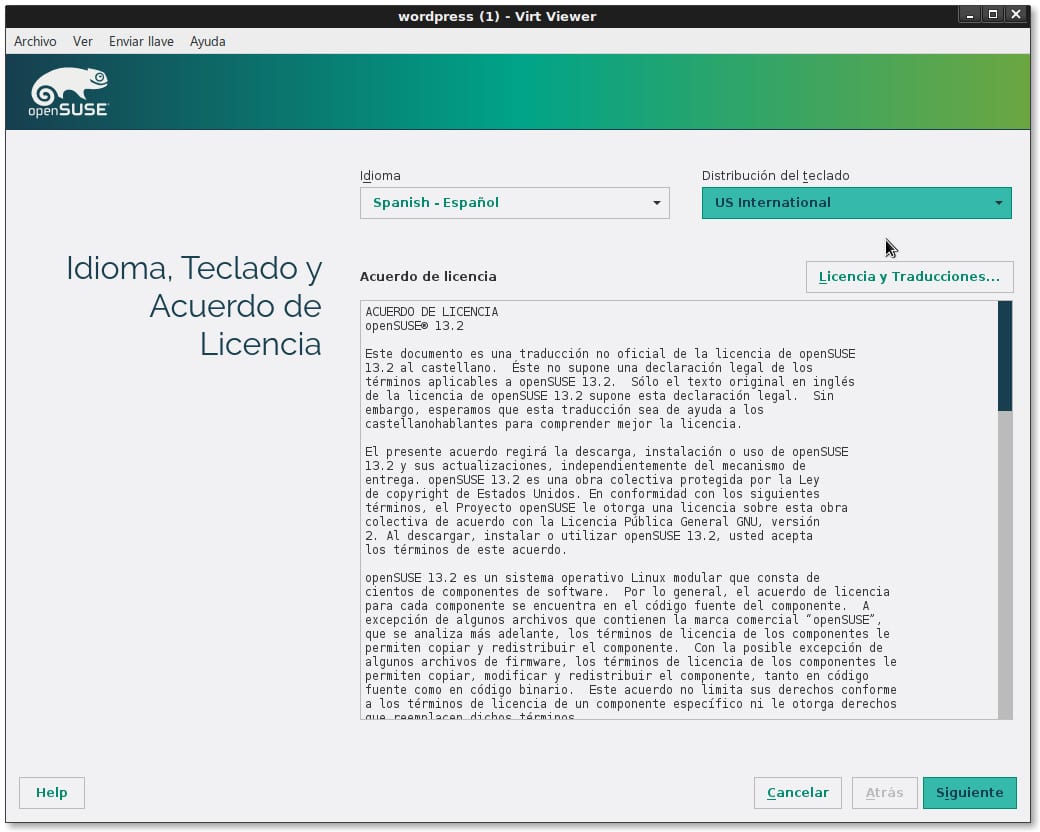
buzz @ sysadmin: ~ $ sudo virt-install \
--connect qemu + ssh: // root @ centos7 / system \
--virt-type = kvm \
--name wordpress\
--ram 1024\
--vcpus = 1 \
--disk /home/vms/wordpress.raw\
--cdrom /home/vms/openSUSE-13.2-DVD-x86_64.iso \
--os-type linux \
--network network = default \
--description wordpress.desdelinux.fan\
--graphics vnc\
--video = vga

[sudo] password for buzz: root @ centos7's password: Starting the installation ... Creating domain ... | 0 B 00:00 root @ centos7's password: root @ centos7's password: (virt-viewer: 7491): Gdk-CRITICAL **: gdk_window_set_cursor: assertion 'GDK_IS_WINDOW (window)' failed

If we inadvertently close the window, it doesn't matter. We reconnect
buzz @ sysadmin: ~ $ virt-viewer --connect qemu + ssh: // root @ centos7 / system wordpress
root @ centos7's password: root @ centos7's password:
Upcoming articles?
DNS, DHCP and NTP - SMB Networks
Happy 2017 friend Fico. What a waste of delivery yours in the absence of comments on such great articles like this one in which you remotely manage an entire hypervisor. I thank you very much for everything you write, Federico. I look forward to your next articles!
Zodiac friend, I do not consider my effort wasted because I know that there are many who follow and wait for my articles, although as you say, they do not comment on them. Thanks for your sincere words.